Azure DevOps PipelineAzure Pipeline is a cloud service that we can use to build and test our code project automatically. The Azure pipeline has a lot of capabilities such as continuous integration and continuous delivery to regularly and consistently test and builds our code and ship to any target. There are three key distinct advantages of using Azure DevOps pipelines. 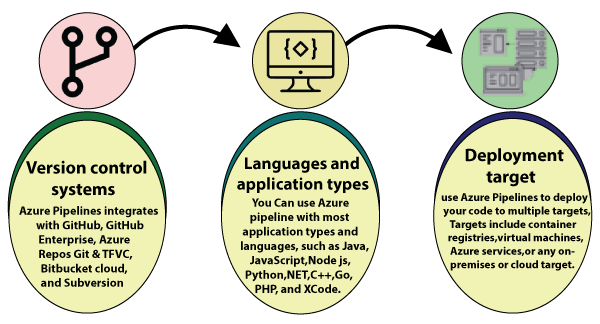 Version control system: Azure Pipelines integrates with GitHub, GitHub Enterprise, Azure Repos Git & TFVC, Bitbucket Cloud, and Subversion. Language and application types: We can use Azure Pipeline with most application types and languages, such as Java, JavaScript, Node.js, Python, .Net, C++, Go, PHP, and Xcode. Deployment target: We can use Azure Pipelines to deploy our code to multiple targets. Targets include - container registries, virtual machines, Azure services, or any on-premises or cloud target. Azure DevOps Pipeline concepts
Publish ARM deployment project into DevOps Repos and deploy using pipeline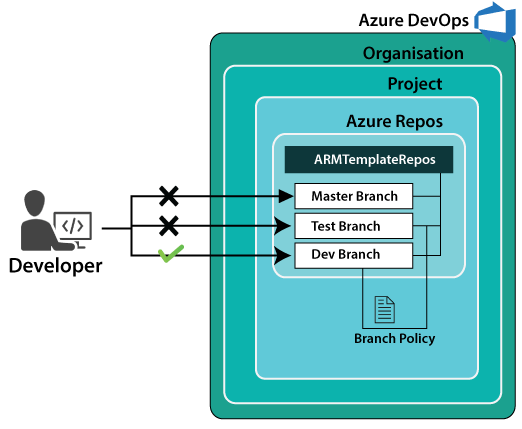 Step 1: Go into the Azure DevOps project and click on pipelines. After that, click on the New pipeline button. 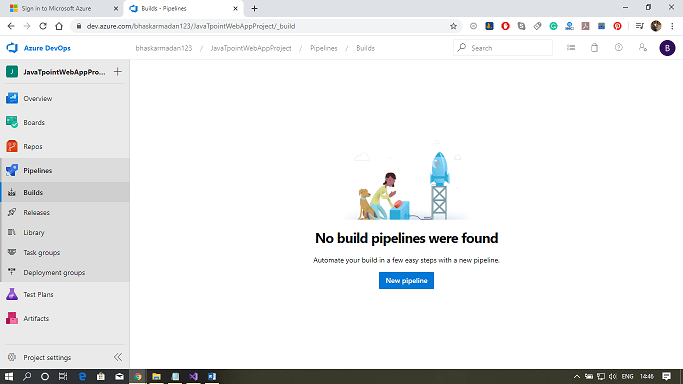 Step 2: Now, Click on the "use the classic editor" link down below. 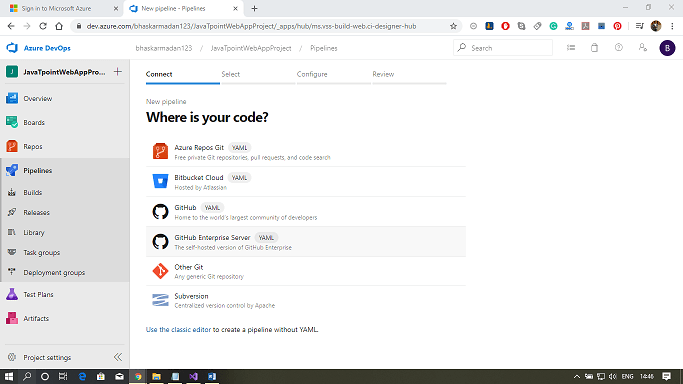 Step 3: Select the project and repository where you want to create the pipeline then click on Continue. 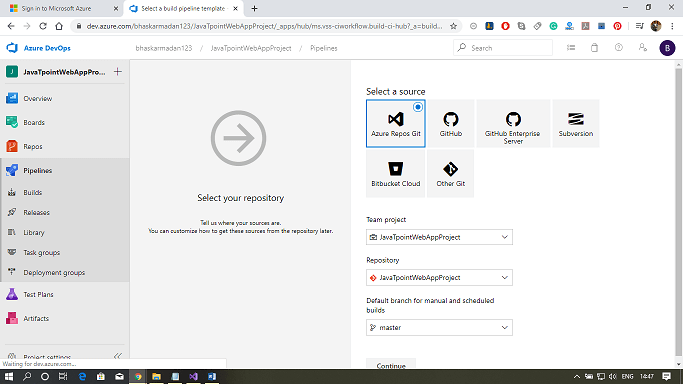 Step 4: Click on the Empty job link to create a job. 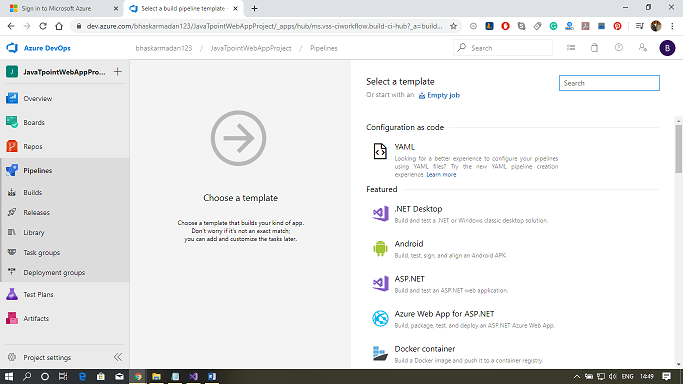 Step 5: Now, you need to add a task for building the activity. Click on the add button on the Agent job 1, then type-in resource group. Finally, click on the Azure Resource group deployment add button. 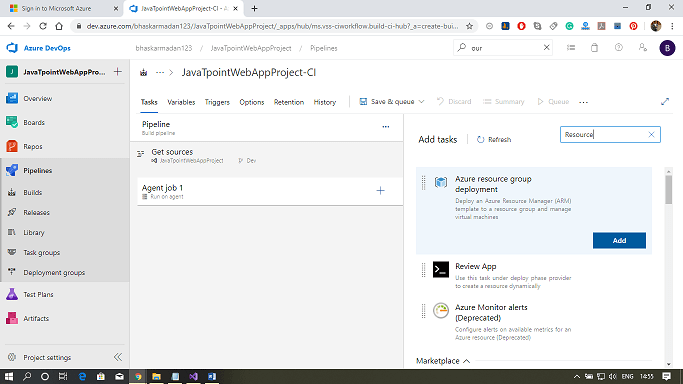 Step 6: Now, you need to select in which Azure subscription you want to deploy the infrastructure, into which resource group you want to deploy, and what you want to deploy in the form of JSON. 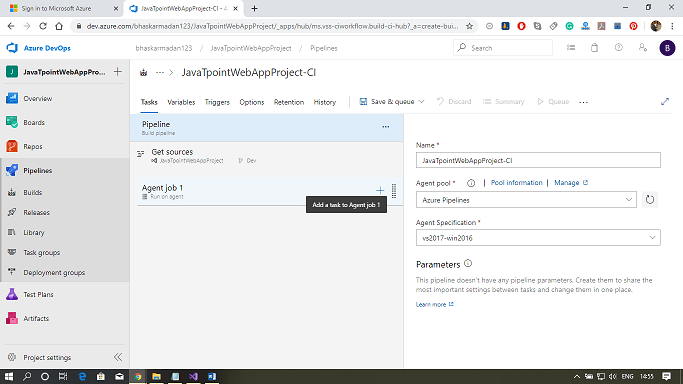 Step 7: Select the template from the repository. 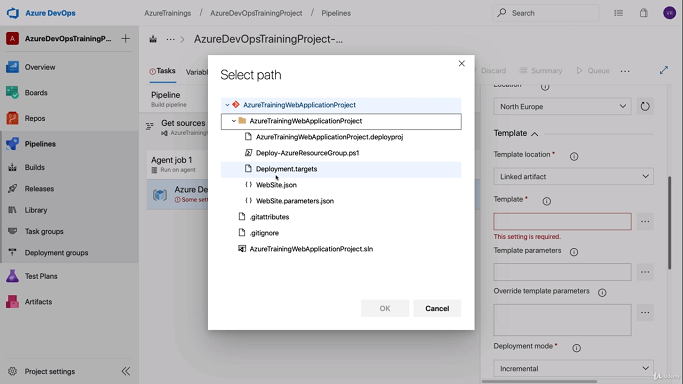 Step 8: After that, select the parameters file. 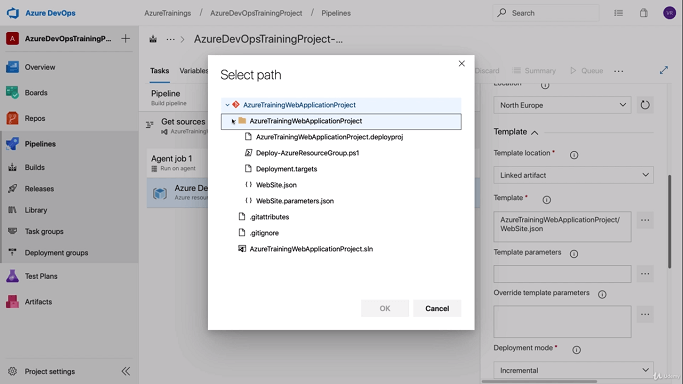 Step 9: Finally, click on Save & Queue. The deployment will take some time. 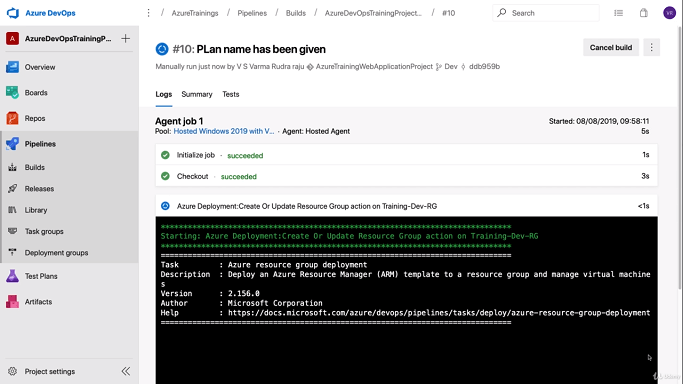 Step 10: Now, you can see the build has been completed successfully. 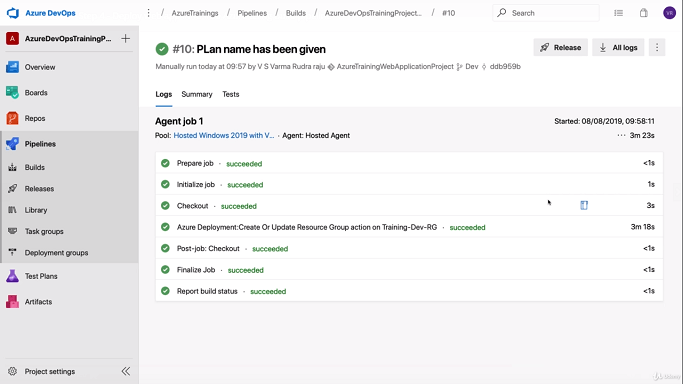 Next TopicWhat is Cold Storage in Ms Azure |