Database-First(Schema First) Approach in Entity FrameworkEntity Framework is Microsoft's preferred method to access the data for .NET applications. It supports the strongly typed access through LINQ. Entity Framework also allows the developers to program against the conceptual model, which reflects the logic of the application rather than a relational model that reflects the structure of the database. Entity Framework can be used from an ASP.NET application (using the Entity Data Source). What is the Database-First approach?The Database-First approach provides an alternative to the Code First and Model First approaches to the Entity data model, and it creates model codes (Classes, properties, DbContext, etc.) from the database to the project, and those classes become the link between the database and controller. Database-First Approach Application demo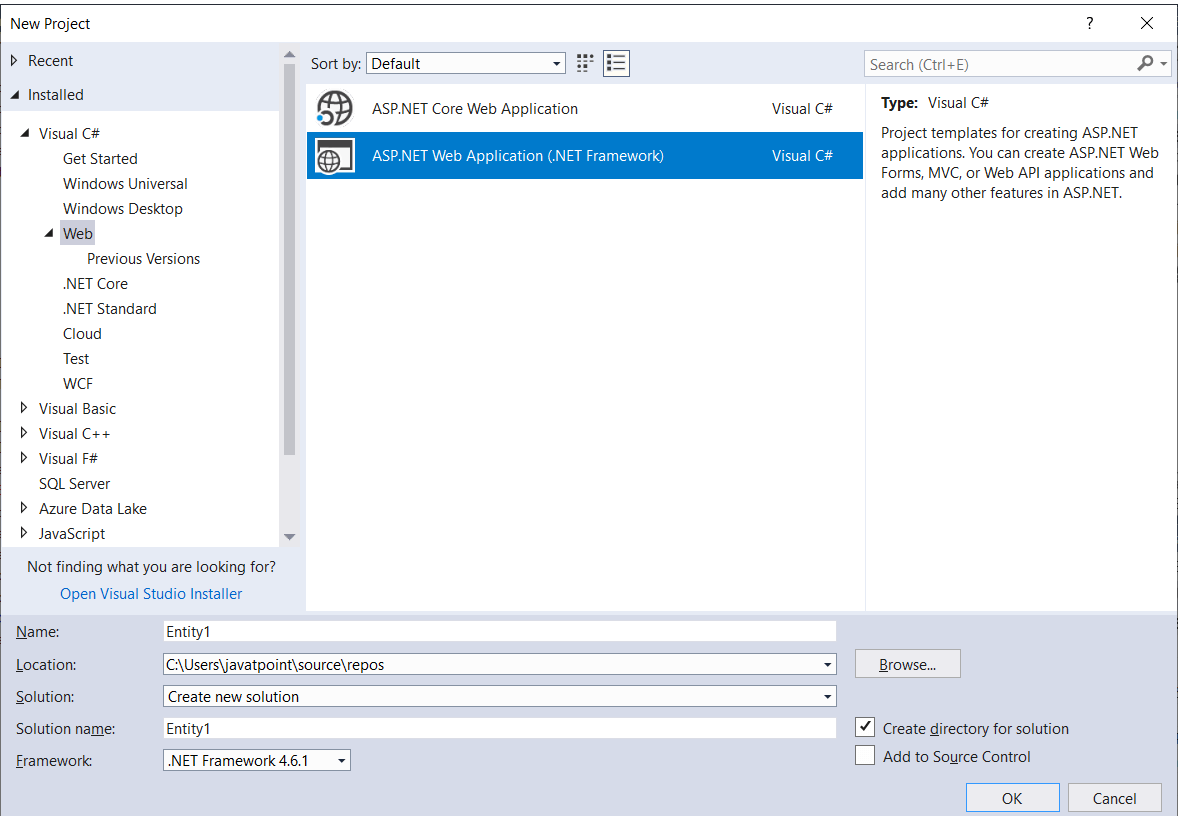 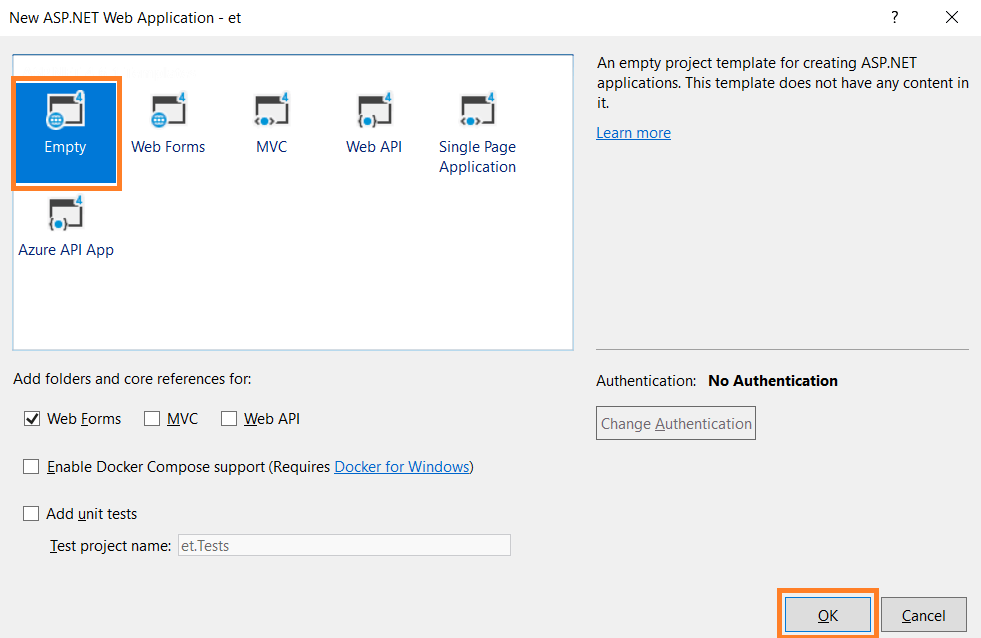 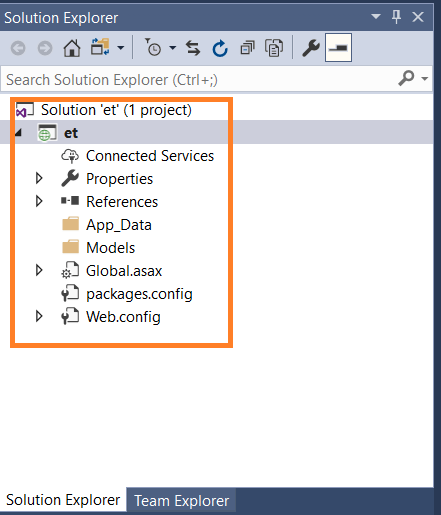 Now we will follow the following steps: Step1: Adding the NuGet Package (if not available)Right-Click on the Reference Folder and select "Manage NuGet Packages". Alternatively, we can install it from the Tool-> Library Package Manager->Package Manager Console and type "Install-Package EntityFramework". Now we will do this from the NuGet Package window, now we will type the "EntityFramework" in the search box and click to install it. After installation, we will find out a new library file in the Reference Folder "EntityFramework". 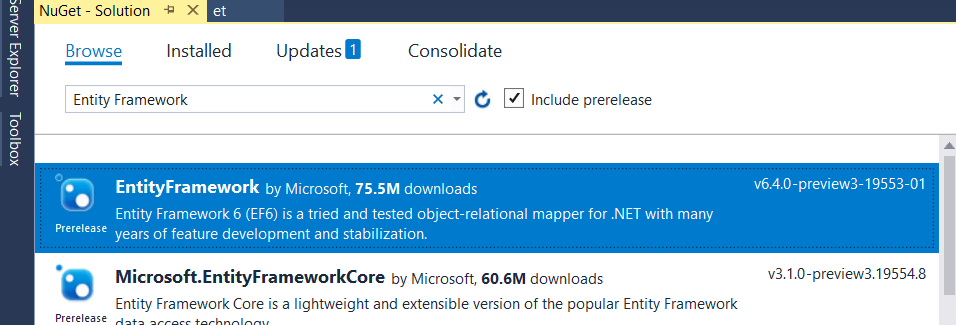 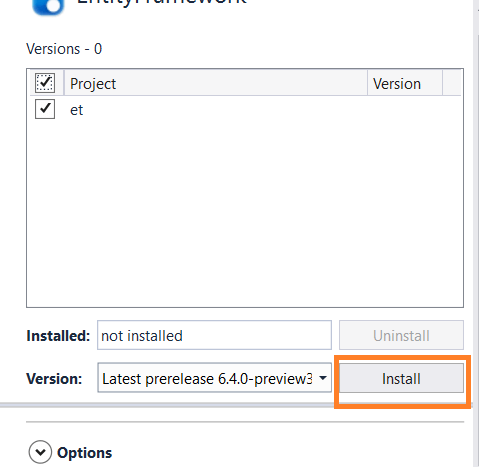 Step 2: Adding Model1.edmxNow we have all the required NuGet libraries. Now we want to add an "Entity Data Model" file. For that, we have to the right click on the Model Folder and Select Add-> New Item and in the window select "ADO.NET Entity Data Model". Now we will see the additional step through the below screenshot. 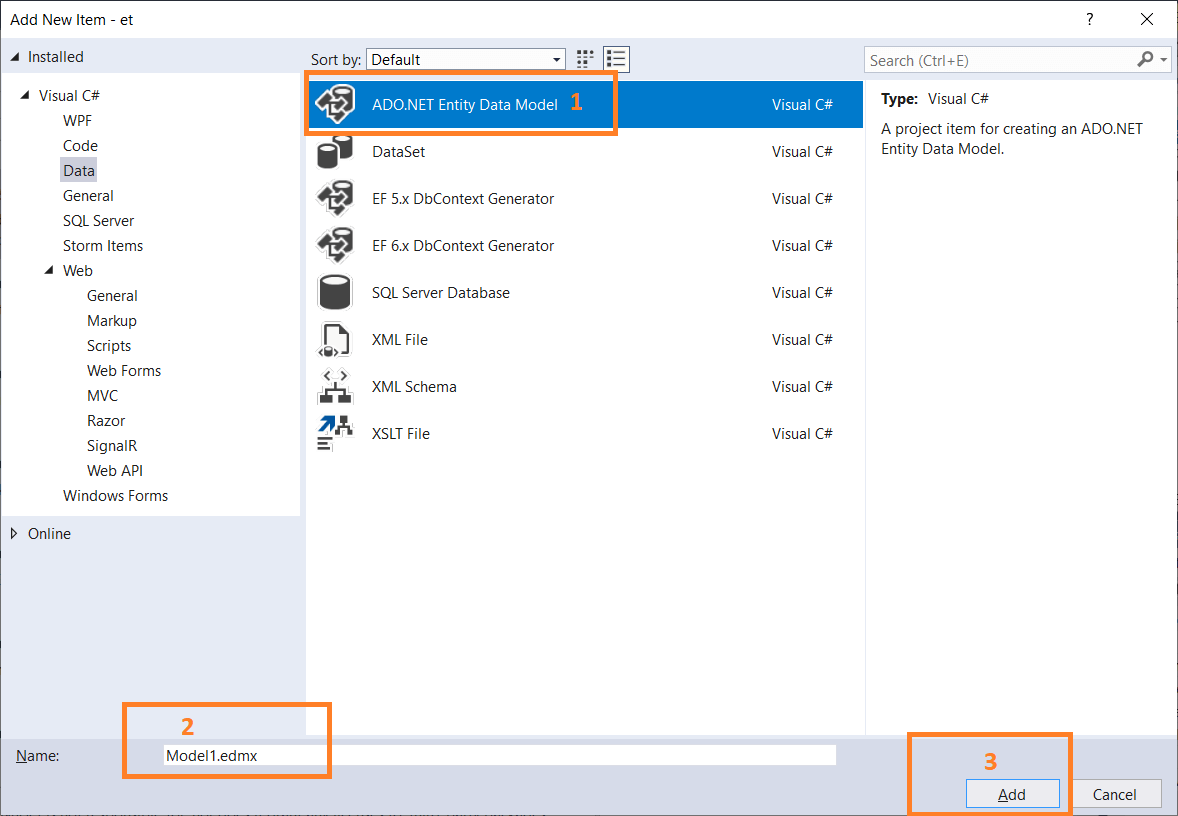 After selecting the "ADO.NET Entity Data Model," give the name and then click on ADD. A new window of "Entity Data Model Wizard" is open where we have to select the source of the data "Generate from Database". 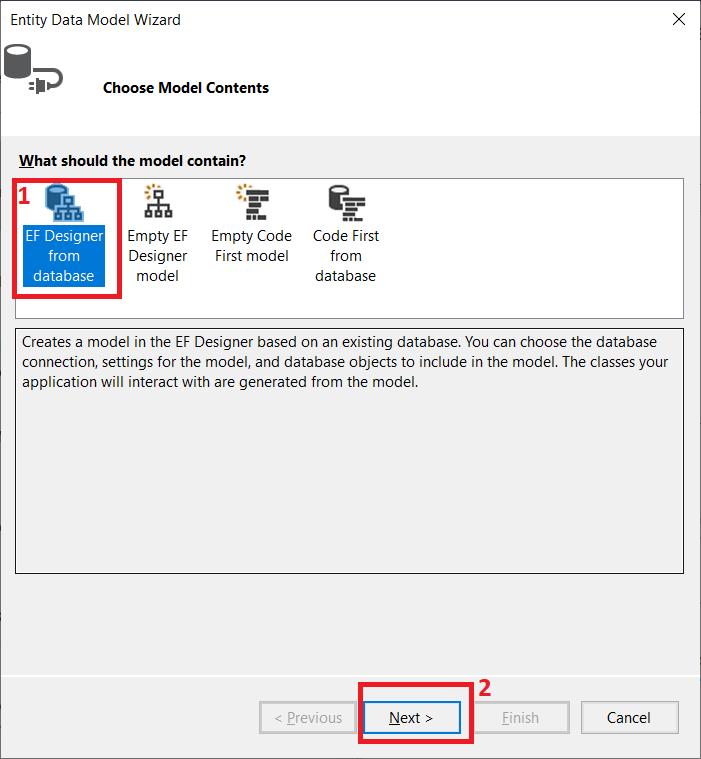 After clicking on the Next button, the new window will open where we have to choose a data connection for our project. 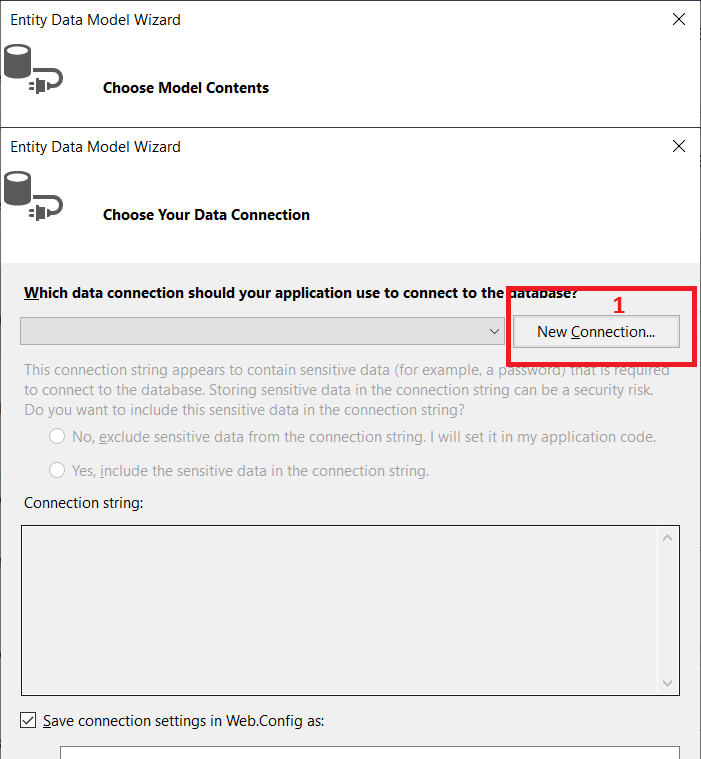 After clicking on the New Connection, a new window will open where we have to fill out the information of the Server Name and choose the name of the database as shown in the below screenshot: 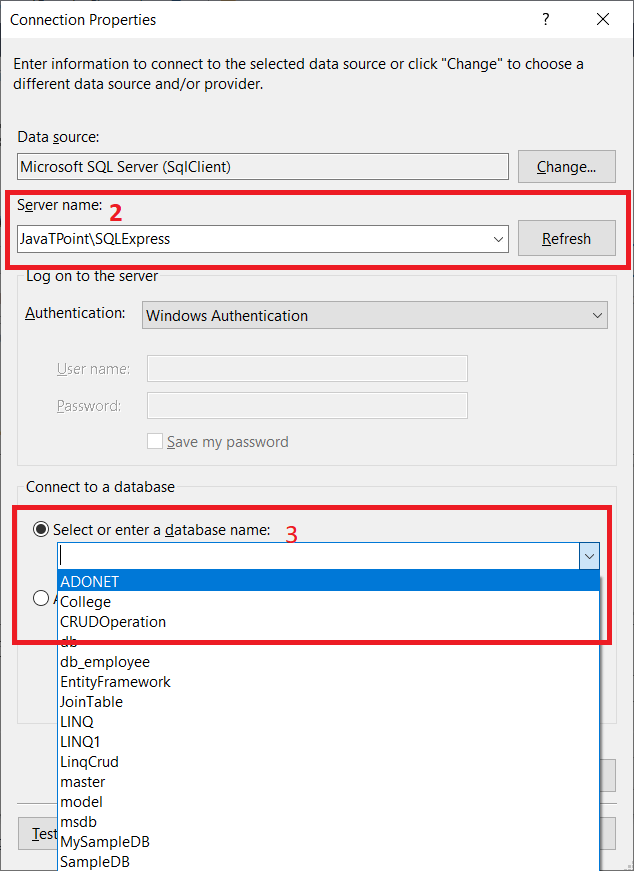 Now we will click on the button Test Connection to check if the connection is successful or not as shown in the below screenshot: 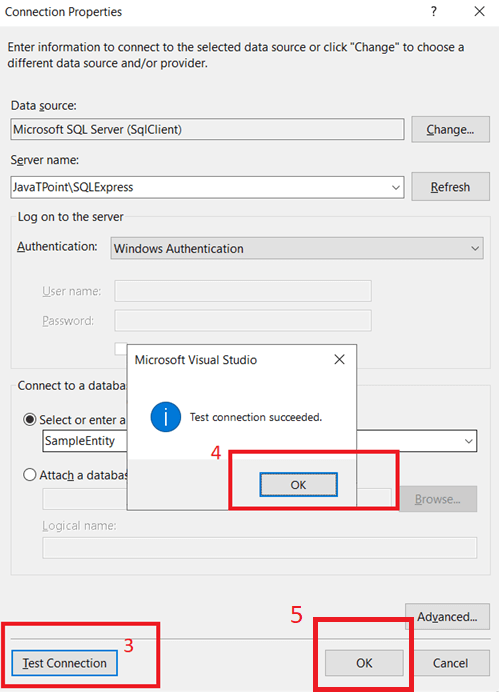 After clicking on the ok button, new window will appear as shown in the screenshot. Here we have to click on the Next button. 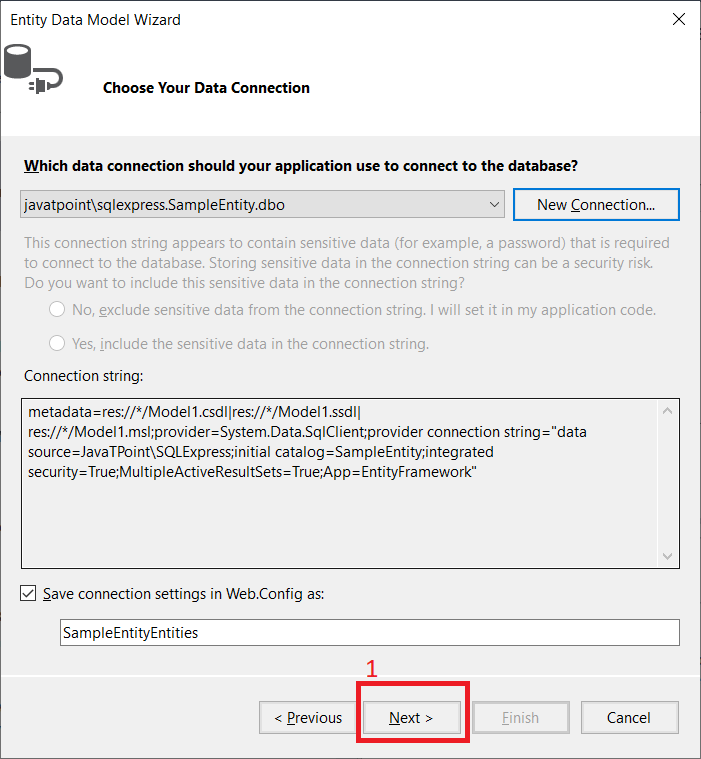 After clicking on the Next button, new window will appear which contains the information on the table. Here we have to select the table which is needed for our project as shown in the screenshot: 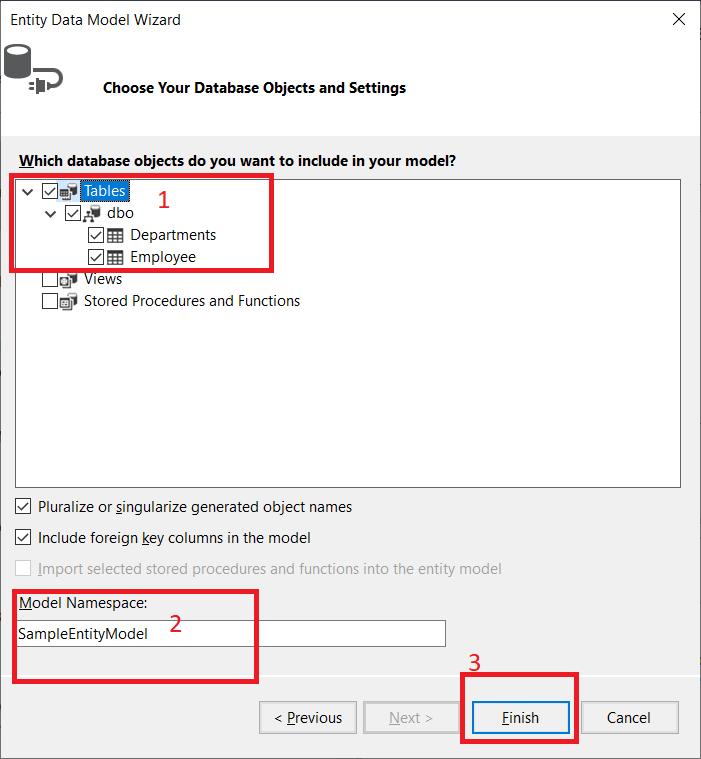 Now we have an Entity Model in our project, as shown below: 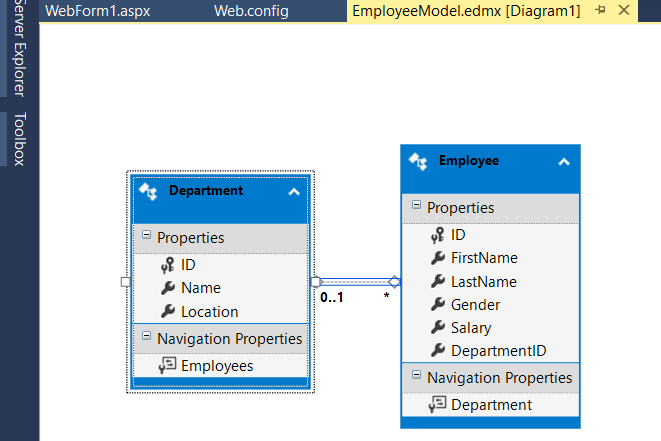 Now we have to add a new web form. For that, we have to right-click on the project->Select Add->Select New Item->Select Web Form click ok. A new window will open as shown in the below screenshot: 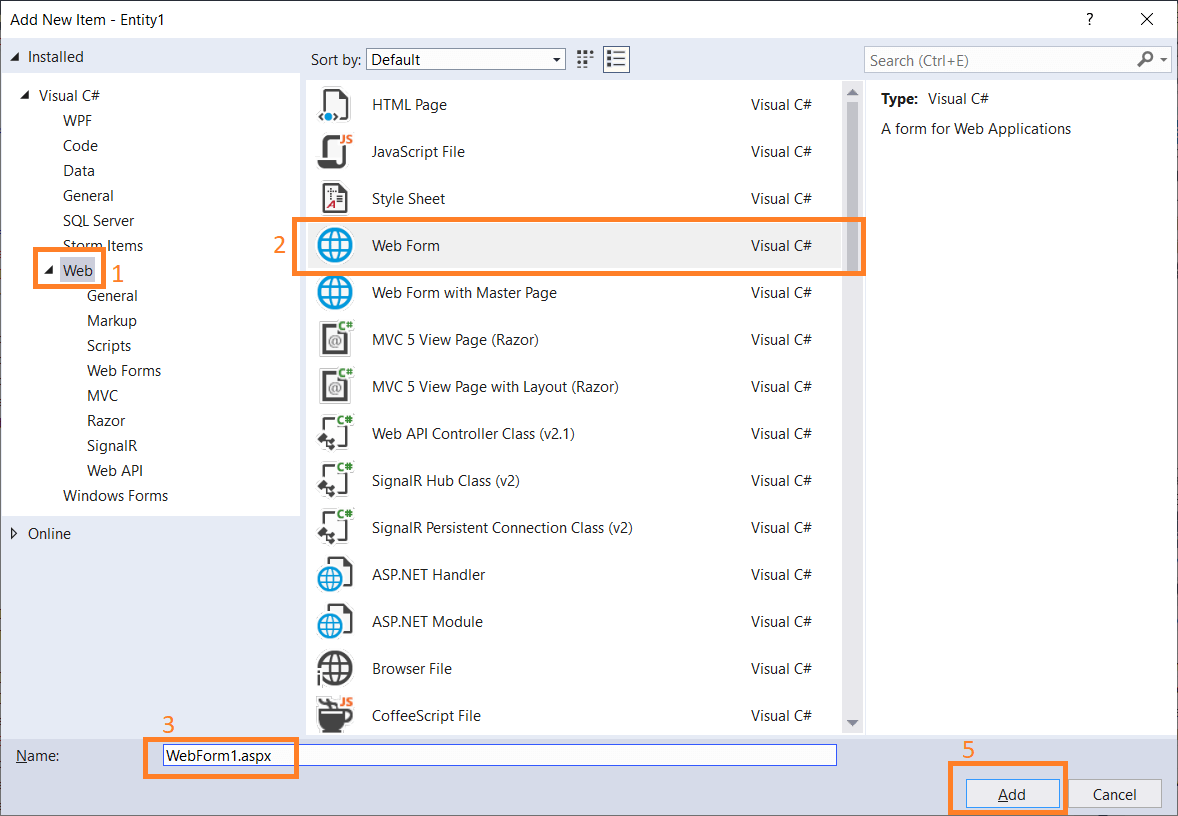 Here we want to fetch the information of Employee according to the department. For that we need to create two tables in the SQL Server Management, first one is the Department table and the second one is Employee table as shown below: WebForm1.aspx Connection with the database to fetch the information of the Department and Employee table is automatically created in web.config file. Output 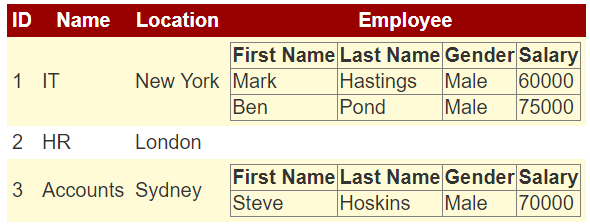 |