Difference between First Angle Projection and Third Angle ProjectionTo represent the 3D systems in a 2D plane, we use an orthographic projection system. The orthographic projection system uses parallel lines to draw the 3D objects into the 2D plane as their projection. The horizontal plane is rotated in a clockwise direction to convert 3D objects into 2D according to the rules of the orthographic projection system. An orthographic projection system is basically used for engineering drawing. Engineering drawing is used to communicate the diagram, shapes, concepts, etc., to develop a system. This projection system has two views which are generally orthogonal or 90 degrees to each other. It provides the perpendicular view of an object to the reference plane. There are three types of the reference plane in the orthogonal projection system:
There are different views for any object, which are listed below:
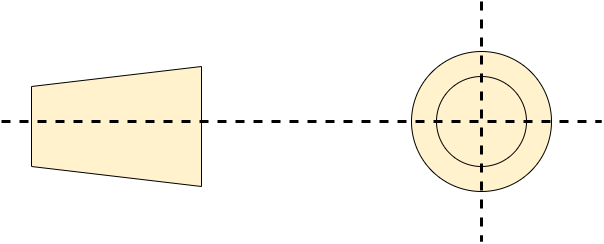
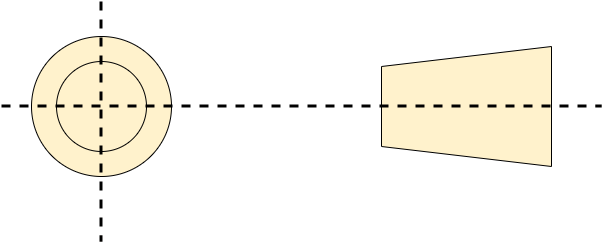
The orthogonal projection system contains two types of drawing: Multiview drawing: In a 2D plane, more than one view represents an item. Axonometric drawing: In this drawing, only a single view is required to represent an item in a 2D plane. There are two types of orthographic projection systems, which are described below: First Angle Projection SystemThe first quadrant is used to place the object in the first angle projection system. The object is generally placed on the top of the horizontal plane and in the front of the vertical plane. So we can say that the object will be positioned between the observer and the planes (vertical and horizontal). The projection plane is taken solid in the first quadrant. India and European countries mostly use this system. In the first angle projection schema following sequence is followed to get the view of an object: Top left -> clockwise -> right view -> front view -> top view  Third Angle Projection SystemThe third quadrant is used to place the object in the third-angle projection system. The object is generally placed on the bottom of the horizontal plane and behind the vertical plane. So we can say that the object will be positioned between the observer and the object. The projection plane is taken transparent in the third quadrant. Australia mostly uses this system for the projection. To represent the three-dimensional objects sequence of two-dimensional perspectives is aligned orderly and joined together to get the correct view. Japan uses this system in the industrial design of buildings etc. In the third angle projection schema following sequence is followed to get the view of an object: Top view -> right view  Following is a list of various differences between First Angle Projection and Third Angle Projection:
Next TopicDifference between |

We provides tutorials and interview questions of all technology like java tutorial, android, java frameworks
G-13, 2nd Floor, Sec-3, Noida, UP, 201301, India


