| |

Eclipse Change ThemeEclipse is one of the most used and popular IDE among developers. It has out of box features and functions that stand it out from other IDEs. There are various factors that influence our ability to code effectively and efficiently. From AI-driven code completion assistance to a plethora of the most useful plugins, one feature that many developers often overlook is the Eclipse editor's theme they use. In this section, we will learn how to change the color theme in eclipse IDE. Installing Eclipse Color Theme PluginIn order to install the color theme in eclipse follow the steps given below. Step 1: Open Eclipse IDE. 
Step 2: Click on the Help menu and select the Install New Software… option from the menu. 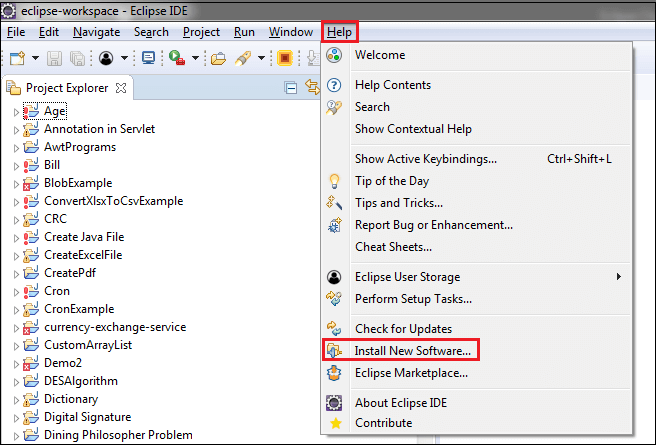
It opens the Install window, as shown below. 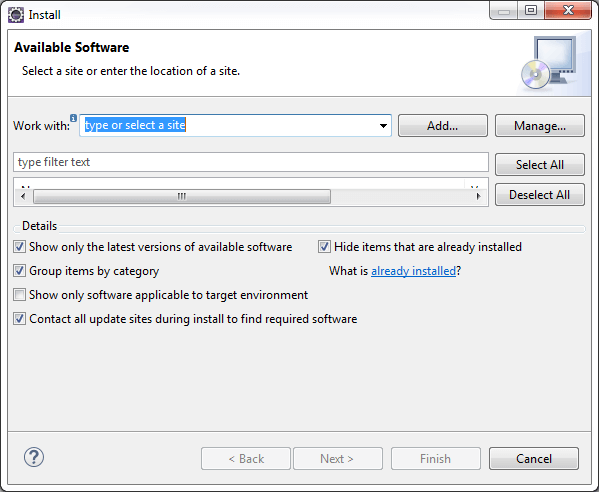
Step 3: Click on the Add button. It opens the Add Repository window. 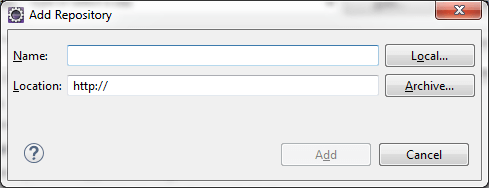
Step 4: In the Name field write the Eclipse Color theme and, in the Location, field type the URL http://eclipse-color-theme.github.io/update. After that, click on the Add button. 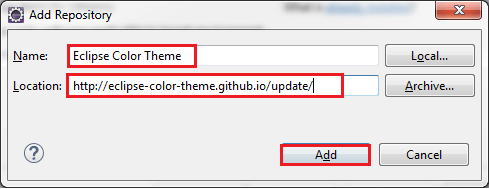
Step 5: Once we have done the above steps, the window looks like the following. After that, click on the Next button. 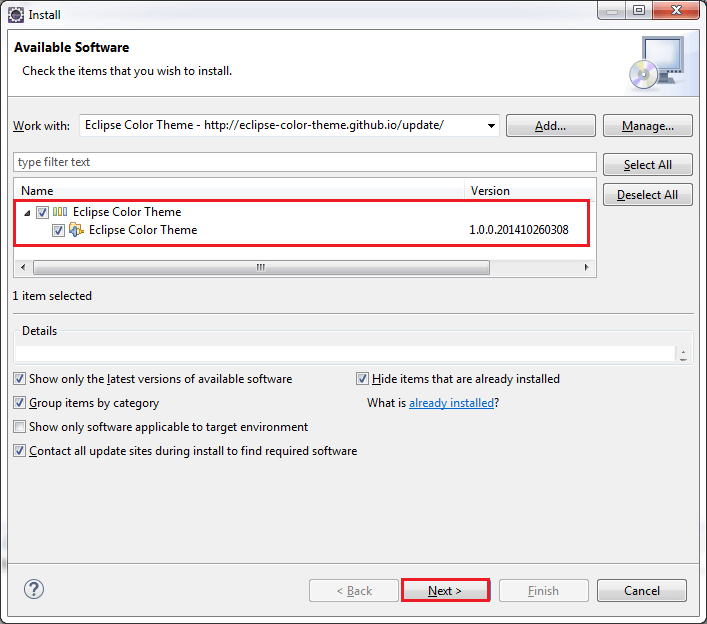
It installs the Eclipse Color Theme. Step 6: Click on the Next button. 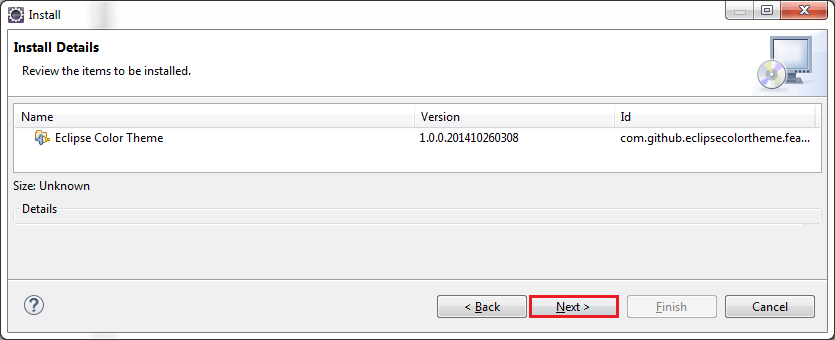
Step 7: Accept the terms and license agreement and click on the Finish button. 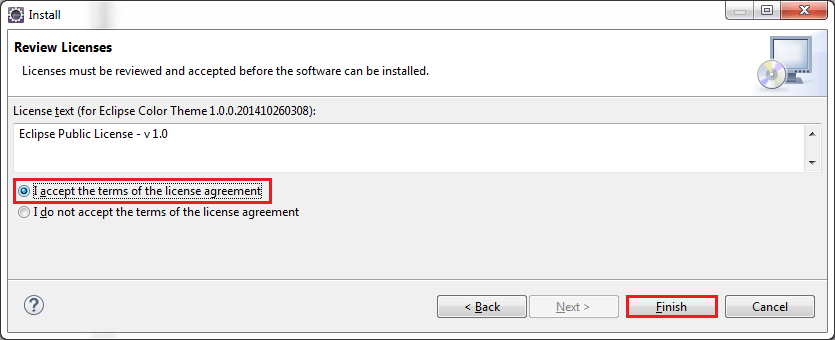
Step 8: After clicking on the Finish button, you may get Security Warning, as shown below. Click on the Install anyway button to avoid the security warning. 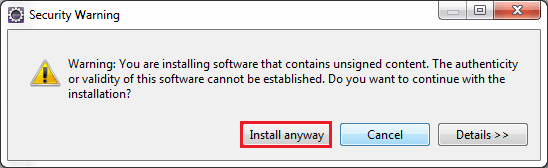
Step 9: It will ask to restart eclipse IDE to reflect the changes. Click on the Restart Now button. 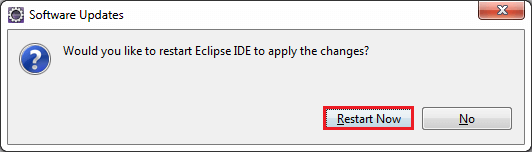
After being done with all the above steps, Eclipse IDE will restart. Now we will change the color theme. How to Change Eclipse Color Theme?Step 10: Click on the Window menu and select the Preferences option. 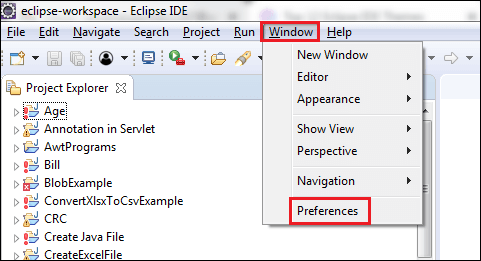
It opens the Preferences window. Step 11: in the left panel, select General -> Appearance -> Color Theme. 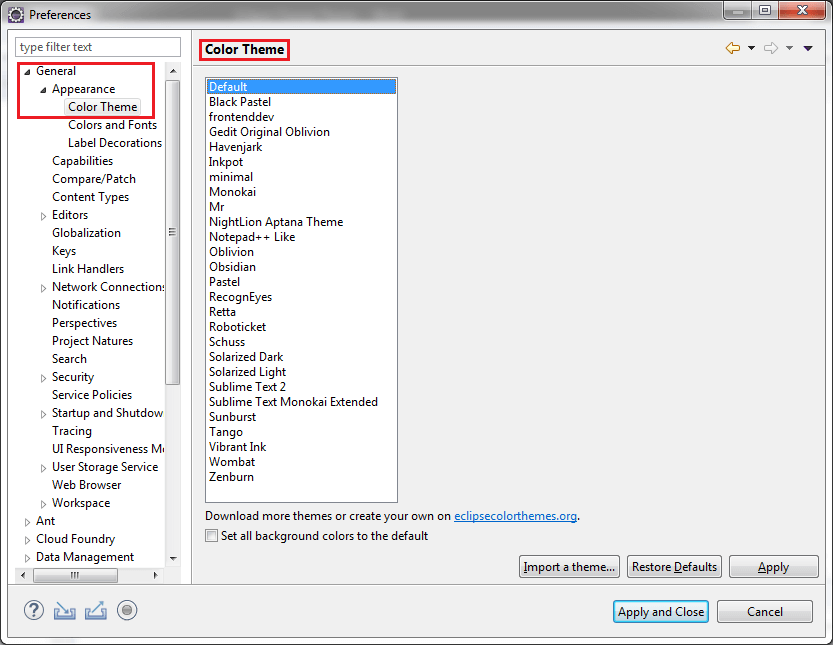
It shows various Color Themes. Step 12: Select any of the color themes (listed above) and then click on the Apply button. At last click on the Apply and Close button. In our case, we have selected a Pastel color theme. It looks like the following. 
Now the theme is changed from Default to Pastel. Top 12 Eclipse IDE Color Theme
Note: We can also import the theme. More Eclipse themes are available on the official website.
Next TopicJava how to Convert Bytes to Hex
|
 For Videos Join Our Youtube Channel: Join Now
Feedback
- Send your Feedback to [email protected]
Help Others, Please Share


