| |

How to Enable Java in ChromeThe Java plugin is part of the Java Runtime Environment (JRE). It allows a browser to work with the Java platform to run Java applets. Almost all the browsers enable Java plugin but sometimes we get the error like the Chrome does not support Java. To overcome this problem, we need to enable Java in chrome. In this section, we will learn how to enable Java in Chrome. If you are using the latest version of Google Chrome Browser, the web pages with embedded Java applets no longer work. By enabling Java in Chrome, we can resolve this problem. The Java plugin is enabled in a large number of browsers and this makes it a target for malicious hackers. Any third-party plugin can be subjected to the same kind of unwanted attention. The team who developed Java has always taken security seriously. They always work for quickly release an update to patch any serious security. It means that the best way to diminish problems with the Java plugin is to make sure it is up-to-date with the latest release. Reason to Enable Java in ChromeEven after installing Java, when we try to run Applets they do not run because the browser we use is not Java-enabled. It is the reason the browser must be Java-enabled. The question arises that why we need to enable Java in Chrome. When we load a website or a web service in which Java technology is used, shows a message, the Chrome browser does not support Java. The reason is that the Chrome browser no longer supports the NPAPI. NPAPI is a technology that supports Java applets. The Java plugin for web browsers depends on the cross-platform plugin architecture NPAPI. Over a decade, it had been supported by all the major web browsers. The Google Chrome version 45 and above versions have dropped support for NPAPI. Therefore, Java plugin does not work for the browsers. Java applications are offered as either a web start application or as a Java applet. This change does not affect Web Start applications it only impacts applets. Developers and System administrators looking for alternative ways to support users of chrome. Solution to the ProblemIf we have already installed Java, we need to restart the browser in order to enable Java. The process recognizes the installation of Java. Make sure that Java content in the browser is enabled through the Java Control Panel. Alternatively, if we are using a website that uses Java, in this case, we must opt for the enable or disable the Java plugin, as required. There is an alternative way to enable Java in Chrome by using the IE Tab extension. Using IE Tab ExtensionStep 1: Go to Chrome Web Store. Step 2: Type IE Tab in the search box. 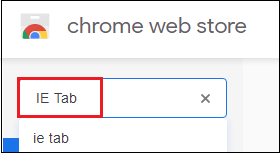
Step 3: Click on the IE Tab Extension. 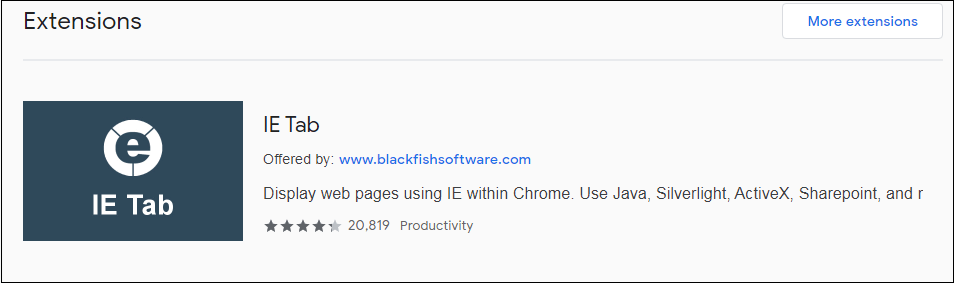
Step 4: Click on the Add to Chrome button. 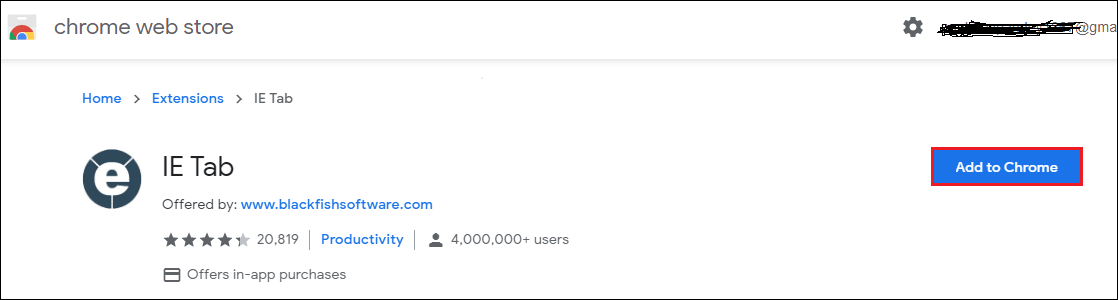
Step 5: Click on the Add extension button. 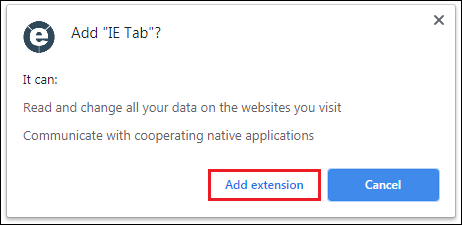
It adds the IE Tab Extension to the Chrome that displays at the right side of the address bar. 
Step 6: Click on the IE Tab icon. It downloads the ietabhelper.exe file. After downloading the .exe file, double-click on the file. It shows a dialog box that asks to Run or Cancel the execution of the file. 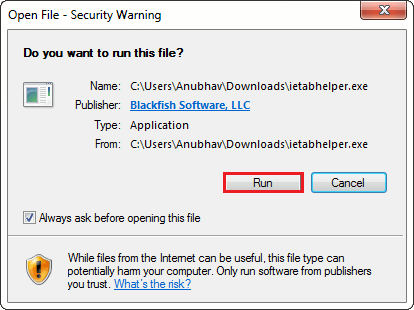
After clicking on the Run button, it opens the following page in the Chrome browser. 
Now, we have resolved the problem. Each time when we visit a web page that contains Java content and the page is unable to open because of Java is not enabled. To display the web page, click on the IE Tab icon presented in the top-right corner of the browser. It opens a new IE Tab and uses the Internet Explorer engine along with the support of Java.
Next TopicJava Semaphore
|
 For Videos Join Our Youtube Channel: Join Now
Feedback
- Send your Feedback to [email protected]
Help Others, Please Share


