Install JDK UbuntuJVM (Virtual Machine of Java) and Java are needed for various types of software including Jenkins, Cassandra, Glassfish, Jetty, and Tomcat. In this article, we will install many releases of Java Development Kit (JDK) and Java Runtime Environment (JRE) using 'apt'. We will install OpenJDK and the official JDK as well from Oracle. We will then choose the release we wish to use for our projects. When we are finished, we will be able to apply the JDK for developing software or using the Java Runtime for running software. The repositories of Ubuntu 20.04 (default) contain two packages of OpenJDK, Java Development Kit, and Java Runtime Environment. The Java Runtime Environment is composed of the Java Virtual Machine, binaries, and classes that permit us to execute Java programs. The Java Development Kit contains the Java Runtime Environment and debugging/development tools as well as libraries mandatory for building Java applications.
Oracle publish binaries for x86-64 architecture for Linux, macOS, and Windows-based OSes and for the aarch64 architecture for Linux and macOS. Older versions supported the SPARC architecture and Oracle Solaris OS. The primary implementation of Oracle of the JVMS is called the HotSpot. JDK contentsJDK contains a group of programming tools as its main components, including:
Experimental tools might not be in the future releases of the JDK. Also, the JDK provides a complete JRE (Java Runtime Environment), usually known as private runtime, because of the fact that it's isolated from the "Regular" JRE and includes additional content. It is composed of a Java Virtual Machine; each class library is available inside the production environment, and extra libraries are only helpful for developers, including the IDL libraries and the internationalization libraries. Other JDKsMany other JDKs are usually available for a range of platforms along with the mostly used JDK, a few of which were initiated from the Sun JDK source and a few that didn't. Each adheres to the common Java specifications but differs in unspecified areas explicitly, including optimization techniques, compilation strategies, and garbage collection. They contain: In maintenance or development mode:
Discontinued or not being managed:
Releases of JDKJDK 10JDK 10 is an open-source Java SE 10 Platform's reference implementation specified by JSR 383 within the Java Community Process. On 20 March 2018, JDK 10 accomplished General Availability. Production-ready binaries upon the GPL are from Oracle. The schedule and features of this version were introduced and tracked by the JEP Process, as modified by the JEP 2.0 proposal. JDK 11It was published on 25 September 2018, and this release is accessible for bug fixes currently. It provides Long-Term Support or LTS. Java 11 contains several new aspects, some of which are as follows:
Several aspects from older versions were discarded; in particular, Java Web Start and Java Applets are no longer present. CORBA, Java EE, and JavaFX modules have been deleted from JDK. JDK 12It was published on 19 March 2019. Java 12 contains several new aspects, including:
The JEP 325 preview feature expands the switch statement; hence, it can be utilised as an expression and includes a new style of case label in which an expression is on the right-hand side. The break statement is not required. A yield statement can be utilized for complex expressions. JDK 13It was published on 17 September 2019. Java 13 contains the below new aspects and several bug fixes and smaller enhancements:
JDK 14JDK 14 was published on 17 March 2020. It contains the below new aspects and several bug fixes and smaller enhancements:
JDK 15JDK 15 was published on 15 September 2020. It supports Text Blocks (multi-line string literals). The Z and Shenandoah garbage collectors are ready to utilize in production. Support for the Solaris operating system of Oracle is abandoned. The Nashorn JavaScript Engine is discarded. Also discarded a few root CA certificates. JDK 16JDK 16 was published on 16 March 2021. It drops Ahead-of-Time compilation aspects. The Java implementation is still and was itself specified in the C++ language, while the latest C++14 is permitted as of Java 16. Also, the code was moved to GitHub, discarding Mercurial as a source control system. JDK 17JDK 17 is the modern LTS version since September 2021. This release is the second LTS version since shifting to the new six-month version cadence. JEP 406 develops the syntax of pattern matching utilized in instanceof tasks to switch expressions and statements. It permits cases to be chosen based on the category of argument, refining patterns, and null cases. JDK 18JDK 18 was published on 22 March 2022. Some new aspects are as follows:
JDK 19JDK 19 was published on 20 September 2022. Some new aspects are as follows:
JEP 405 permits record patterns, expanding the capabilities of pattern matching aspect of switch expressions and instanceof operators to add record patterns that refer to the elements of the record explicitly. JDK 20JDK 20 was published on 21 March 2023. Some new aspects are as follows:
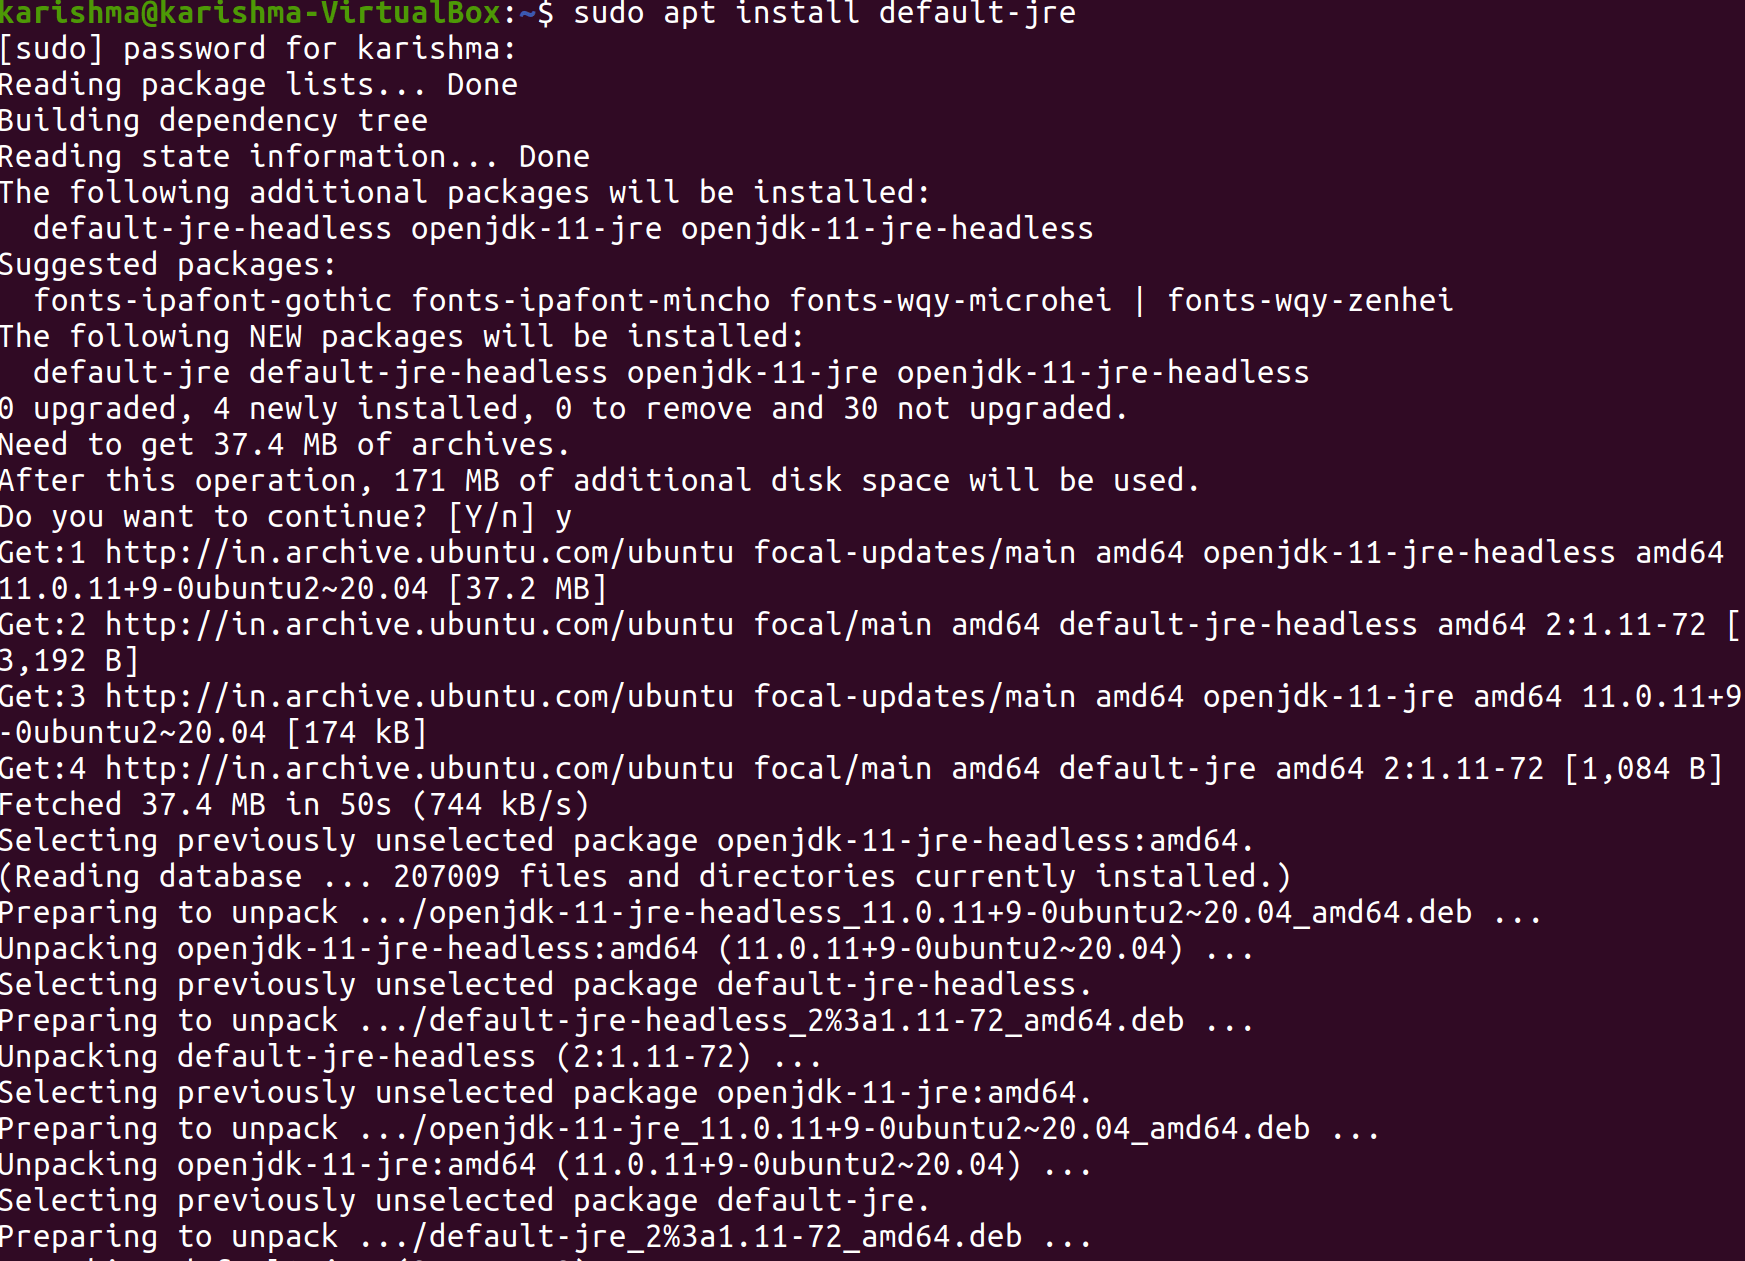
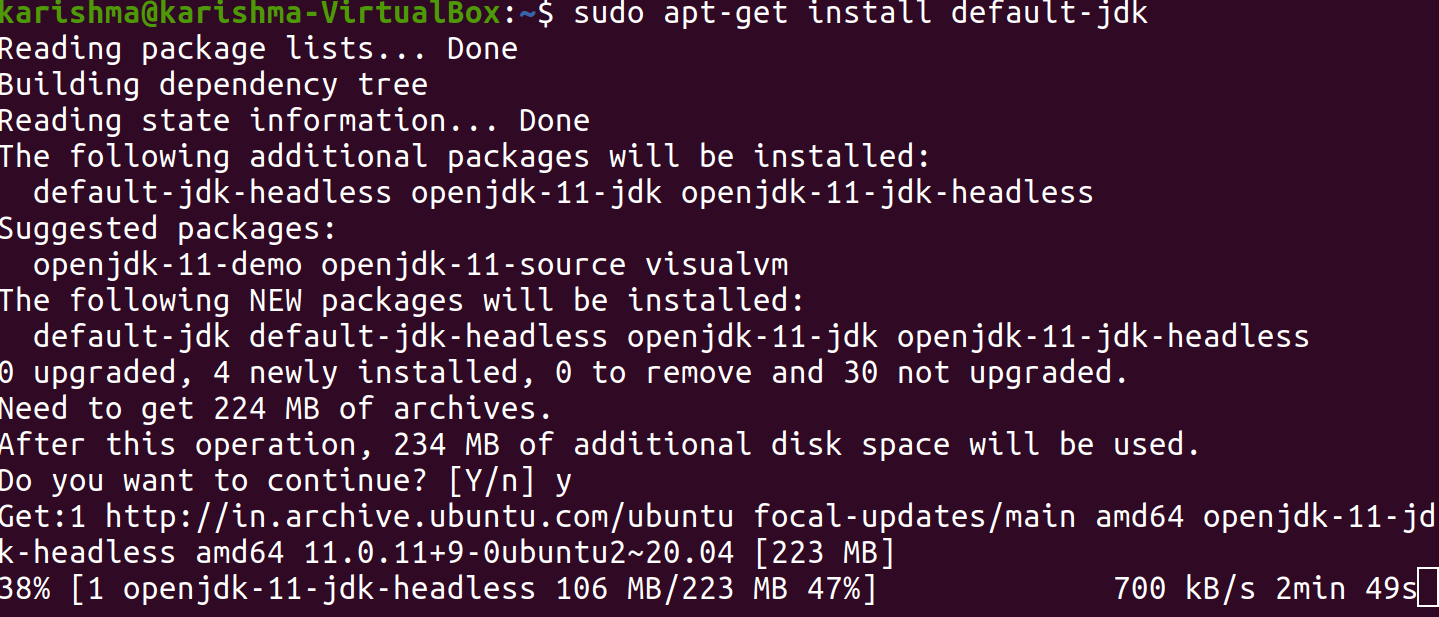
PrerequisitesWe will need to follow this article: The 20.04 server set up of Ubuntu by following the 20.04 initial server setup guide of Ubuntu including a non-root sudo user and a firewall. Install the default JDK/JREOne of the easiest options to install Java is to apply the version which is packaged using Ubuntu. The 20.04 version of Ubuntu by default includes the 11 version of OpenJDK and it is an open-source version of the JDK and JRE. First, we need to update the index of the package for installing this version.  Next, see if the Java version is installed already.  We will see the following result if the Java version is not installed currently. We need to run the below command for installing the default Java Runtime Environment which will install the JRE using OpenJDK 11.  The Java Runtime Environment will permit us to execute almost every Java software. We can verify our installation using the following command. We will find results similar to the below:  We may require the Java Development Kit in addition to the Java Runtime Environment for compiling and running some particular Java-based software. We need to run the below command for installing the JDK which will install the JRE as well.  We need to verify the JDK is successfully installed by checking the Java Compiler javac version.  We will see e the below result: Next, let's see how to install the official JDK and JRE of Oracle. Install Oracle JDK 11The licensing agreement of Oracle for Java does not permit automatic installation from the package manager. We should create an account of Oracle and download the JDK manually for adding any new package repository for the release we had like to use for installing the Oracle Java Development Kit which is the official release shared by Oracle. Then, we can apply apt for installing it with the help of the third-party installation script. We will need to install must match the release of the installer script of the JDK version of Oracle. We should visit a page, i.e., 'oracle-java11-installer' for finding out which release we need. The script version is 11.0.7 on this page. We would require the 11.0.7 version of Oracle JDK in this case. Our version number might vary depending on when we are installing the software. We do not need to install anything using this page, we will download the script of the installation from apt shortly. Then, we need to check the downloads page and after that locate the release that matches the one we need.
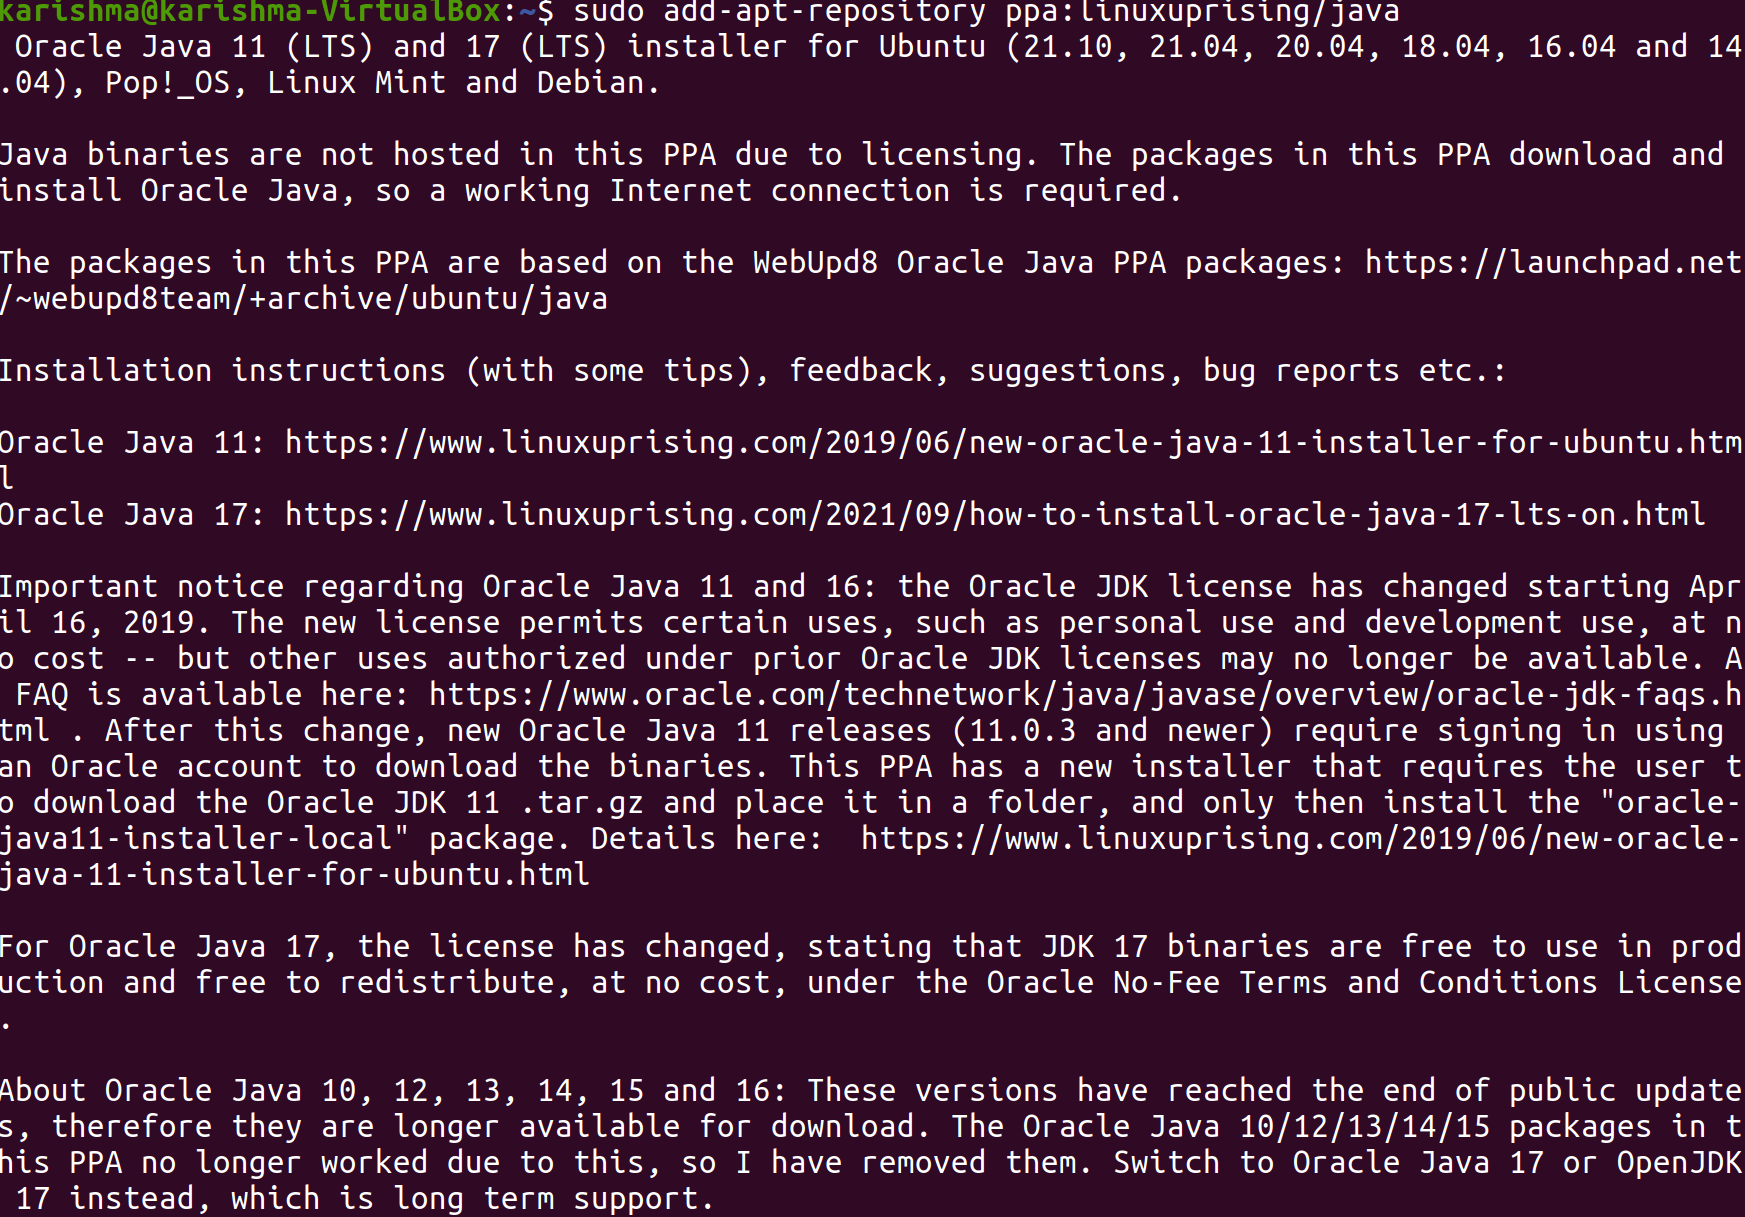
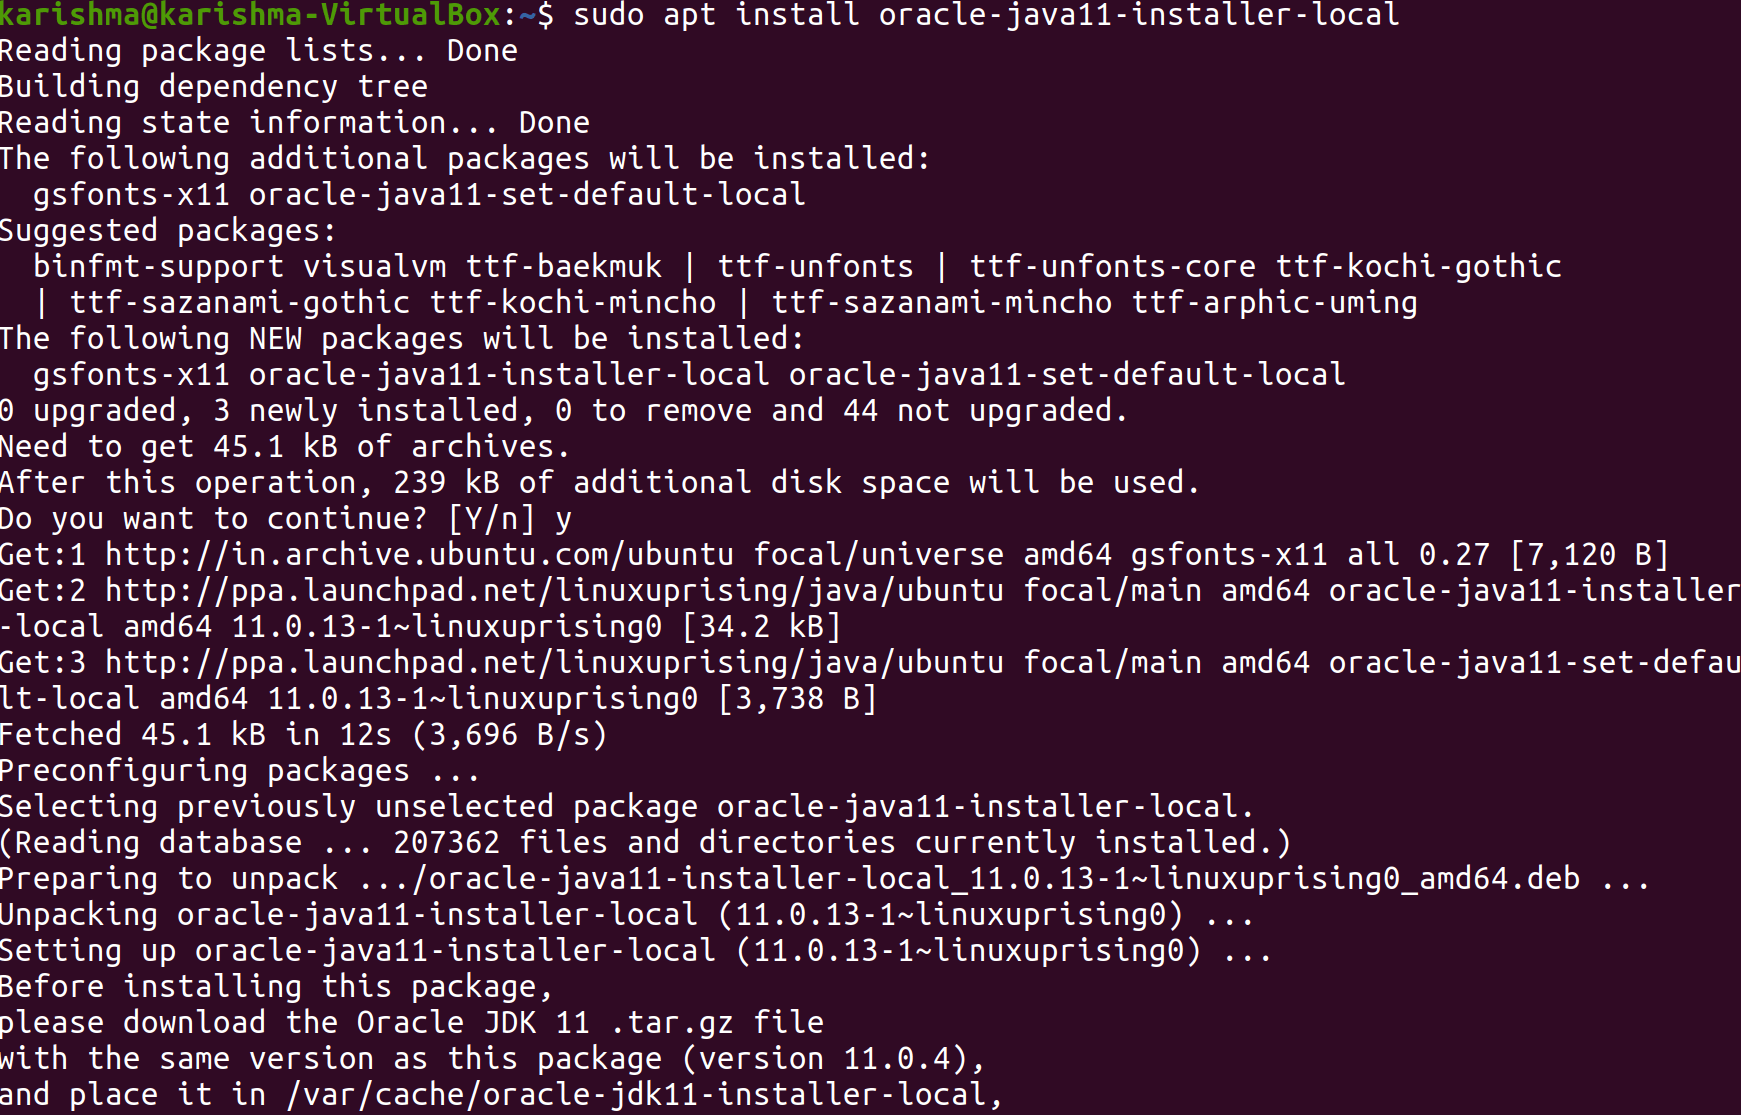
We will return to our server and add a repository of the third party that will support us to install the Java of Oracle when the file uploading process has been completed. We will install a package, i.e., 'software-properties-common' which will add a command, i.e., 'add-apt-repository' to our system.  Next, we will import a signing key which is used for verifying the software we are about to install:  We will see the following output: Then, we will use a command, i.e., 'add-apt-repository' for adding the repository to our list of the package sources:  We will see the following message: We need to press the enter button for continuing the installation process. We might find a message about 'no valid OpenPGP data found', but we can ignore this message safely. We will update our package list for making the new software present for the installation process using the following command:  The installer would see for the Oracle JDK we downloaded in the /var/cache/oracle-jdk11-installer-local directory. We will make this directory and transfer the archive of Oracle JDK there.  Finally, we will install our package using the following command:  First, the installer will ask us for accepting the license agreement of Oracle. We will accept the agreement and the installer would extract the package of Java and install it. Now, we will see how to choose which Java version we wish to use. Java ManagementWe can have more than one installation of Java on a single server. We can configure which release is the default for apply on the terminal with the help of a command, i.e., 'update-alternatives'. The command is mentioned below:  It is what the result will look like if we have installed both releases of Java in this article. Select the number corresponding to the version of Java to apply it as a default or click on the Enter button for leaving the current settings in position. We can do it for other commands of Java like the javac compiler. The command is mentioned below: Many other commands to which this command could be executed include, but aren't restricted to: keytool, jarsigner, and javadoc. JAVA_HOME Environment Variable SettingSeveral programs written in the Java language use the environment variable, i.e., JAVA_HOME for determining the installation location of Java. First, we need to determine that where the Java version is installed for setting the environment variable. We will use the following command:  This command will display all installations of Java with the installation path. In this type of case, the paths of the installation are below:
We need to copy the path using our preferred installation. After that, we will open the /etc/environment directory with the help of the nano text editor or any other text editors. We will add the below line at the completion of this file. Ensure for replacing the highlighted path with our copied path, but don't add the path portion of the bin/. We will modify this file which will set the path, i.e., JAVA_HOME for every user on our system. We will save this file and exit from the text editor. Now, we will reload the file for applying the modifications to our current session: We will verify that this environment variable has been set with the help of the following command: We will find the path we just set. Many other users will require to run the source /etc/environment command or log back and log out to use this setting. Next Topic# |