| |

Java Digital SignatureThe digital signature is a mechanism that verifies the authority of digital messages as well as documents. It is very popular because it provides more security than other signatures. In Java, JDK Security API is used to create and implement digital signatures. In this section, we will discuss the digital signature mechanism and also implement the digital signature mechanism in a Java program. 
Digital SignatureThe digital signature is an electronic signature to sign a document, mail, messages, etc. It validates the authenticity, and integrity of a message or document. It is the same as a handwritten signature, seal, or stamp. It is widely used to verify a digital message, financial documents, identity cards, etc. In short, we can say that it ensures the following:
The digital signature is used by the Directory Server that preserves the integrity of information. When we apply encryption and message digests to the information to be transmitted, the receiver of the information can easily determine that the information is not tempered during transmission. The function on which temper detection and authentication depend is called the one-way hash. It is also known as a message digest. The one-way hash is nothing but a long number of fixed lengths. It has the following characteristics:
So, public and private keys are a vital parts of digitally signed data. Rather than encrypting the actual information or data, the signing application generates a one-way hash of the information or data. After that, it uses the private key to encrypt the hash. The encrypted hash, with other information, like the hashing algorithm, is known as digital signature. The following figure depicts the same. 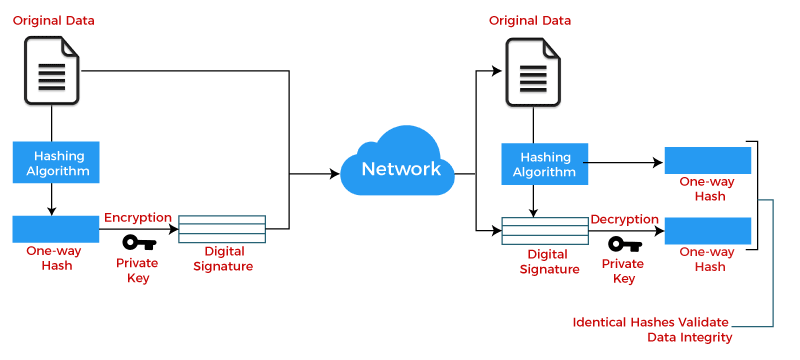
TerminologyThere are the following three major technical terms that are used in the digital signature. Public key infrastructure (PKI): It is a set of modules (hardware, software, and other resources) that is required to securely manage digital signatures. It includes a pair of keys i.e. public and private. The public key is shared among all those who need to validate the signature. While the private key is not shared at all. It is only used by the signer to digitally signed a message or document. Certificate Authority: These are the trusted organizations that are widely recognized for ensuring key security and digital certificates. Digital Certificate: The digital certificate contains the public key and also specifies the identity associated with the key. Usually, certificates are issued by the trusted authorities that are valid for a period. Advantages of Digital Signature
Uses of Digital SignatureDigital signatures are used in the following areas:
Working of Digital SignatureA digital signature is based on asymmetric cryptography. It is also known as public-key cryptography. There are a number of public-key algorithms. But among them, two are widely used are RSA (Rivest-Shamir-Adleman) and SHA (Secure Hash Algorithms). Both algorithms are used for secure data transmission. These algorithms generate a mathematically linked pair of keys one is public and the other is private. An individual who creates the digital signature uses a private key that encrypts signature-related data. One who receives the digitally signed data uses the signer's public key which is only the way to decrypt data. At last, both the cryptographic hashes are compared with each other that check its authenticity. If they match, the document is valid. If the recipient is unable to open the document or message with the signer's public key, it means there is a problem with the document or signature. The digital signature mechanism requires all parties to believe that the individual creating the signature keeps the private key secret. On the off chance that another person accesses the private marking key, that party could create fraudulent digital signatures in the name of the private key holder. 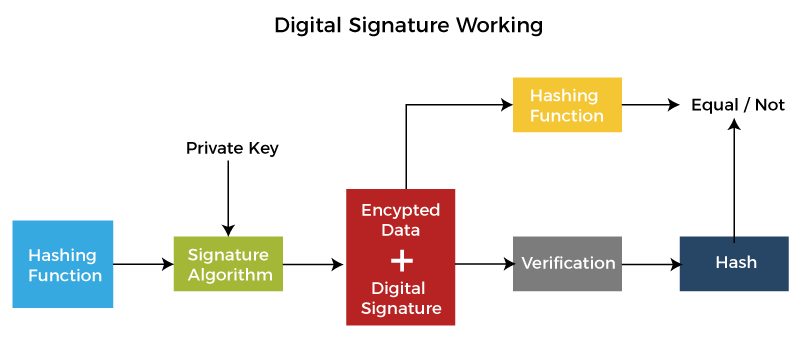
Sending a Digitally Signed MessageTechnically, the digital signature is an encrypted hash of a message or document. It means that a digital signature generates a hash from a message. After that, the generated hash is encrypted with a private key. We can use SHA and RSA hashing algorithms for the same. When we send a message, the encrypted hash and corresponding key also send with the message that classified as a message with the digital signature. Receiving a Digitally Signed MessageWhen a receiver received a digitally signed message, the receiver generates a new hash from the message. After that, it decrypts the received hash by using the public key. At last, it compares both the keys. If they are equal, the digital signature is verified. Here, a point to note that, we have encrypted only the message hash not the whole message. Since the digital signature only ensures that the message is not altered during transmission. The following figure demonstrates the same. 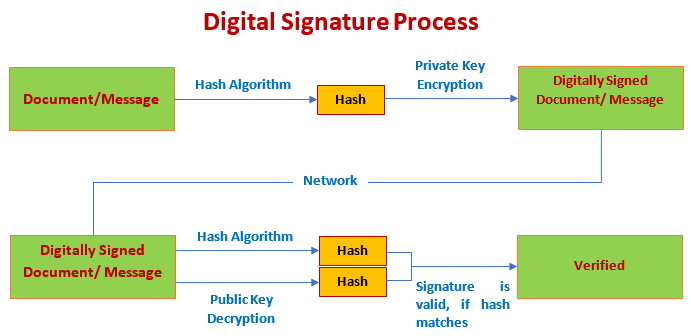
Digital Signature FlowSuppose, X (sender) sends a message to Y (receiver). X calculates the hash of the message and attaches a signature with it which he wants to send with the message using the private key. At the receiver (Y) end, messages again generate a hash and decrypt the signature with X's public key. After that, compares the hashes. If hashes match at the receiver (Y) end, the signature is verified and validates the document. Also, ensures that the message is not tempered in between. Note: Before proceeding with this section, make sure you know hashing algorithms well.Implementing Digital Signature in JavaGenerating Digital SignatureJava provides the JDK Security API that allows us to deal with digital signatures. In order to generate a digital signature, we must follow the steps given below:
Let's follow the steps. Digital Signature Java ProgramCreating an Initial Program StructureGenerateDigitalSignature.java Generating Public and Private KeyCreating a Key Pair Generator As we discussed above, a digital signature required a private key. Also, the corresponding public key is required in order to verify the signature. But sometimes the key pair already available in files. If not available, we need to generate it. We can generate the key pair by using the KeyPairGenerator class. It generates keys with a 1024-bit length. We invoke the getInstance() method of the KeyPairGenerator class. There are the two forms of the getInstance() method. Both have two arguments, algorithm as the first argument and provider as the second argument of type String. Where DSA (Digital Signature Algorithm) is an algorithm to use and SUN is the default provider that is in-built in JDK. Now, we will initialize the key pair Generator. Initialize the Key Pair Generator All the key pair generator provides the concept of key size and randomness. The initialize() method of the KeyPairGenerator class accepts these two as a parameter. For DSA, the key size is 1024. So, will set the key size to 1024. Another parameter randomness must the instance of the SecureRandom class. It provides a cryptographically strong random number generator (RNG). It uses the SHA1PRNG algorithm provided by the built-in SUN provider. Java 8 provides a list of known strong SecureRandom. It belongs to the securerandom.strongAlgorithms property of the java.security.Security class. So, we can also use SecureRandom.getInstanceStrong() method as it obtains an instance of the known strong algorithms. At last, generate a pair of keys. Generate the Pair of Keys Using the KeyPair class, we generate the public and private keys. Next, step is to sign the data. Sign the Data Java provides the Signature class that can be used to create a digital signature. Getting Signature Object In the above syntax, a point to note that we have mentioned the signature algorithm name with the message-digest algorithm that is used by the signature algorithm i.e. SHA1withDSA. Where SHA-1 is a message-digest algorithm and DSA is a signature algorithm. In combination, it is a way to specify the DSA algorithm with the SHA-1 algorithm. Note: When specifying the signature algorithm name, you should also include the name of the message-digest algorithm used by the signature algorithm. SHA1withDSA is a way of specifying the DSA signature algorithm, using the SHA-1 message digest algorithm.Initialize Signature Object The signature object must be initialized before using it. The initialization method for signing requires a private key. So, we will use the object (priv) of the PrivateKey that we have created above. Supply the Signature Object the data to be Signed It uses the data to be signed. In order to supply the data, we use the update() method provided by the Signature class. Generate the Signature When we supplied all the data to the Signature object, it allows us to generate a digital signature for that data. In the next step, we will save the signature. Save the Signature and the Public keys in FilesIn the previous step, we have generated signature bytes. In this step, we will save both signature and public keys in two separate files so that it can share with someone. Saving Signature We will save the signature in a file named sig by using the following code. Saving Public Key Here, we will save the encoded public key. We get the encoded key by using the getEncoded() method. It returns the encoded byte. We will store the same bytes in a file. Compile and Run the ProgramAfter completing all the above steps, we get the following source code. GenerateDigitalSignature.java Remember: Do not forget to specify the file name to be signed. We have used the file Output: 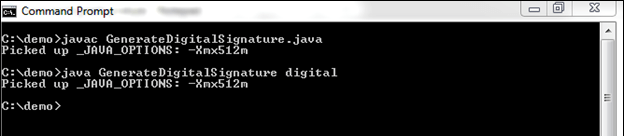
When we execute the program, it generates two files named publickey.txt and signature.txt files at the specified location. 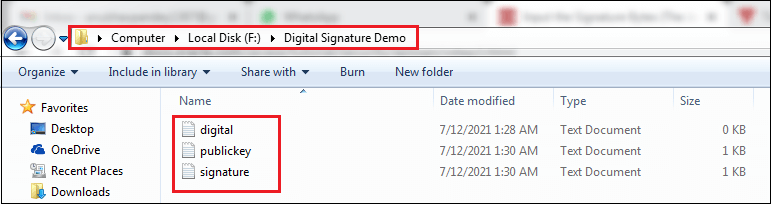
Let's see what inside the files. digital.txt 
publickey.txt 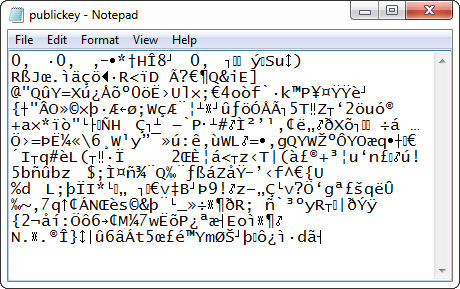
signature.txt 
We see that both files have encrypted data that cannot be read by humans. Verify Digital SignatureNow we will verify the signature that we have generated above. In order to verify the signature, follow the steps given below:
Let's follow the step. Prepare Initial Program StructureCreate a program in which we will implement the logic to verify the signature. We have created a Java file with the name VerifyDigitalSignature. VerifyDigitalSignature.java In the above code snippet, we have imported a package named java.security.spec that provides the X509EncodedKeySpec class. Input and Convert the Encoded Public Key BytesIn this step, we will import the encoded public key bytes and convert them into a public key. So, in order to read the public key, use the following code snippet. The above code converts the byte array into the encoded public key bytes. Now, instantiate a DSA public key from its encoding. For the same, we can use the KeyFactory class. It provides conversion between opaque keys (key type) and key specifications. Opaque key uses the X509 standard that is used to determines the algorithm name, a format name, and the encoded key bytes. Note that it does not provide the key material. For this, we need a key specification that can be achieved by using the following code. Assume that the key was encoded according to the X509 standard. Now, we will convert the key by using the KeyFactory class object. Note that the object must be able to work with DSA keys. At last, generate a public key specification from the object of the KeyFactory class. Input the Signature BytesFrom the specified file, input the signature bytes as CLI. Verify the Digital SignatureInitialize the Signature Object for Verification For the verification of a signature, we need a Signature class's object. It uses the same signature algorithm as we used to generate the signature. Initialize the Signature class object. The initialization method for verification requires a public key object (pubkey) as a parameter. Supply the Signature Object with the Data to be Verified Supply all the data to the Signature object for which signature was generated. Verify the Signature We have supplied all the related data to the Signature object. Now, we can verify the digital signature. When we have done with all the steps, we get the following source code. VerifyDigitalSignature.java Now, compile and run the program. Compile and Run the ProgramWhile running the above program, specify three arguments on the console:
We get the following output on running the program. Output: 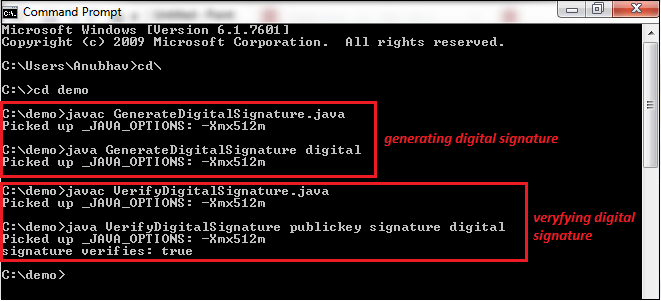
We see that signature is verified. Let's do some modifications in the file for which the digital signature was generated. We have removed the last word from the digital.txt file. After removing the word before, the file looks like the following. digital.txt 
Now, run the VerifyDigitalSignature.java file only and see what happens. 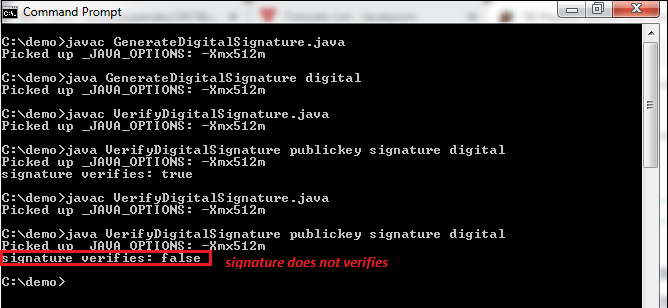
From the above output, we can observe that every time when we alter or modify the data, the key changes, and the signature verification returns false. In the above program, we have used the SHA-1 and RSA algorithm to generate and verify the digital signature. Similarly, we can also use other asymmetric algorithms to generate and verify the digital signatures. Generating and Verifying Digital Signature Using RSA and SHA256 AlgorithmLet's create another Java program but in this program, we will use the SHA256 algorithm with RSA. Rest the code and concept is the same. DigitalSignature.java Output: Signature Value: 0B5F7239F701F38932006DA86ED1DB0CA7883F9AE5D1934D6DC1ACB474B60CB69B39D7A983778AD6979967E0C1A9C73E5DD39CF3991B9612EABE25DAF84ECFCD52C7EBE9FD27DFE0BFF426E27476D35A30C87A94B0EA2CA99812DE4A6DA10614533A05CBF37833560E898B88C4733DF4A22C2B89DE56848A59DDE7CC0BBED0F0CE086DC6CC2789511C17008CB2BA8F2B30D6394221C2414C065385E270ADC191716BAE4B34B2790355D67D4B30AA514438515B5ACDA5E4FB846BD42226DE045294DE949AA15DE8CBD6885E29B9059136DB36347AEC5833D9B60EBEA72484A5F3B79B12E4AF6A0B9D8EB0EFBDBEC892E094E1418C6249C368F4ED39FD6EFEAE9A Verification: true
Next TopicCatalan Number in Java
|
 For Videos Join Our Youtube Channel: Join Now
Feedback
- Send your Feedback to [email protected]
Help Others, Please Share


