| |

javac is not RecognizedIn Java, we usually get the errors and exceptions during the compilation time. But the error javac is not recognized is the most common error that is faced by many new Java programmer. In this section, we will detect why the javac command is not recognized by the compiler and what is the reasons to generate javac is not recognized. We will also see the possible solutions to resolve the error. Before moving ahead in this section, let's understand the meaning of the error statement javac is not recognized as internal or external command. In Java, javac is a command that compiles the Java source code. When we type the command in the Command Prompt, the prompt refuse to identify the javac command. It means that the javac.exe file is not found by the compiler. The javac.exe file exists in the bin folder of the JDK installation folder. The error we get because the PATH is not properly set. The following image shows, what the error shows. 
Reason to Occur the Errorjavac is not recognized is an error occurs while we compile the Java application. It is because the JVM is unable to find the javac.exe file. The javac.exe file is located in the bin folder of the JDK. 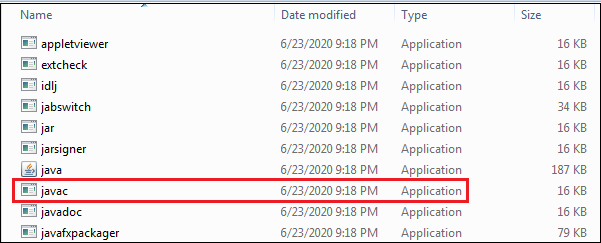
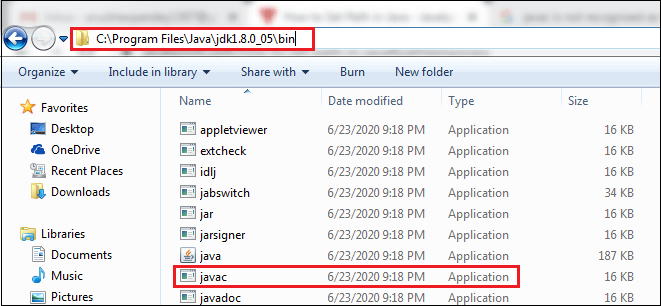
The reason behind to occur the error is that the PATH is not added to the System's environment variable. If the PATH is not added to the environment variable or not properly set, we cannot compile the Java application. So, to resolve the error is important. Let's see the solution to the error. Solution to the ErrorTo resolve the error, we need to add PATH (used by operating system to find the executable files) variable to the System's environment variable. The PATH is the address of the folder where javac.exe file located. It is necessary to include bin directory to the environment variable because all the executable files required to compile, run, and debug Java program are located in the bin directory. So, in our case, the PATH to the bin directory is: C:\ProgramFiles\Java\jdk1.8.0_05\bin; Your path may differ from the above path. It depends on where you have installed the JDK. Remember that put a semicolon (;) at the end of the PATH because it is possible that you need to add another PATH variable of another application. So, in this case, the semicolon separates two paths. Note: The PATH may differ if you have installed later versions of Java.First, we check the PATH is already added or not. To check which paths are added to the environment variable, follow the steps, given below:
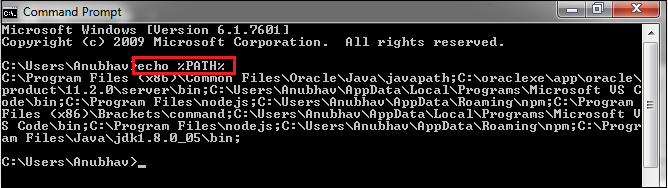
It shows all the paths or directories that are already added to the environment variable. If the PATH is already set, continue with the javac command for compilation, else add the PATH to the environment variable. There are the two ways to set PATH in the environment variable, either set the PATH temporary or set the PATH permanently. The disadvantage to set the PATH temporary is that as many as times we compile the Java application, we need to specify the PATH. It takes lots of time and there are more chances to type the wrong command. So, it is not good to use. We recommend you to set the PATH permanently. Let's see how to add PATH to the system's environment variable. Set the PATH TemporaryTo set the PATH temporary, follow the steps given below:

Once the PATH is set, we can compile and run the Java application. Set the PATH PermanentlyTo set the PATH permanently, follow the steps given below: Step 1: Open the Control Panel. Step 2: Click on the System. 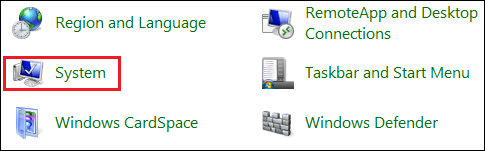
Step 3: Click on the Advanced system settings. It opens a dialog box for the System Properties. 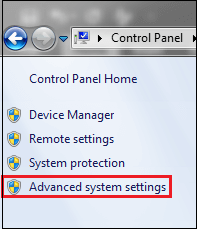
Step 4: In the System Properties dialog box, click on the Environment Variables button, located at the bottom right corner. It opens the Environment Variables dialog box. 
Step 5: In the Environment Variables dialog box, click on the New button if the PATH variable is not appearing under User Variables section. It opens the New User Variable dialog box. 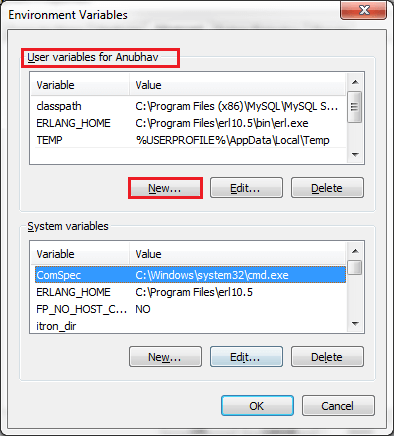
Step 6: Provide the Variable name PATH and Variable value path up to the bin folder of the JDK directory. In our case, the path is: C:\ProgramFiles\Java\jdk1.8.0_05\bin. After that, click on the OK button. 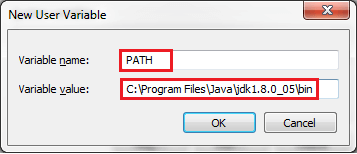
Now the PATH variable has been saved and it is visible under the User Variables section. Step 7: Again, click on the OK button. 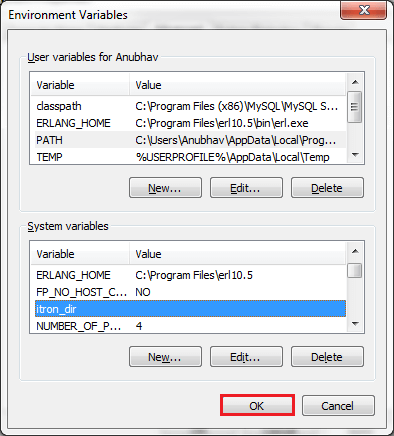
Step 8: Click on the OK button. 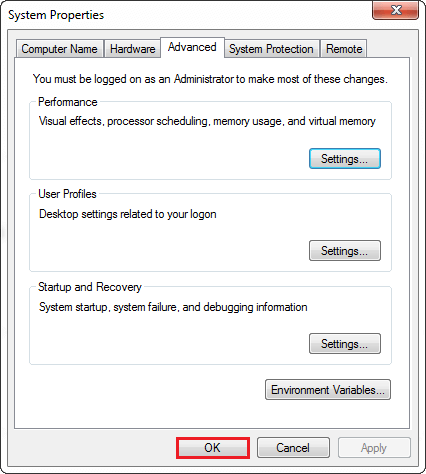
The PATH has been saved permanently. To test it is working properly or not, open the Command Prompt and type javac command and press the enter key. The command shows the options that we can use with the javac command. 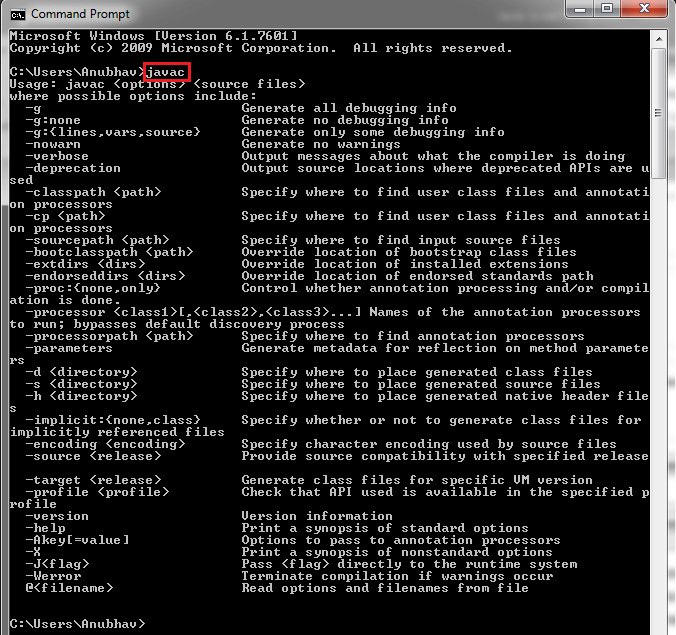
The command ensures that the PATH is properly set and we can compile and run Java programs without occurring the error javac is not recognized as an internal or external command, operable program or batch file.
Next TopicDynamic Array in Java
|
 For Videos Join Our Youtube Channel: Join Now
Feedback
- Send your Feedback to [email protected]
Help Others, Please Share


