| |

No Java Virtual Machine was FoundThe error "no java virtual machine was found" is thrown by an IDE where Java code is executed, such as in Eclipse or Netbeans IDE. It usually happens when we begin to open the Eclipse IDE on the system, but it does not open because it is unable to find the Java Virtual Machine and without which the Eclipse IDE cannot get started. It happens because if you are opening Eclipse on your system and it does not find the appropriate JDK or JRE on the system, it does not open and throws such an error. However, there can be a case that Eclipse was working properly before, but suddenly it throws this error. 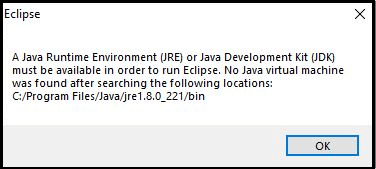
In this section, we will discuss why such an error is thrown and how we can resolve this error so that next time on opening the Java IDE on the system, it may not show such an error again. For discussing the concept, we will make use of the Eclipse IDE. Case 1Fresh Installation of Eclipse: Opening Eclipse IDE for the first time, but it throws "No Java Virtual Machine was Found" error In this case, when we try to open Eclipse IDE for the first time after successfully downloading, it throws such an error. Reasons can be:
Troubleshooting the ErrorOne needs to go through the below-discussed points in order to get rid of this error and fix it: 1) Modify the Environment Variable and check if you have correctly set the Path or not. If the Path variable for Java is not set. Set it first. To do so:
2) Need to check out the operating system, whether it is a 64-bit or 32-bit system. To check: Right-click on This PC/My Computer > Properties, and there you will find the properties of the system you own. A snippet is shown below: 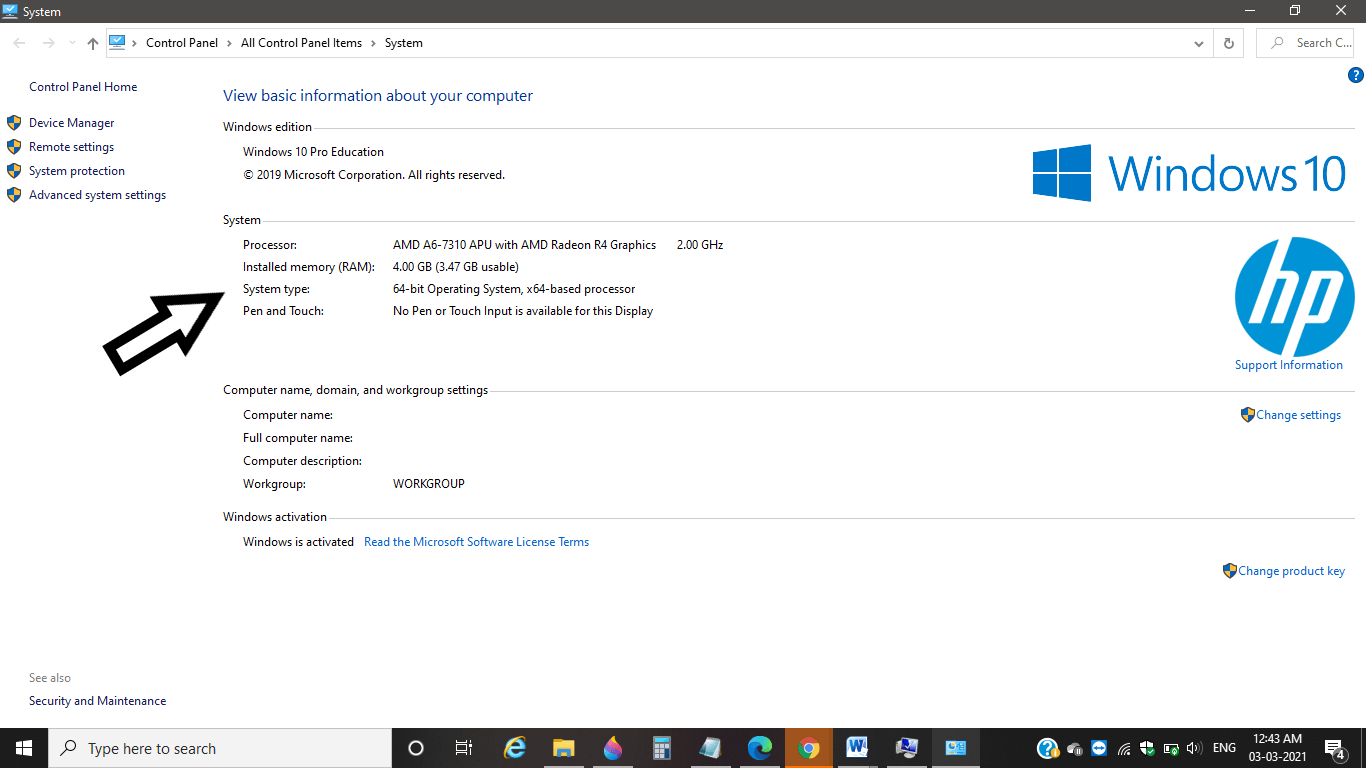
3) Check if you have successfully downloaded JDK or JRE on your system or not. If not, download it from the official website of Oracle and as per your system requirement and suitability. Oracle may require you to accept the License Agreement and Sign in to your account to download Oracle software. The link to the website is: https://www.oracle.com/in/java/technologies/javase-downloads.html 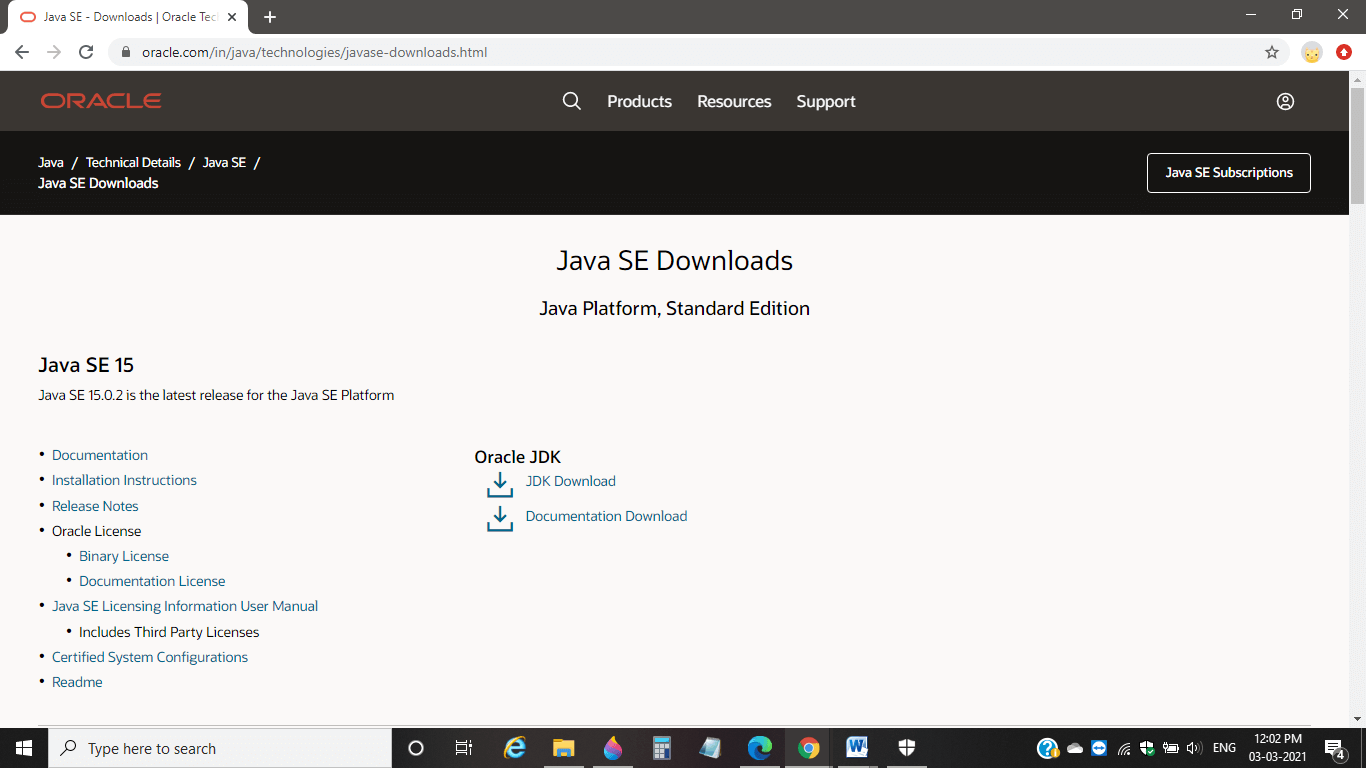
4) The version of both for Java and Eclipse must be the same, i.e., if you have Windows 10 x64-bit operating system, then JRE or JDK must be installed of the same version and vice versa. 5) The last one is if you have more than one Java installed on your system and you have set the Path for all those JDKs, then keep in mind that Eclipse IDE will pick out the first one, which is set in the Environment variable. So, set the path value appropriately, Thus fixing the "No Java Virtual machine was found" error before using Eclipse is quite simple because there can be these small issues due to which Eclipse is unable to work. If these discussed points do not solve the error, you can try to uninstall Java from the system and once again install it and set the Path. Case 2A sudden throw of error: Eclipse suddenly throws "No Java Virtual Machine was found" error In this case, you worked comfortably before, but at a sudden such error is thrown. Reasons can be:
Troubleshooting the ErrorIn order to troubleshoot the error, check out, and if found any of these appropriate, follow the changes: 1) Edit the file eclipse.ini file The file eclipse.ini is a configuration file that is responsible for controlling the startup of the Eclipse IDE, and so we need to modify this file for the -vm argument if such an error is thrown. To check whether you have set the JVM path correctly to the -vm argument in the eclipse.ini file, open the eclipse.ini file and see if the JDK/JRE path is set. As you can see in the below snippet, no path is pointing to JVM: 
So, add the below command before -startup: Save the changes 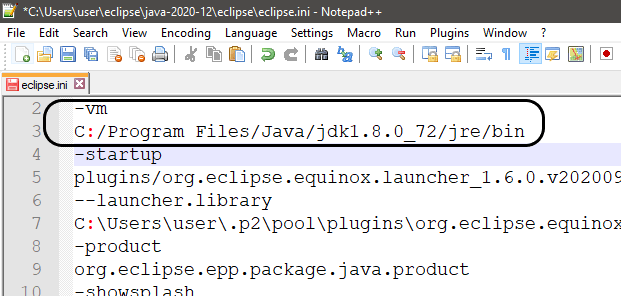
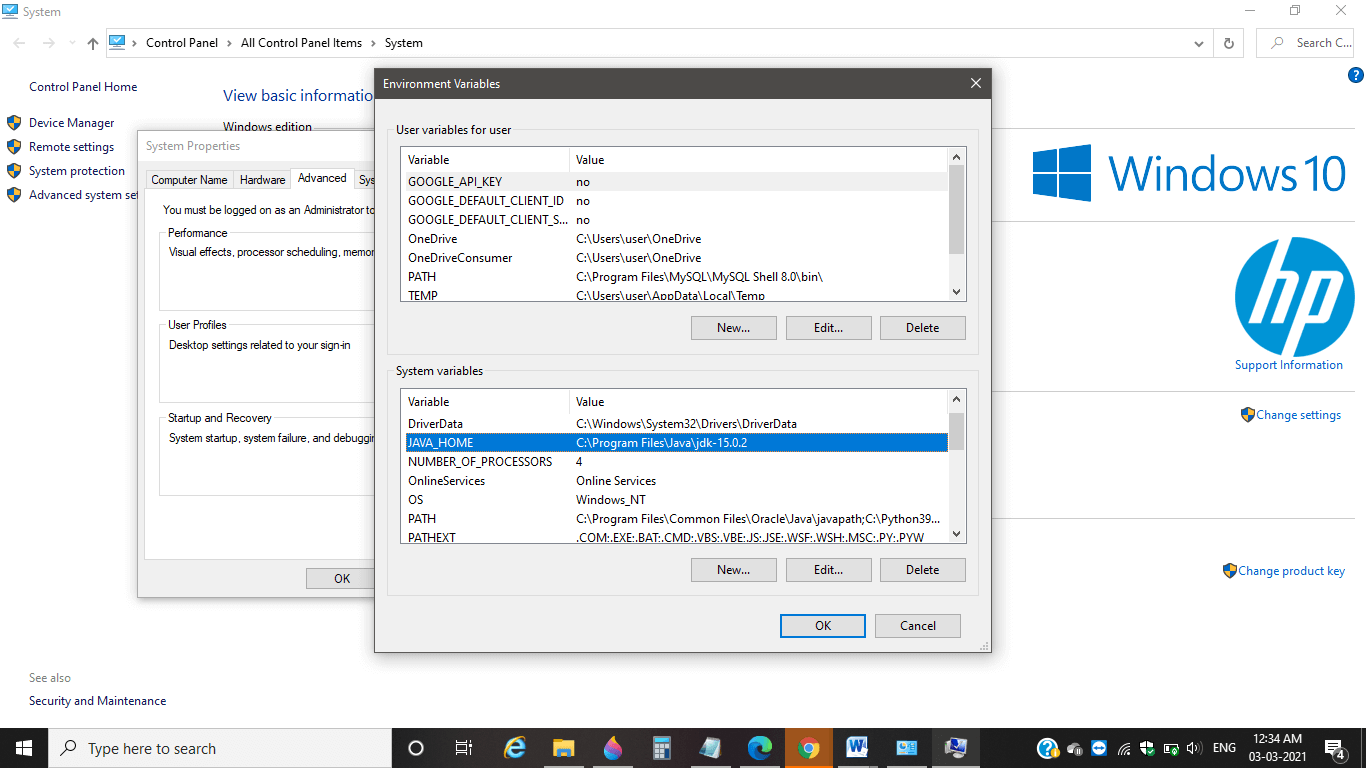
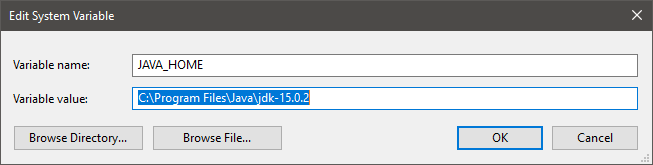
2) Remove and replace the corrupted eclipse.ini file. It is possible that somehow the eclipse.ini file gets corrupted. Thus you do not have any option rather than deleting the corrupted file and getting the new one to its place. To replace the files, one needs to take the default template and then make the changes in it as per the system requirement and availability of the Java version. 3) Set the JDK path correctly This can happen that Eclipse IDE is unable to access the JDK/JRE path because either you have changed the $PATH value or it has been deleted. So one needs to check out the Environment variable and look if $PATH exists or has been deleted or modified. It should be similar to the snippet that is shown below: 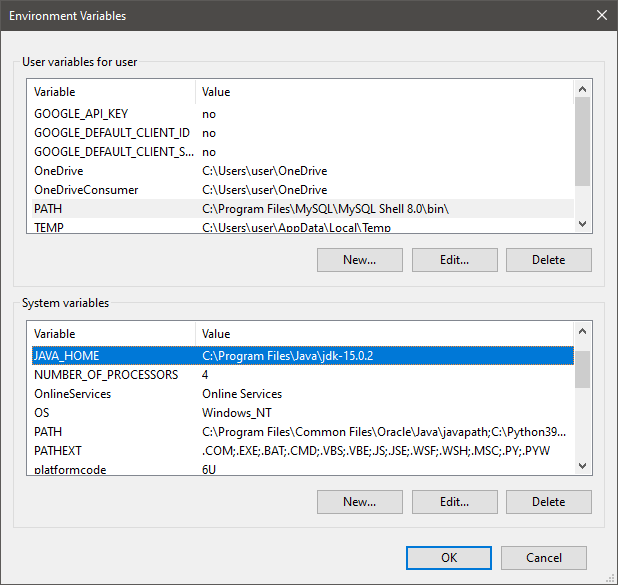
Note: We have used the JAVA_HOME variable, which is similar to the $PATH variable; thus, the value should be appropriate.The version will vary, but else should be the same, and if not so, do make the changes and Save. SummaryAfter discussing all the possible points, the conclusion comes out that all that matters is the Path of Java. If it is set correctly and both Eclipse and Java are compatible and are of the same version, then the "No java virtual machine was found" error will not be thrown.
Next TopicJava Program Number to Word
|
 For Videos Join Our Youtube Channel: Join Now
Feedback
- Send your Feedback to [email protected]
Help Others, Please Share


