Prototyping in Adobe XDAdobe XD supports dynamic and interactive prototypes for the designs to interact between different layouts. We can add animations transitions to simulate the flow of our application. It provides a real-time preview of the application. Using the prototype feature of Adobe XD, we can experience a virtual tour of the application. The interactive prototypes can be easily shared with the team and stakeholders by a web link. The team can experience a complete preview of the application and provide valuable feedback right from their browsers. The XD provides three modes of the work: design, prototype, and share. In design mode, we create the design for our application using XD tools and design features. Then we switch to prototype mode to specify the interactive links between artboards and components. We can also create prototypes using the component state. Once we are done with the design and prototype, we can share the design using the share feature. We can preview the designs and prototypes using the preview feature. The prototype is one of the finest features of the Adobe XD which makes it different from other tools. Most of the tools, such as Photoshop, do not support the prototype feature. Thus, we cannot have a real-time preview of our application. We can also add transitions and animations to our prototypes while redirecting to other screens. Adobe XD provides a real-time preview of the application over the web as well as the mobile application. It supports mobile applications to preview the application design and prototype. It allows us to test and validate the actions and navigation, usability, and other user experience aspects of our application. Thus we can avoid fundamental design flaws before making the actual development. It also reduces the actual cost of the development because making the changes in the code takes more time than design. In this section, we will discuss the following topics for the prototyping in Adobe XD:
Let's understand how to create prototypes: How to Create Prototype in Adobe XDThe XD provides three modes of the work: design, prototype, and share. In design mode, we create the design for our application using XD tools and design features. Then we switch to prototype mode to specify the interactive links between artboards and components. First, we need to create mockups for the different application screens; then, we need to switch to Prototype mode using the top left tab panel. 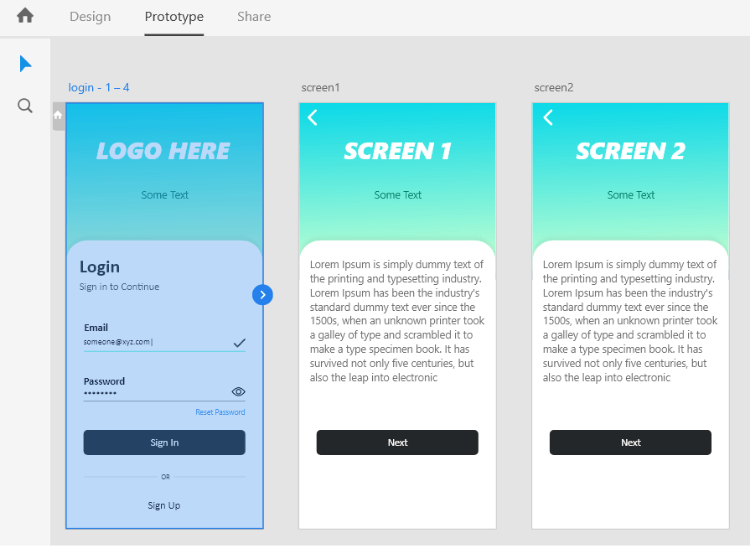 When we switch to Prototype mode, we can notice all the design tools and features is not available anymore; instead, the prototypes icons such as the home arrow are available now. We can now start prototyping our artboards and components. Set the Home Screen The home screen is the first screen of your application; it is also known as the welcome screen or index screen. It could be any splash screen, login screen, dashboard, or any other screen as per the project requirement. We can set any screen as a home screen by selecting an artboard and clicking on the home icon. The users interact with the application using the available navigation option on the home screen. These navigation links redirect the user to the respective page. We can define the links using the prototyping feature. To define the home screen, switch the workspace to prototype mode and select an artboard. Now, click on the home icon: 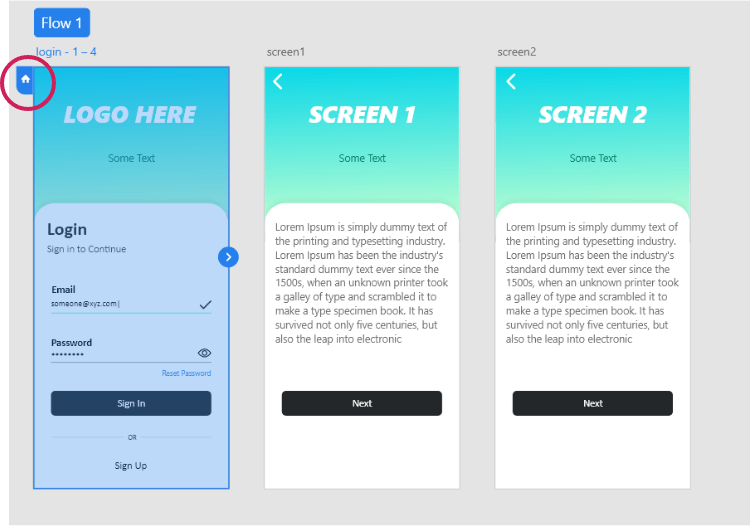 After selecting the home screen, the home icon turns into a blue icon from grey, which indicates that the home is selected successfully. It will set the selected home screen. When we preview our application, it will be the first screen when nothing is selected. However, we can also have a preview without specifying the home screen. By default, the first artboard is selected as the home screen. To set any artboard available in the workspace as the home screen, select the specific artboard and click on the Home icon associated with that artboard. We can have multiple flows for an application using the different links. Let's understand how to create multiple flows for an application: Setting up Multiple Flows in Your ApplicationMultiple flows allow us to define the multiple versions of the application design. For example, if we have created two different layouts of the application with a different flow. We can share that different version by defining another flow of the application. We can create and share multiple versions of a design from the same document or in the same file having the same set of artboards across many prototypes or design specs. Each flow has its set of prototypes and interactions so that we can modify the team feedback without losing any changes in the existing application. Each flow has its unique share link to display only the attached artboards with it. The home artboard will be the first screen for that specific flow. We can have the same artboards in different flows without duplicating them. To define multiple flows in the same application, switch to prototype mode and select another artboard that you want to set as the home screen for other flows. Now, click on the home icon associated with it. It will create another flow for the application. When we share this flow, it will create a unique share link for this flow. 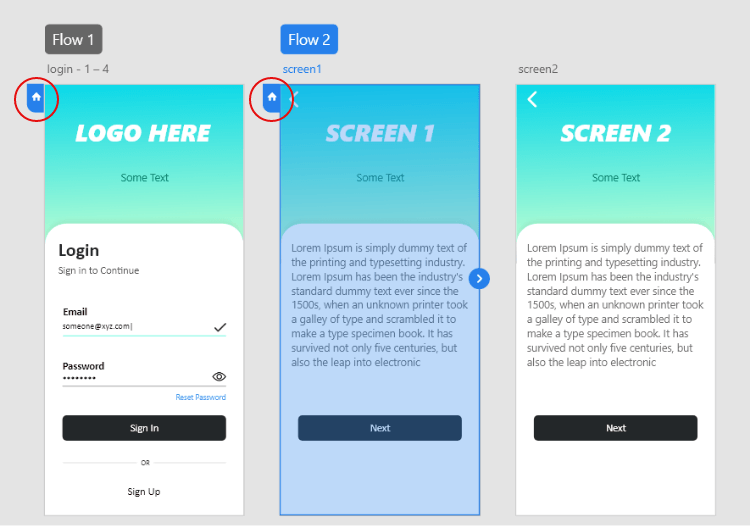 Multiple flows of an application are useful for designing a website for different platforms such as mobile, tablet, and PC. We can create different flows for each platform with a different share link within the same project. This will help the stakeholders understand the application flow for the different platforms and provide their feedback separately. The following are the quick steps to create multiple flows of an application:
How to Add Interactions for Objects and ArtboardsOnce we have created the screens and wired them, we can create a more interactive prototype by introducing triggers and actions on a particular component. A trigger hits the event, and action redirects the component where it is defined. A trigger can be any action such as a tap or hover. The following are a few important points to add an interaction for the objects and artboards. 1: To add an interaction to a specific component, select the component and click on the + icon displayed on it. Now, specify the triggers and actions from the property inspector area. Once we have defined the action type and trigger, set the destination to that trigger. For example, we want to redirect the login page to other screens by clicking on the login button. Then we will add a trigger to the login button and specify the destination as another artboard. Consider the below image: 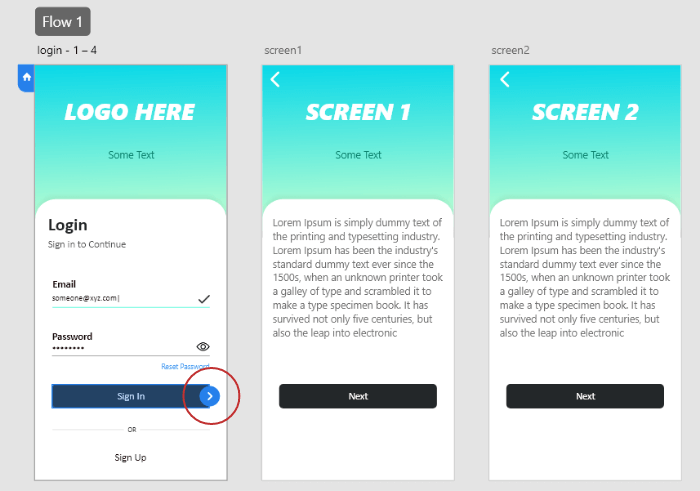 In the above image, we are specifying the trigger for the sign-in button. When we select the button in prototype mode, it will display an arrow icon next to it. Drag this arrow to the destination screen. When we connect it with other screens, it will open the interaction options in the property inspector area. Consider the below image: 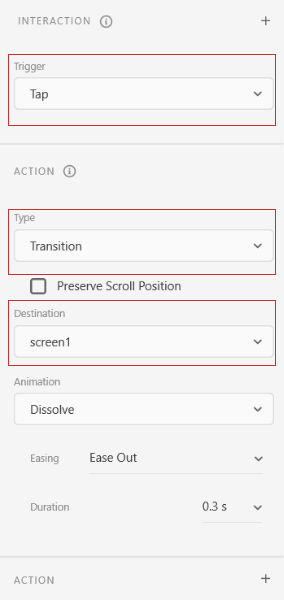 Here, we can specify different interaction properties such as trigger, type, destination, animation, etc. Trigger: The trigger property allows us to specify the trigger which initiates the action; it could be any interaction event such as tap, drag, etc. We have the following trigger options: 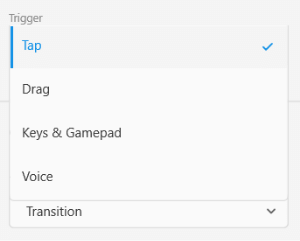 We can select any of the available options to hit the event. For voice prototyping, select the voice option. Type: The type option specifies the behavior of the action. For example, if we select the transition option, the upcoming artboard will display as a transition. If we select the overlay or hyperlink option, it will display the behavior accordingly. We have the following options in the Type dropdown menu. 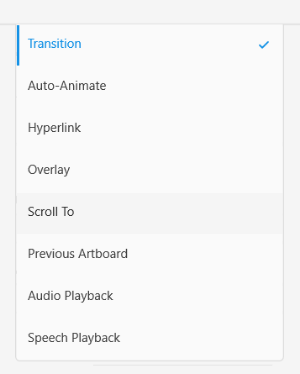 Destination: The destination menu contains available artboards and states in the list. We can specify the artboard or state where we want to redirect after hitting the event. Animation: The animation option contains the list of animations that can be applied during the transition of the states or artboard. Thus, we can redirect any page to any state or artboard for any specific event. 2: If we have selected the tap as a trigger option, we can combine our component with a non-transition option such as audio playback or speech. To add a second action with the first one, select the first action from the type menu and the second action by clicking on the + button in the action menu and specify the second action as audio playback or speech. It will combine both the actions, and they will be performed when the specified event is triggered. If we select the audio or speech action as the first option, we cannot add the second action. 3: We can also combine multiple triggers together for creating the next-level interactions without specifying the triggers across different objects within the same artboard. To combine multiple triggers together, click on the + button on the canvas and specify triggers, actions, and destination. Note: we can apply the hover, drag, tap, and time triggers only once, but the voice, gamepad, and keys triggers can be applied multiple times.Hence, we have created different types of interactions for the objects and artboards. Now, it's time to preview them to ensure they are working properly. Preview the PrototypeWe can preview the prototype by clicking on the desktop preview icon given at the top right corner of the Adobe XD window. Alternatively, we can press the Ctrl + Enter key combination to preview it. We can share these prototypes with the team and stakeholders by creating a shareable link. Check out how to share prototypes in Adobe XD. We can create and share multiple flows for the same project. How to Link Artboard with Previous Artboard?To link the artboard with the previous artboard, first, switch the workspace from design mode to prototype mode and select the component or artboard that you want to link with the previous artboard. Now, drag the + icon to the previous artboard and connect with it, or we can also select the action > Previous Artboard in the property inspector area. Now, preview the prototype by pressing the Ctrl + Enter keys to confirm. We can also unlink a prototype from an artboard by dragging it away from the destination artboard. How to Unlink an Artboard?To unlink an artboard from the prototype, switch the artboard from design mode to prototype mode and click anywhere on the prototype wire and drag it away from the destination artboard. We can also select the destination > None option in the property inspector area. It will remove the artboard or component from the prototype. Now, preview the prototype by pressing the Ctrl + Enter keys to confirm. How to Record Prototype Interactions?Prototypes features are very excellent. Apart from creating the prototypes Adobe XD allows to record them in video format. If any of the team members or stakeholders are having trouble using the Adobe XD link. You can send them a recording to take their feedback. The recording will be saved in .mp4 format. After recording the prototype, we can share it with the team members or stakeholders who can view and have a virtual tour of the application and provide their feedback. Isn't it cool? Let's understand how to record the prototypes interactions? Follow the below steps to record the prototype interaction in a video format. Step1: Preview the Artboards The first step is to open the preview window. To open the preview window, click on the desktop preview icon given to the top right corner of the Adobe XD.  It will open a new window with document preview and displays the artboard in focus. Step2: Test the prototype To test the prototypes navigations between artboards, click on the components that you have connected with other artboards. We can also make changes during the preview; it will instantly update them in the preview window. Step3: Record the Interactions To record the prototype interactions, click on the record icon given in the preview window. 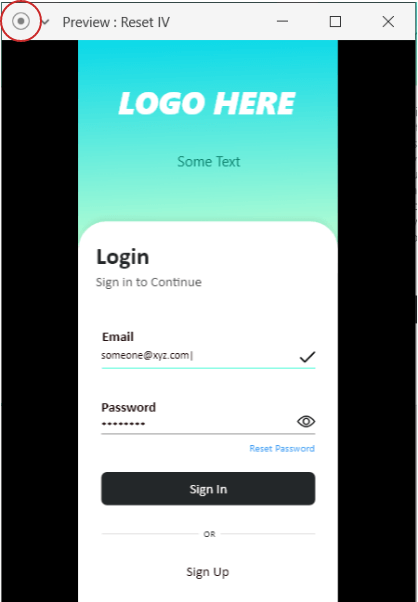 To end the recording, press the record icon again or press the Esc key. Now, select the directory and name of the recording. The recording will be saved as a .mp4 file. We can share this file with the team and stakeholders. Summary: We have discussed how to create interactive prototypes using triggers and actions. We can now easily create different elements and map them with other objects and elements to make the design realistic and share with the team. It will provide teams and stakeholders with a real-time preview of the application. Adobe XD supports dynamic and interactive prototypes for the designs to interact between different layouts. We can add animations transitions to simulate the flow of our application. It provides a real-time preview of the application. Using the prototype feature of Adobe XD, we can experience a virtual tour of the application. The interactive prototypes can be easily shared with the team and stakeholders by a web link. The team can experience a complete preview of the application and provide valuable feedback right from their browsers. For sharing the prototypes, visit how to share design and artboard in XD? |