SoapUI Test StructureThe SoapUI structure for functional testing is divided into three parts: Test Suite, TestCase and TestSteps. The following figure shows the flow diagram of the Test Structure used in the SoapUI testing tool. 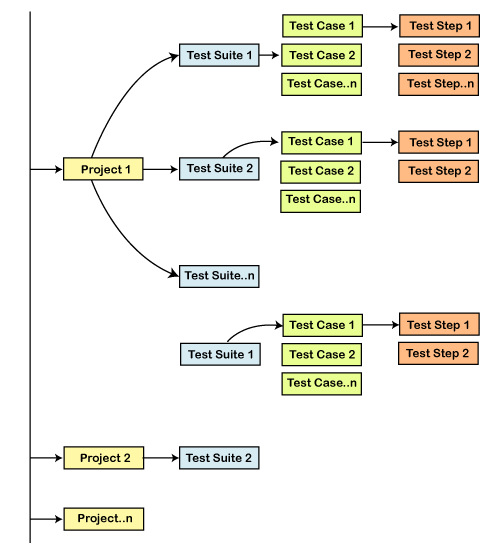 What is the TestSuite?The TestSuite is the collection of test cases used to group functional tests into logical units. We can create any number of tests inside the TestSuite of SoapUI project to support large scale test scenarios. Furthermore, the test suite is a root node that can be explicitly built to add test cases to it and add test steps inside the test cases. It means it creates a tree structure that is well defined to execute web services in one click. Using the test suite in SoapUI, we can do smoke, performance, regression tests, etc. Create a TestSuite in SoapUITo create TestSuite in the SoapUI tool, follow the steps given below: Step 1: We can create a TestSuite in two ways: 1. Add a TestSuite while creating a new project in the SoapUI tool, as shown below. 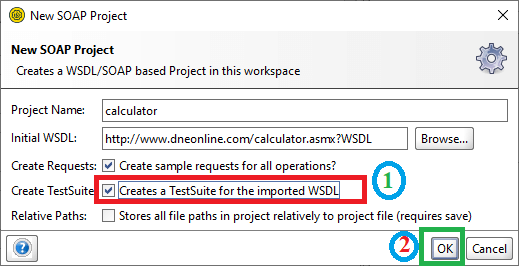 2. Select the <create> option from the TestSuite dropdown menu and then click on the OK button to generate the TestSuite. 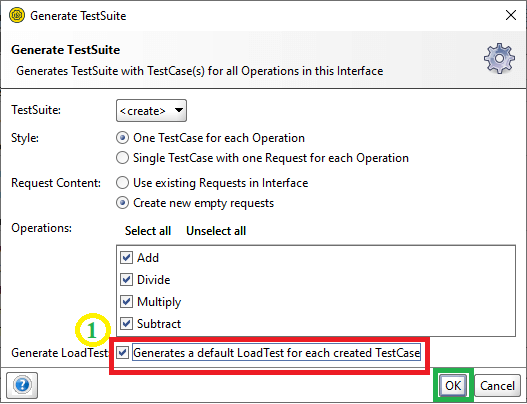 3. Now check the checkbox of Generate LoadTest and click on the OK button; it shows a popup box, as shown below. 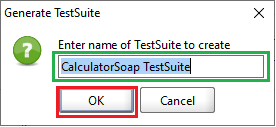 4. Click the OK button to generate the LoadTest for each TestCases created in the project calculator, as shown below. 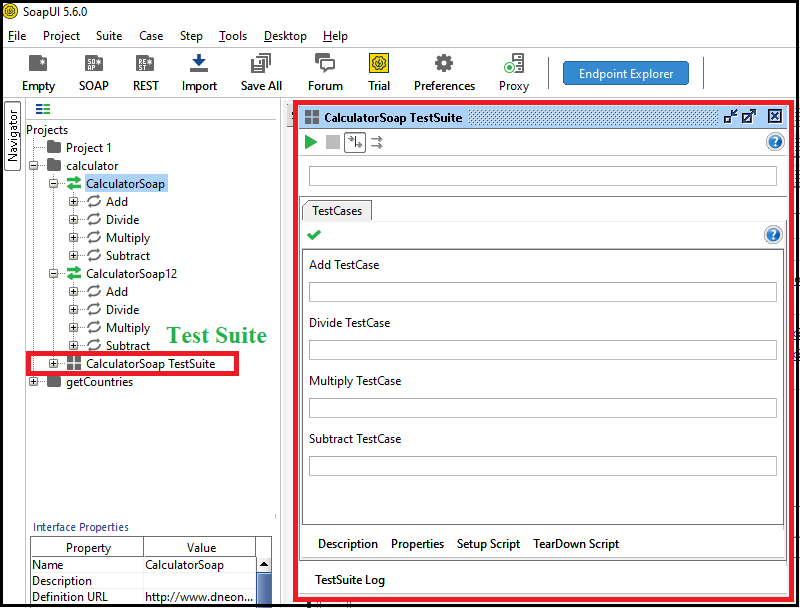 5. In the image above, we have created the CalculatorSoap TestSuite in the left pane. It shows the test case for each operation of the calculator Project. Step 2: We can also create the TestSuite for specific service in the project calculator, as follows: 1. Right-click on the Specific service of the calculator and select the Generate TestSuite option as shown image. 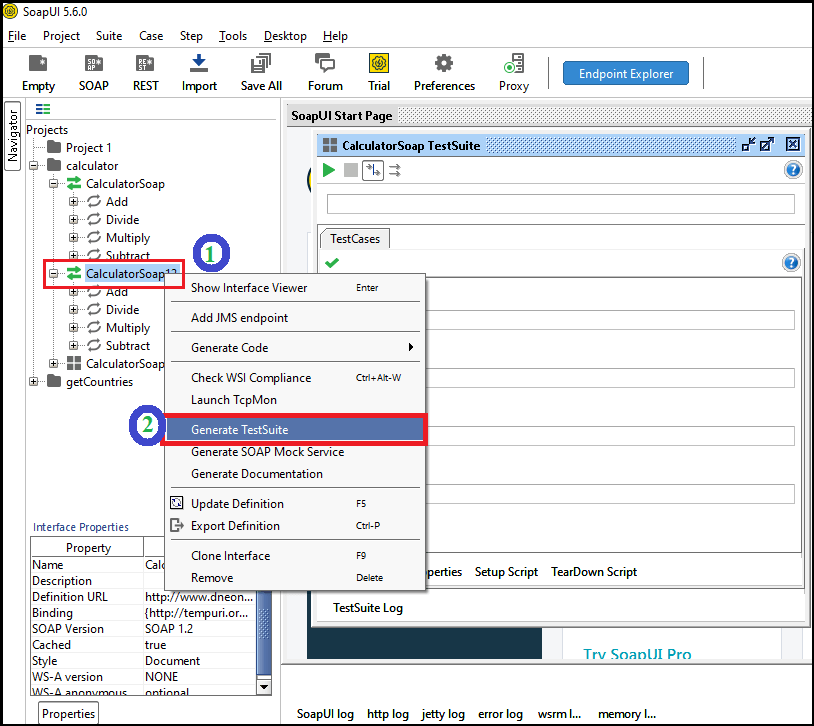 It shows a dialog box to Generate TestSuite, as shown above. 2. Now check the checkbox of Generate LoadTest and click on the OK 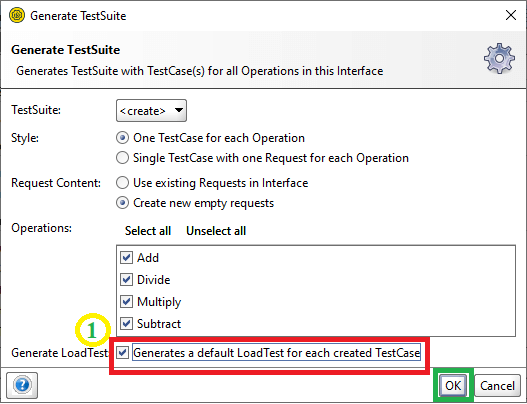 After performing the above step, it shows a popup box, as shown below. In the pop-up box click on the OK button. 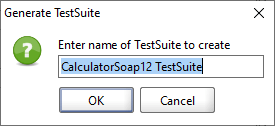 It generates the LoadTest for each TestCase created in the calculator project, as shown below. 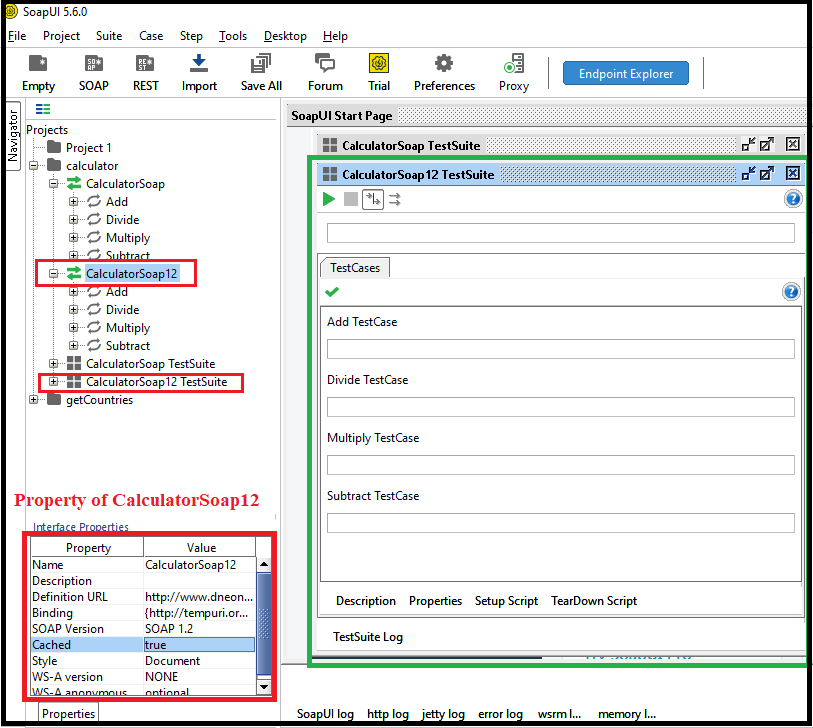 3. Click on the (+) CalculatorSoap12 TestSuite to get the Test Case inside the TestSuite, as follows. 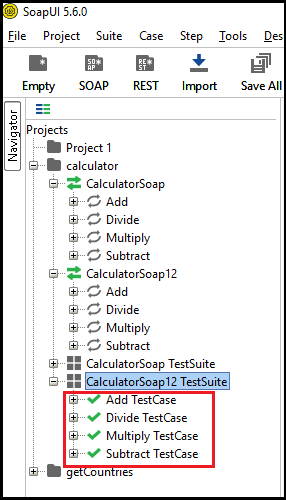 What is a TestCase?A TestCase is a collection of TestSteps that are grouped to perform some specific tests according to the requested service. Furthermore, we can also create many test cases inside the TestSuite, and even we can call each test case in the SoapUI tool to execute complex test scenarios. How to create TestCase in the SoapUI tool?To add a TestCase to the above created TestSuite, we have to follow the steps shown below. Step 1: Right-click on the TestSuite CalculatorSoap12 TestSuite in the navigation section and select the New TestCase, as shown below. 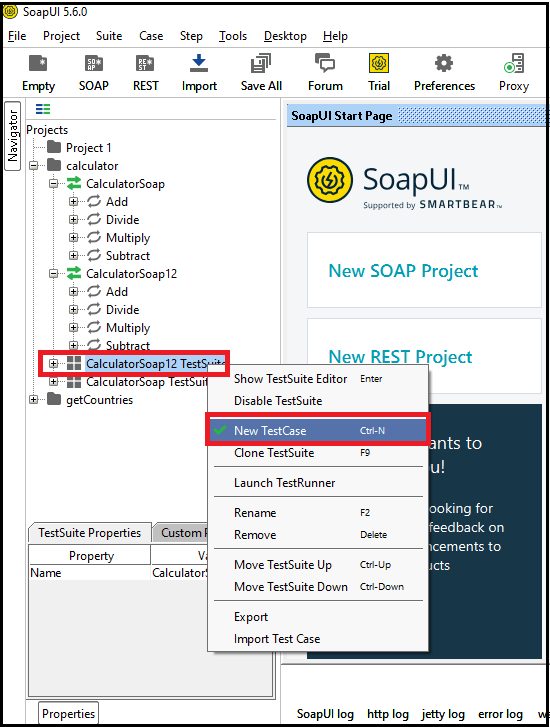 After clicking on the New TestCase, it opens a dialog box for specifying the name of TestCase. Provide the TestCase name and click on the OK button. 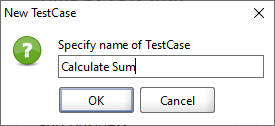 After click on the OK button, it shows all the TestCase for Calculator like Add TestCase, Divide TestCase, Multiple TestCase and Subtract TestCase inside the CalculatorSoap12 TestSuite. 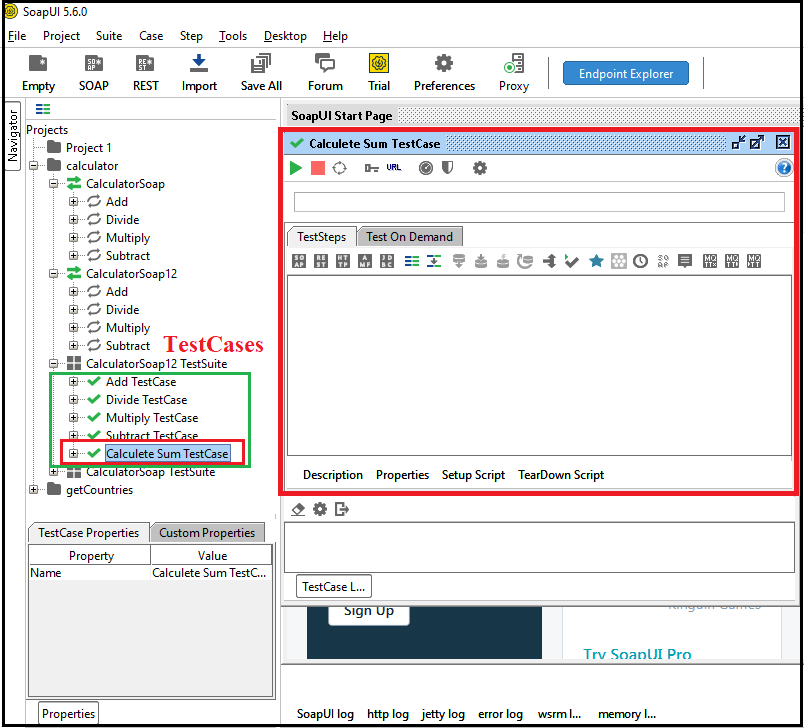 After that, we will learn how to create TestSteps inside the TestCase to execute web-based project in the SoapUI tool. What is TestSteps?TestSteps are the components of functional tests used in a SoapUI tool. All TestSteps are created inside the TestCase to control the flow of execution and validate the web service functionality that needs testing. How to create TestSteps in the SoapUI tool?To add a TestSteps to the above-created TestCase, we have to follow the steps shown below. Step 1: Click on the (+) icon of the "Calculate Sum TestCase", it shows the below image. 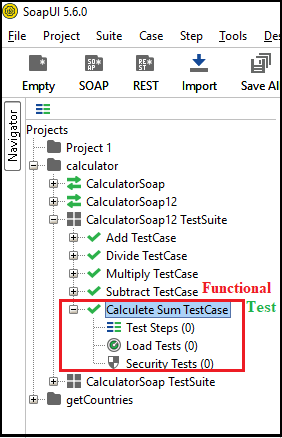 Step 2: Add Test Steps. Right-click on the Test Steps and choose an appropriate TestStep service from the list, as shown in the following image. 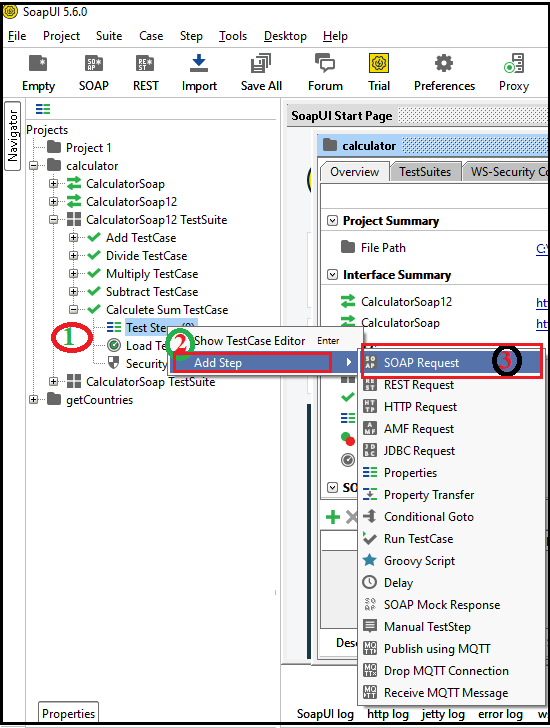 Step 3: We have selected the SOAP Request from the available list of TestStep: Test Steps -> Add Step -> SOAP Request, as shown in the above figure. Step 4: Click the SOAP Request to specify the step's name and then click the OK button. 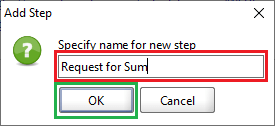 Step 5: After clicking on the OK button, it shows a popup dialog box that specifies the list of all functions exposed by the SOAP service, as shown below. 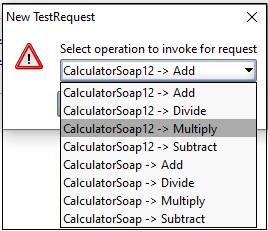 Step 6: Select an operation to invoke for request and then click the OK button as shown. In this, the version makes no difference like CalculatorSoap12 - uses SOAP version 1.2 and CalculatorSoap - uses SOAP version 1.1. So, we can select a suitable operation of our choice in the New TestRequest dialog box. 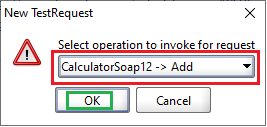 Step 7: After clicking the OK button, it shows a dialog box for creating a TestStep, as shown below. 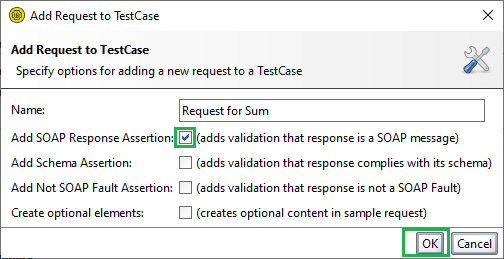 Step 8: Click the OK button, it represents the newly requested XML file for the Requested Sum, as shown below. 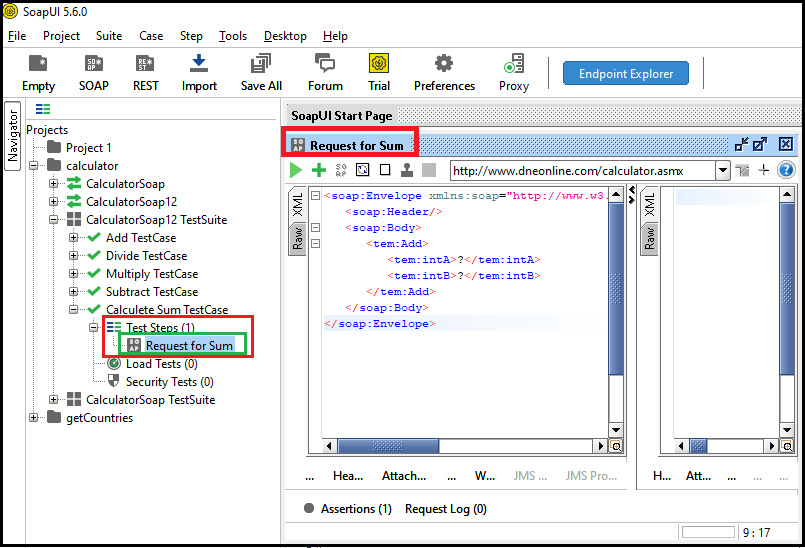 Request for Sum: XML File Send Request Manually & get Response1. Set the Int value for IntA and IntB is 5, and 5 in place of the question mark, which will be sent as an XML request. Step 9: Now click on the run icon 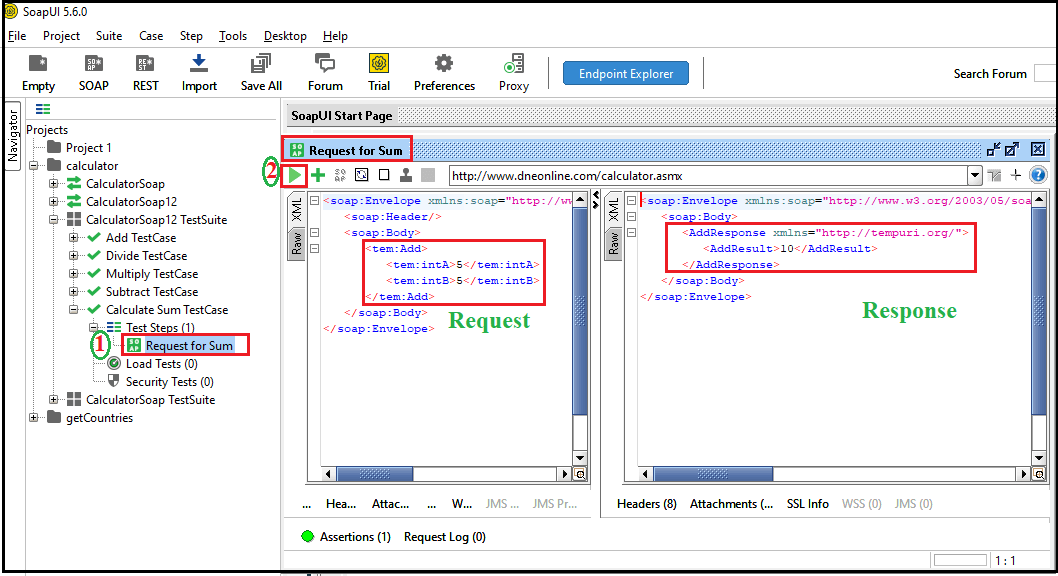 XML Output File After creating the TesSteps inside the Calculate Sum TestCase, now we learn how to Execute the TestCase in the SoapUI tool. Step 10: Double click on the "Calculate Sum TestCase," and then it displays a popup window to the right end, as shown below image. 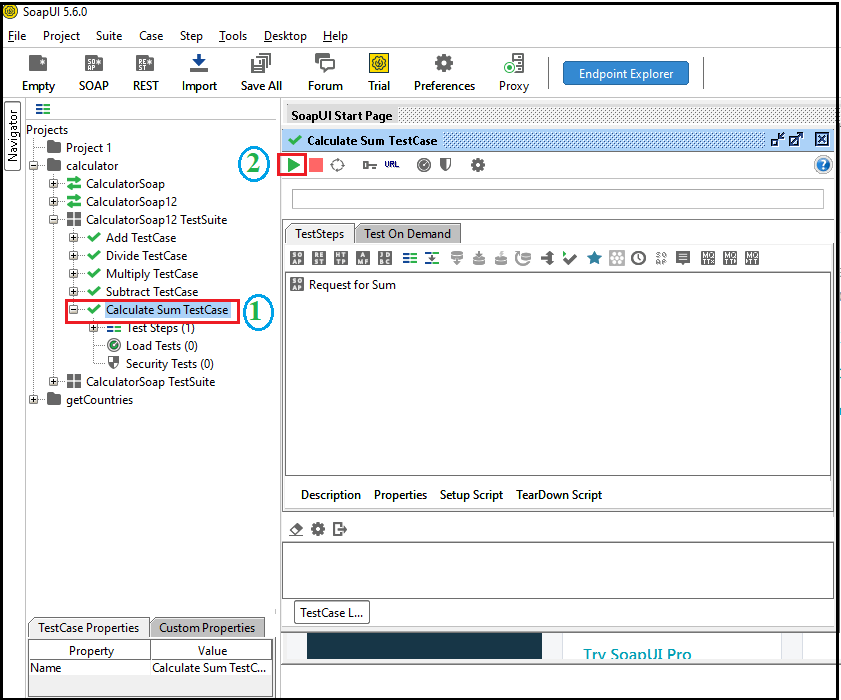 Step 11: After that, click on the 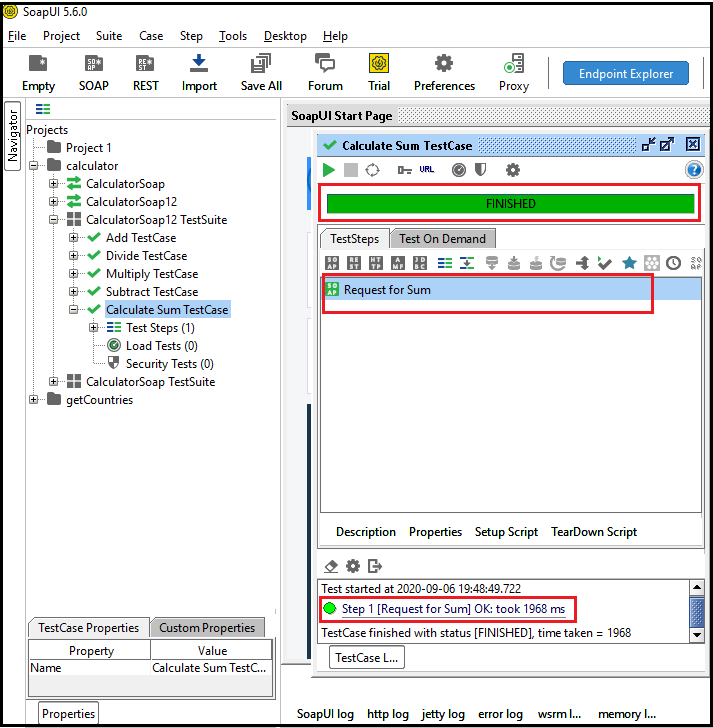 Similarly, we can create more than one test case and Test Steps by adding different values and request to execute the TestCase. Next TopicSoapUI Response and Logs Pane |