| |

Centralizing File Regex MetadataIn this section, we will learn how to centralize Regex File Metadata in Talend Studio for Data integration platform. Before going further in this chapter first, we will understand why we will use Regex Files. The Files which are made of regular expressions used by Regex File schemas. For example: Log Files If we want to connect to a regex File, we will centralize the connection and schema information in the Repository for reusability. To create the Regex File connection from the beginning:
Repository → Metadata → File Regex → Create file regex 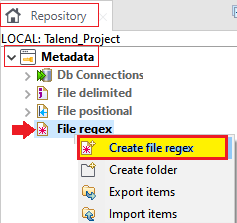
Note: To use the centralized File Regex in our job, go to the basic setting view of the necessary components with its property typeset as build-in for opening the File Metadata setup window.Then New RegEx File window will open where both the File connection and schema definitions are completed in four steps:
Step 1: Defining General Properties In the first step, we will fill all the necessary details like Name, which is a mandatory field, and the Purpose and Description fields if we want to more specific. We can also manage the version and status fields of a Repository item in the project setting dialog box. Click on the Select button next to the Path field for selecting a folder under the File Regex node to hold our newly created File connection. Note: we cannot select a folder if we are editing an existing connection, but we can drag and drop it to a new folder whenever we want.After filling all the details of general properties, click on the Next button. 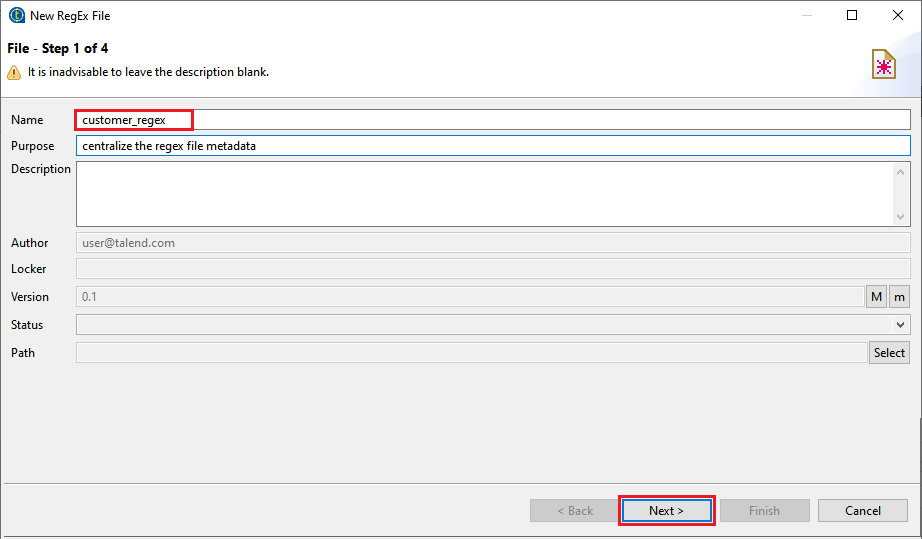
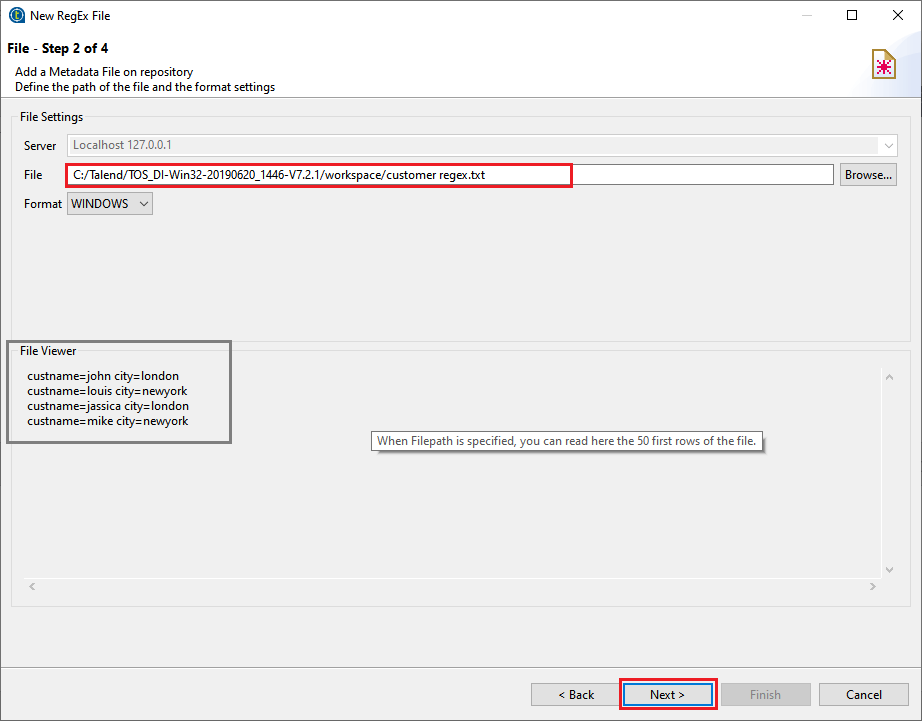
Step 2: Defining File path and Format In the next step, we will click on the Browse button to locate our File from the local system. For example, we will select the customer_regex.txt File from our system.
Step 3: Define File Parsing Parameters In this step, we describe the File parsing variable to recover the File schema properly.
Note: Regular Expression: It is used to search for specific patterns of text; we can create a regular expression for any pattern of text.As we can notice in the below screenshot: 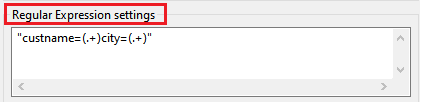
Note: The Regex code would be written in a single or double-quotes.The regular expression for our text File is: "custname=(.+)city=(.+)" Here, [.] It is a special character that is used to match any single character. [+] It is used to match the preceding element one or more times.
To see the effect and result view, on the viewer, click on the Refresh Preview button. 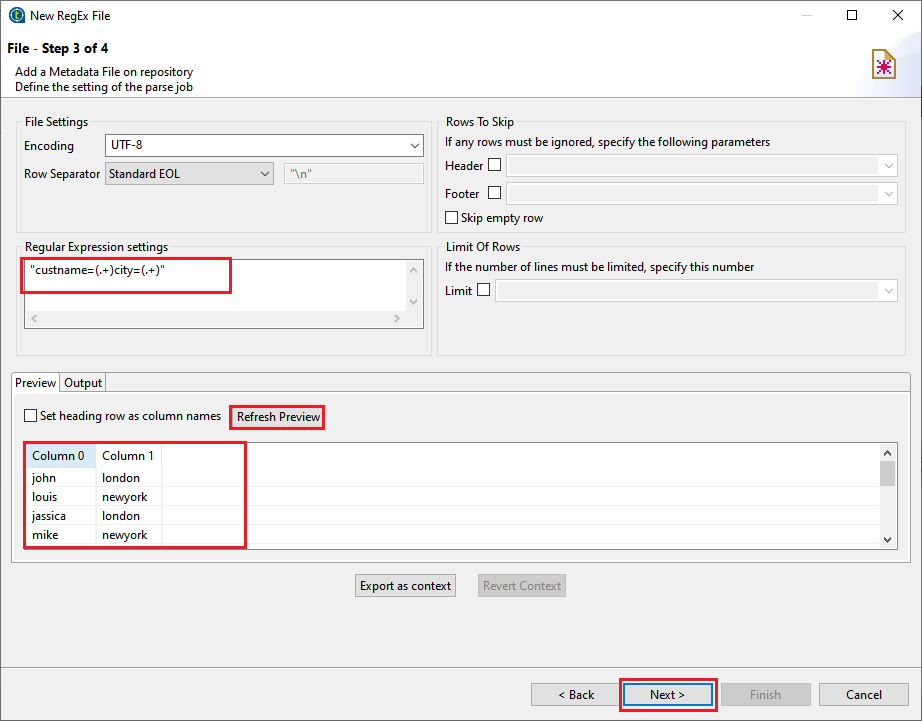
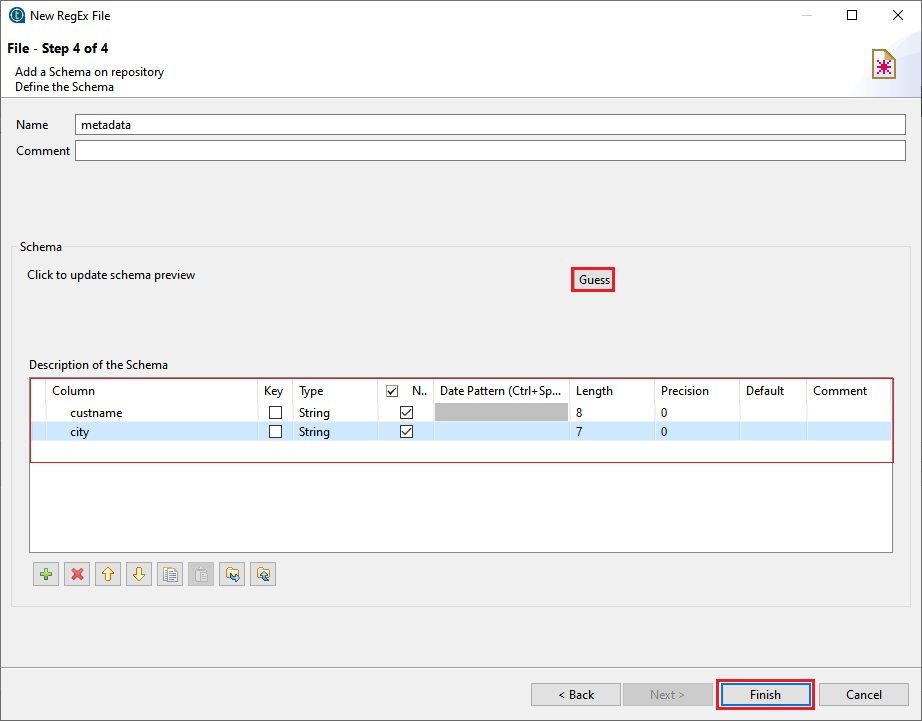
After that, click on the Next button. Step 4: Checking and Customizing the File schema In the last step, we will check and customize the File schema:
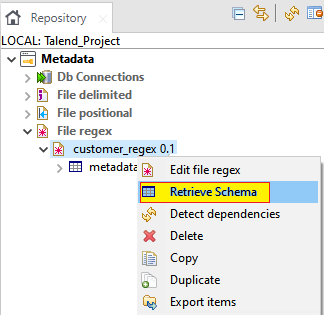
To see the newly created Metadata in the Talend studio:
Repository → Metadata → File Regex → customer_regex 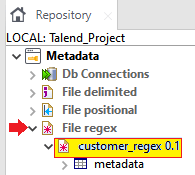
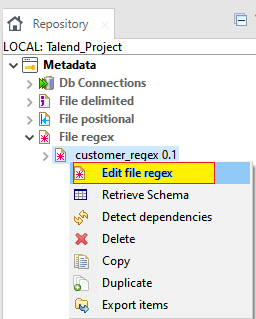
To reuse the Metadata as a new component or the existing component, simply drag the File connection or schema from the Repository's Metadata node and drop it to the design workspace window. For modifying the existing File connection:
For adding a new schema to an existing File connection:
Next TopicCentralized FTP Connection
|
 For Videos Join Our Youtube Channel: Join Now
Feedback
- Send your Feedback to [email protected]
Help Others, Please Share


