Working with MySQL Database
In this section, we will learn about how we will work with databases in the Talend.
Before we will start working with the MySQL database, we will know how to connect MySQL database with Talend Studio.
Create a Database connection
To create a MySQL database connection in the Talend studio, refer the below link: https://www.javatpoint.com/talend-mysql-connection
Working with database
Follow the below process to see how we will work with a database in the Talend Studio:
- Read a File
- Load the File into the Database
- Execute the job
Read a File
To read a File in a Talend studio, follow the below steps:
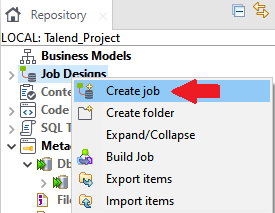
- First, we will create a job in the Repository panel.
- Then, right-click on the Job Designs field, and select Create job which is as shown below image:
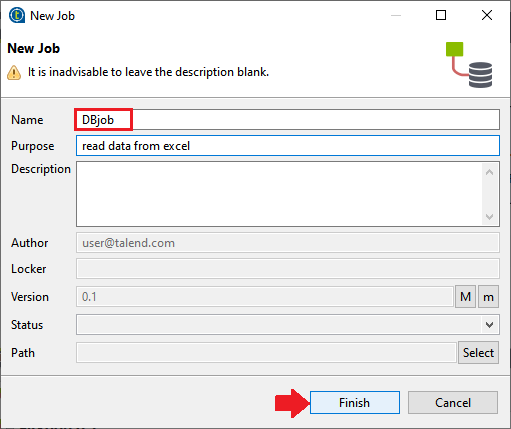
- The New job window will open where we will fill all the necessary details like Name, Purpose, and Description.
- And, click on the Finish button as we can observe in the below screenshot:
- In the next step, the Components window will appear where we can choose the particular component in the available list of the components.
- For this, we will select the tDBConnection(MySQL) component from the Components window, and click on the OK button as we can see in the below image:
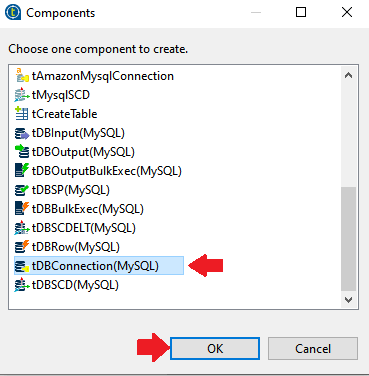
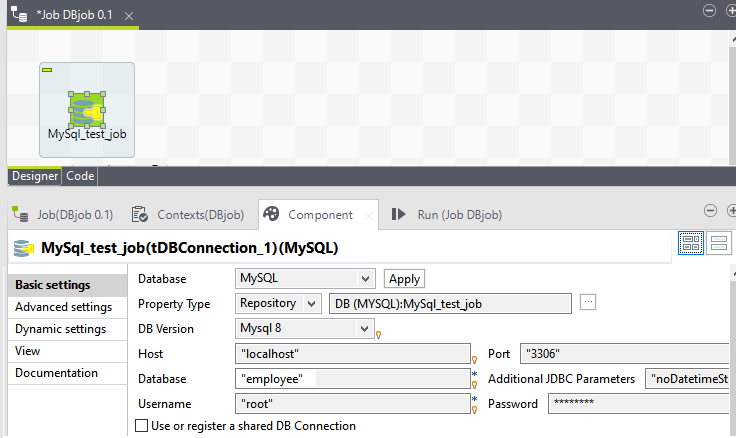
- This selected component has all the details while we are creating the Metadata of the MySQL database.
- After that, we will go to the Palette panel for adding components to a job where we have several numbers of components available in the palette panel.
- Or, we can also use the Search field where we can enter the name of the component, and select it as we can see in the below image:
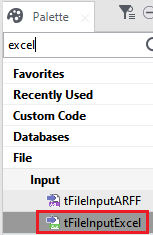
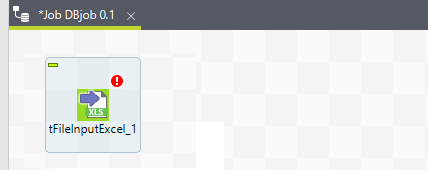
- We are taking this Excel file as an input, and we will drag the tFileInputExcel component from the palette panel, and drop it into the design workspace window, as we can see in the below image:
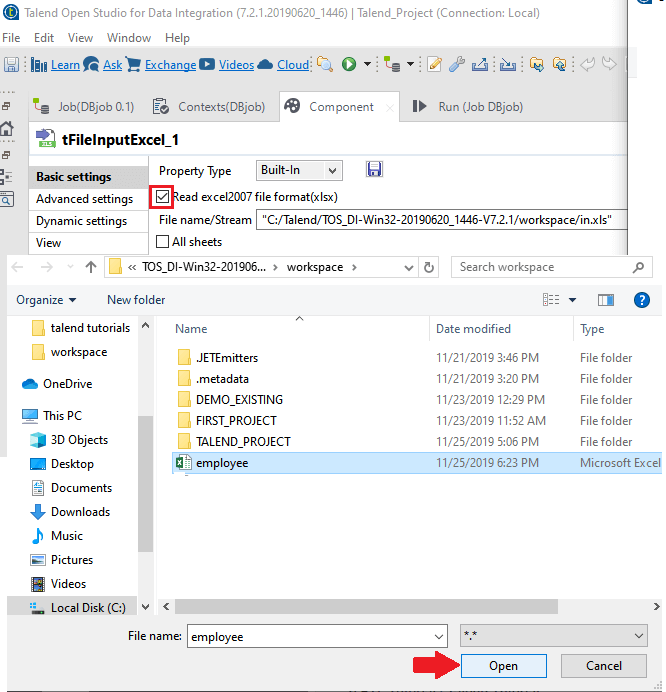
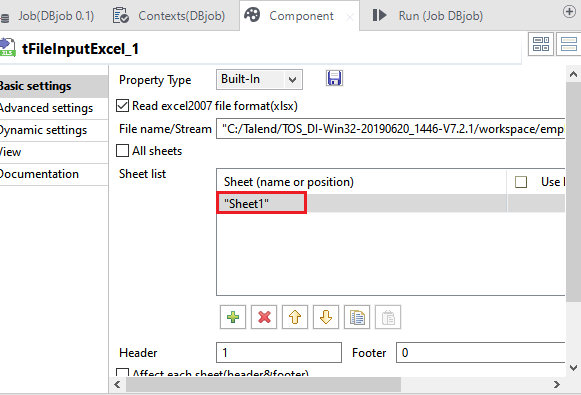
- After that, go the component window of tFileInputExcel_1, and select the checkbox of Read Excel2007 file format(.xlsx).
- And, in the File name /Stream field give the address of the excel file, which we want to load into the Database as we can see in the below image:
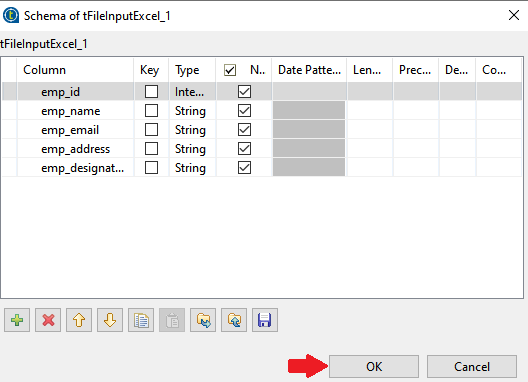
- After that, we will be defining the Excel file structure manually.
- For this, click on the Edit Schema button and create a structure of the input file.
- Then, click on the OK button as we can see in the below image:
To create a connection between the Excel file and MySQL, follow the below process:
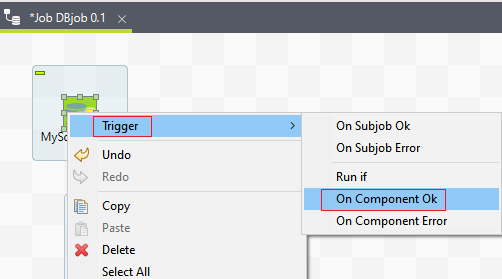
- We will right-click on the Mysql_test_job, and go to the Trigger option, then select On Component Ok from the pop-up menu as we can see in the below screenshot:
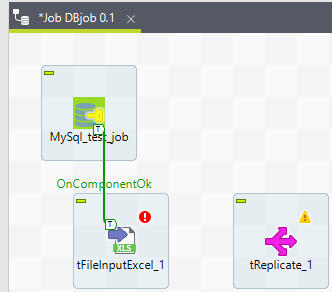
- The successful connection is created between MySql_test_job and tFileInputExcel_1, to read the file as we can see in the below image:
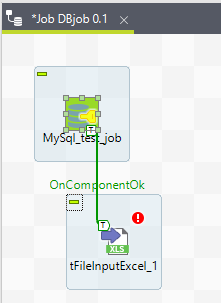
- This component should have an output link, which means that there is an input component that is capable of reading and giving up the data.
- We will add one more component in the given use case.
- We have the employee details where emp_designation has a different value like the employee could be HR, Manager, and Employee as we can see in the below image:
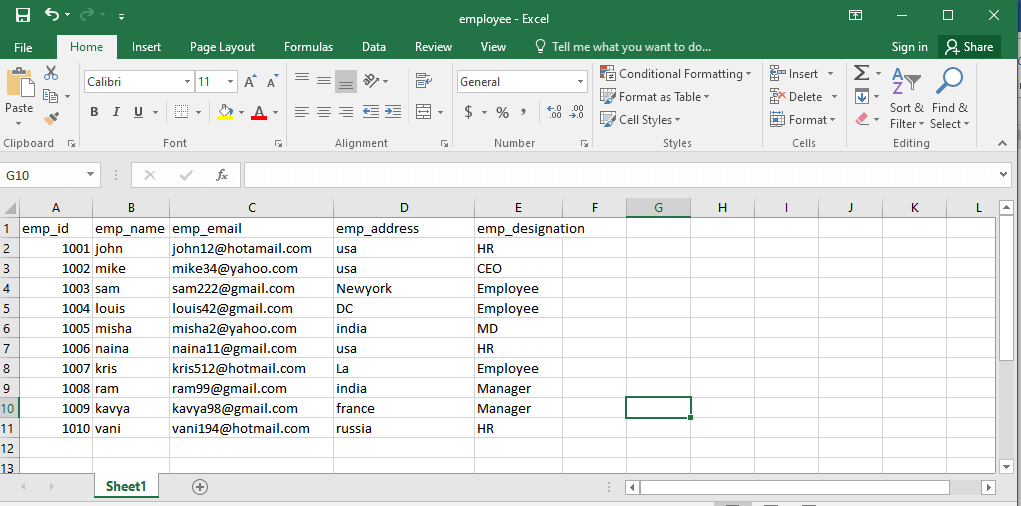
- And, we will filter out the employee according to their designation, and put them into a different table in the MySQL separately.
- For this, we will use the replication where the same data set to be work on the different use cases.
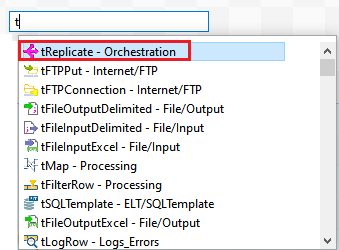
- For the same data set, we have a component called tReplicate.
Note: tReplicate: It replicates a row as many times as needed.
- To add the tReplicate component in the design workspace window, type the name of the component, and press Enter key as we can see in the below image:
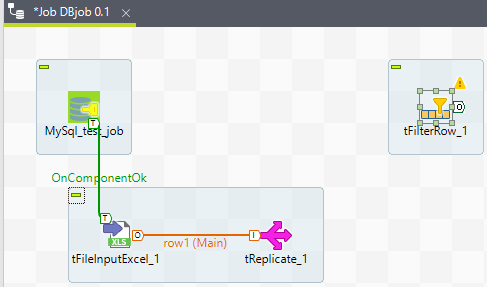
- And, our design workspace window will look like this after adding the Replicate component as we can observe in the below image:
- Once we successfully add the component, we will connect them to the other components.
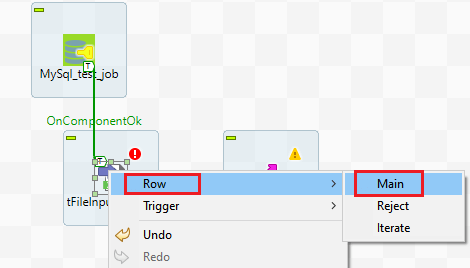
- Like as we can see in the below screenshot, that we will connect the tFileInputExcel_1 to
Row → Main
- We will take n number of inputs with the help pf tReplicate
- The tFileInputExcel input file should have at least one sheet name.
- So, we will give the sheet name as "Sheet1" as we can see in the below image:
After that, we will be filtering out the data here.
To filter the data, we will use the filter component called tFilterRow, which is available in the design workspace window.
Note: tFilterRow: It filters the input rows by setting one more condition on the selected columns and helps to parametrize filter on the source data.
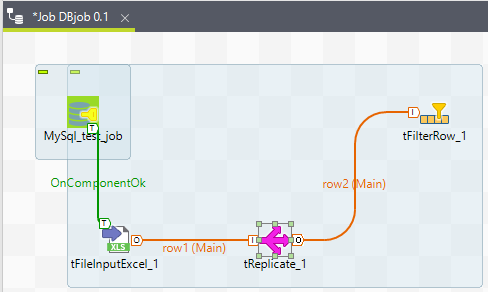
- After adding the tFilterRow, our design workspace will look like this in the below image:
- Then, we will connect tReplicate_1 to
- For this, we will right-click on the tReplicate and select Row → Main to the tFilterRow, as we can see in the below image:
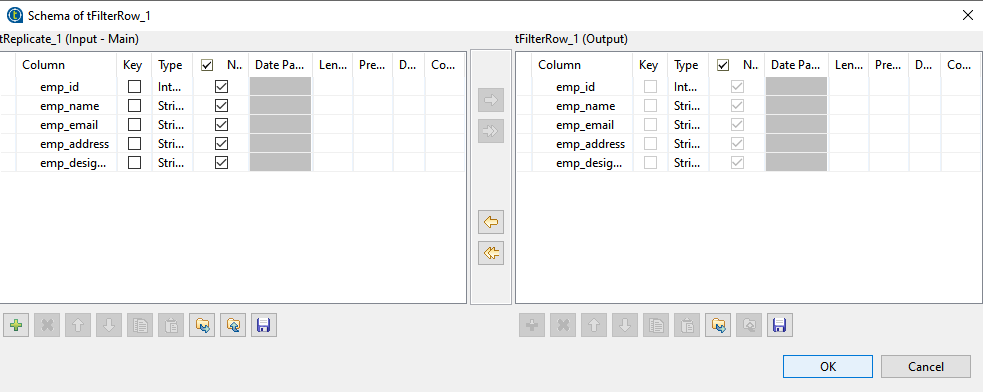
- Now, we will configure the tFilterRow_1, which is quite simple, as we know that schema will be automatically copied.
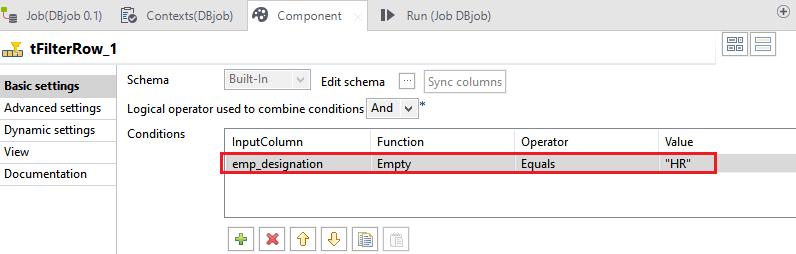
- After that, we will create the condition for filtration in the conditions field, which is available on the tFilterRow_1 component window.
- And, our first condition is to select the employee whose emp_designation is "HR" as we can see in the below screenshot:
Loading the file into the Database
In this section, we will try to load the data file to the MySQL database.
To load the data into the MySQL, follow the below process:
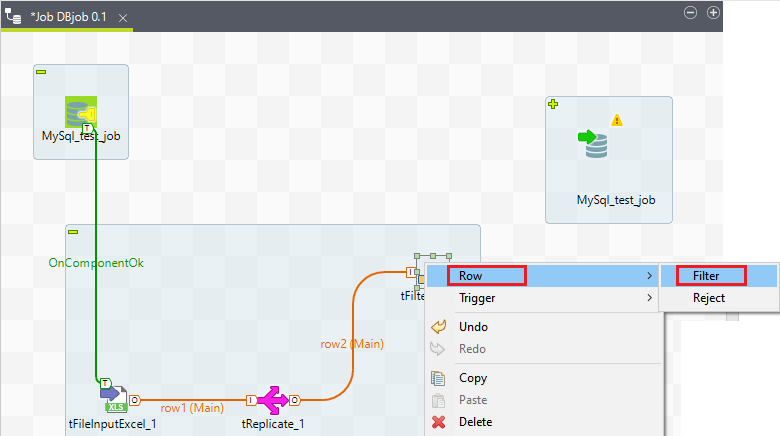
- First, we add MySQL output component in the design workspace window, as we can see in the below screenshot:

- Once the component is inserted into the design workspace window, we will take Row → Filter from tFilterRow_1 and give it to MySql_test_job.
- Then, we double-click on the MySql_test_job and give the table name as "emp_HR" for the output, which is coming into the MySQL Database.
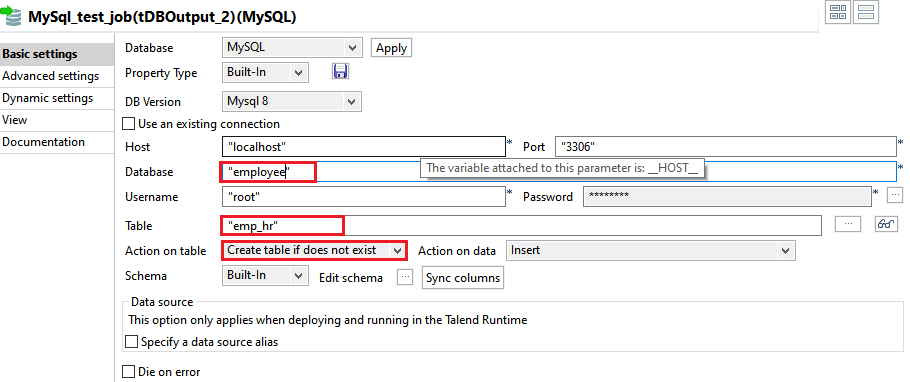
- For better understanding, we can also change the component name as well, like in this example, we change the MySql_test_job to
- After that, we will add two more filters following the same process as did it above.
- For our next conditions, we select the employee whose emp_desgnation is "Manager" and "Employee" just like we did it in our first condition.
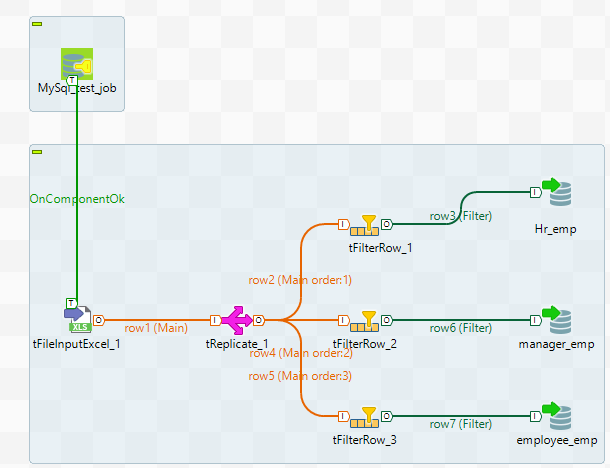
- Our final design workspace window will look like this after adding two more filter conditions.
- After completion of all the steps, we are ready to run the job, and check whether we get the expected output or not.
Execute the job
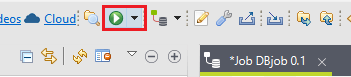
- To run the job, we will click on the Run button, as we can see in the below image:
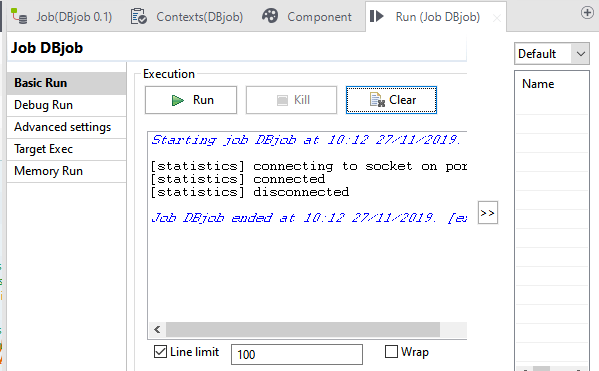
- When the job runs successfully, it will show the details of the job in Run (Job DBjob) window as we can see in the below image:
- And the design workspace window will show the result of our filtering condition, as we can see in the below screenshot:

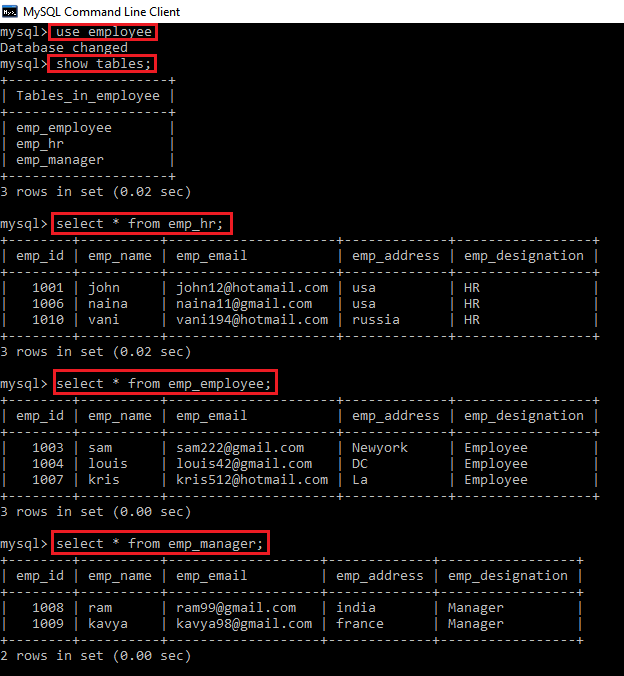
And, we can check the result of loading the input data in the MySQL database as the output, as we can see in the below screenshot that it created the three tables in the employee Database.
- emp_hr
- emp_manager
- emp_employee
|

 For Videos Join Our Youtube Channel: Join Now


