| |

How to Install MongoDB on MacOSMongoDB is an open source, cross platform document-oriented database management system. It is a NoSQL database which stores data and schemas as JSON objects. Mongodb is developed by Mongodb Inc and is published under GNU affero General Public License and Apache. This tutorial describes the steps involved in the installation of MongoDB on MacOS Prerequisites
InstallationFollowing steps are used to install MongoDB on MacOS. 1) Update homebrew installer package To get started with the installation of MongoDB on MacOS, we need to update the repository index of Homebrew package Installer. This will be done with the following command. 2) Install MongoDB After updating the repository index, we need to install MongoDB which will be done with the help of homebrew installer. It simply installs the MongoDB on location /usr/local/Cellar/mongodb 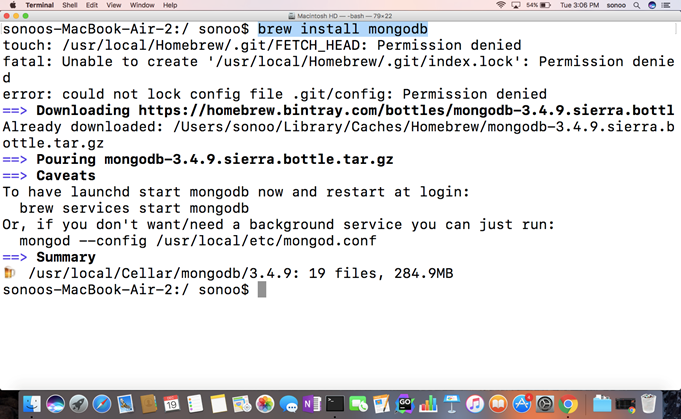
3) Start MongoDB To start MongoDB, we need to run the following command. 
4) Working on command line The MongoDB shell can be accessed by running the file named as mongo which is a executable script located inside the bin folder under installation directory. 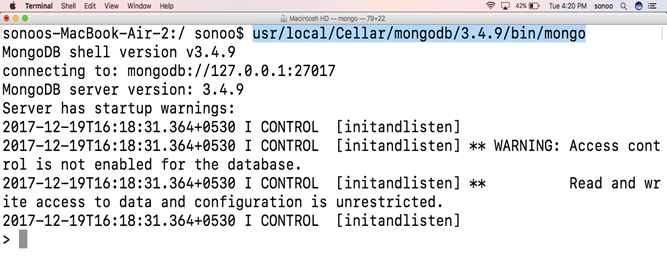
To create database, we use following command on the MongoDB shell. 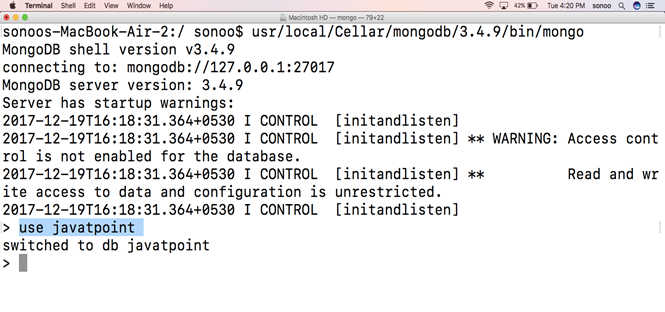
5) Stop database To stop database, we have to specify unload option with the launchctl command as follows: 
Well, we have installed MongoDB version 3.4.9 successfully on our MacOS.
Next TopicHow to Install CouchDB on Mac
|
 For Videos Join Our Youtube Channel: Join Now
Feedback
- Send your Feedback to [email protected]
Help Others, Please Share


