| |

Laravel File UploadIn this topic, we are going to see how to upload the files. Let's understand through an example.
composer create-project laravel/laravel=5.8 form -prefer-dist; 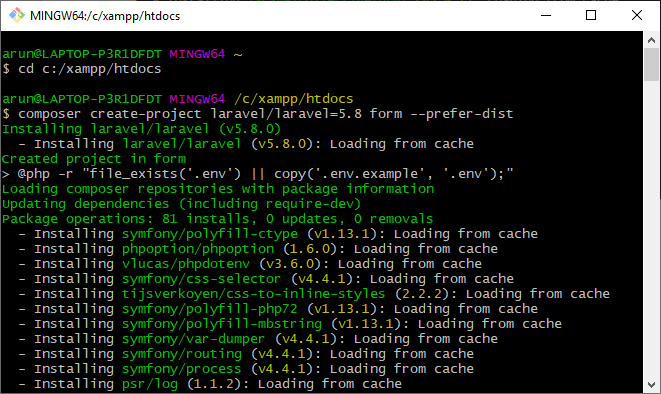
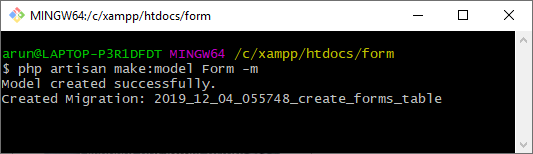
The above code creates a table named 'forms', which contains four columns (id, path, created_at, updated_at ).
form.blade.php Storing the file in a databaseIn this, we will define the store() function in which we add the code of saving the file in a database. FormController.php In the above code, we have defined the store() function in which we store the file in $name variable, and then we move the file to the images folder. The file which we moved to the images folder is saved in a database by using the statement $data->save().
Output 
When we click on the Choose File button, then we need to select the file which we want to upload. Suppose I have selected the file named as 'img.png' shown in the below screenshot: 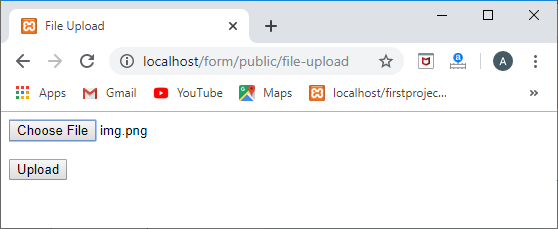
In the above screenshot, I have chosen the file (img.png), and then we click on the Upload button. After clicking on the Upload button, the file gets saved into the database shown in the below screenshot: 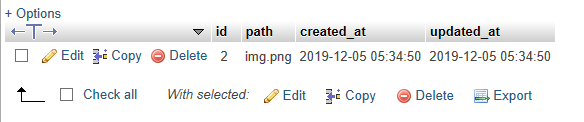
Retrieving the data from the databaseIn this section, we will see how to retrieve the data from the database.
FormController.php
index.blade.php In the above code, "./images/{{$form->path}}" defines the path of the image, i.e., the image is stored in the images folder.
Route::get('/show','FormController@index'); Output  
In the above case, we use the static way to display the image by passing the path to the src attribute. We can also display the image without passing the name(images) of the folder in <img> tag, and this can be achieved by defining the getPathAttribute() function in the Form model. Form.php index.blade.php Output 
Next TopicLaravel Sessions
|
 For Videos Join Our Youtube Channel: Join Now
Feedback
- Send your Feedback to [email protected]
Help Others, Please Share


