
Select Tag in HTMLIntroductionIn HTML, with the help of a select tag, we can create the dropdown list while creating the form where the user can choose one of the options from the given option. If the developer allows the user, then the user also selects multiple options from the given option. We can implement the select tag only inside the HTML form. We can preserve the space by choosing the dropdown menu while accepting the information from the users. We can take the selected elements inside the opening and closing of <select> tag. The <select> tag's implementation is in the example below. Example 1:Output: 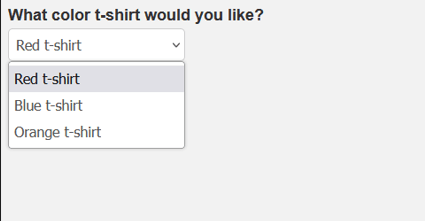
In the above code, we have created a simple HTML dropdown menu. By default, the first option is displayed on the webpage. When the user clicks on it, it will reveal all the options to the users. In the first part of the code, we created a <label> tag that contains the text that introduced the select element. Using the <label> tag is the best practice for the developer. The <label> tag is linked with the preceding dropdown menu that contains the <label> attribute. We can select the element with the help of the ID selector. In the next steps, we have created the select tag. The opening tag of the select tag contains two attributes. One is the name, and the other is the ID attribute. With the help of the name attribute, we can provide the name for the dropdown element. And with the help of the ID attribute, we can target the selected element. In the third step, we have provided the options list inside the select tag. Each option tag has a value attribute. It will collect the information during the saving process of the form and store it inside the server. HTML Select AttributesThe select tag accepts all the global attributes available in HTML. It also has so many attributes. These attributes are as follows. 1. Autocomplete: With the help of this attribute, we can enable the browser to auto-select the option from the user. 2. Autofocus: Activating the autofocus for the select tag will automatically focus on it when the page loads. 3. Disabled: With the help of this attribute, we can turn off the whole dropdown option in the form tag. If we disable the select tag, then the user can not interact with this tag. Example 2:Output: 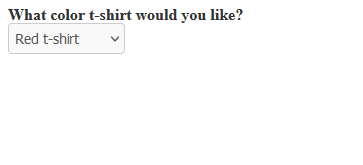
Note: When the user clicks on the dropdown option, there is nothing to be happened.We can also put the disabled attribute on a particular option. Let's see this in the below example. Example 3:Output: 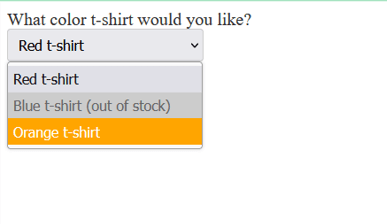
Form:We can associate the form tag with the help of <select> tag by the help of <form> tag. We can also use the <select> tag outside the form tag. We can also use the ID as the value of the form that belongs to the <form> tag. Multiple:By default, the HTML provides the feature to select only one option from the dropdown list. But with some modifications, the user can also select multiple options simultaneously. It will display a scrollable scroll bar rather than the dropdown option. If the user wants to select more than one option at a time, then the user should press the ctrl or shift key on Windows or the command or shift key on macOS. Let's see this in the below example. Example 4Output: 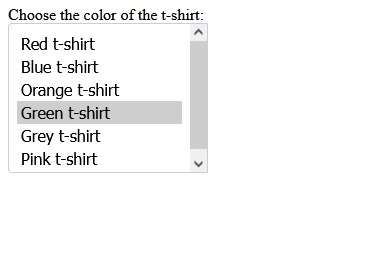
For a better alternative, we should have taken the help of a check box for this.
Example 5:Output: 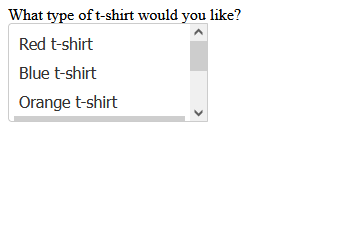
Other HTML Select TricksWe can also customize the dropdown menu in many ways. Let's discuss some of the ways. 1. Change the HTML and select the Default Option.The <input> tag automatically selects the first <option> tag as nested in HTML. We want to set another option as the default first option. We can achieve this with the help of the below example. In the below example, we make the second option the default option. Example: Output: 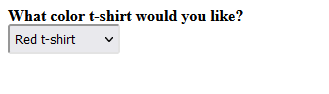
2. Add Placeholder Text to HTMLWith the help of placeholders, we can prevent the list from displaying as the default option. Instead of displaying the default option, we can display it as "choose one". To do this, we have to do something. The first thing we have to do is write your placeholder text as an <option> element, and the second thing is to add both the disabled and selected attributes to this element. Example: Output: 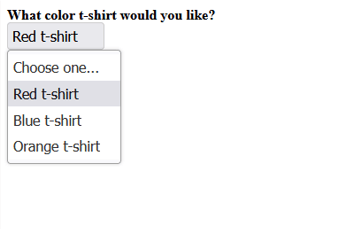
3. Group HTML select Items.We can also separate all the response items into different groups in HTML. If we do this, it helps us to be handy for particularly large dropdowns. We can achieve this by taking the help of <optgroup>. Inside this tag, we have to take <select> tag in each group. Then, we have to add the <label> attribute in each <optgroup> tag. Then, we have to write the <option> tag inside the <optgroup> tag. Let's understand this with the help of an example. Example: Output: 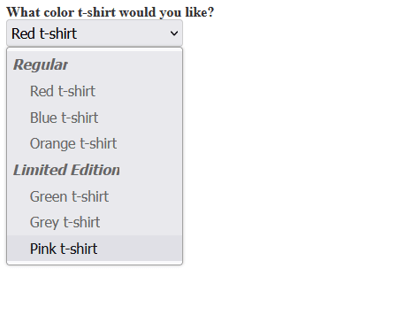
How to Use HTML Select in a FormAs per the convention in HTML, we can use the <select> tag inside the form tag. If we do this, then the user can enter the information and also the user can submit the form. We can nest the <select> tag inside the form tag. Let's discuss this with an example. Example:Output: 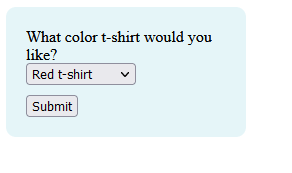
Example:We can also write the <select> tag outside the form tag. We can associate the <select> tag into a form like the below code. Output: 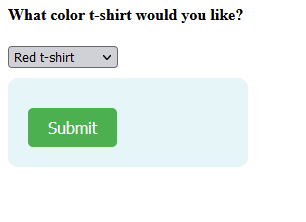
HTML Select: An Easy Solution for DropdownsWhen there is a need for the creation of an HTML dropdown option, then it is very simple to go for an HTML <select> tag. It can handle the necessary functionality for the developer. It also saves space for the developer.
Next TopicHTML small Tag
|
 For Videos Join Our Youtube Channel: Join Now
Feedback
- Send your Feedback to [email protected]
Help Others, Please Share


