| |

Boot Repair UbuntuBoot repair Ubuntu is a general tool for repairing the issues of frequent boot we may trigger in Ubuntu like if we cannot boot Ubuntu operating system after installing Windows operating system or other distributions of Linux, or if we cannot boot Windows operating system after installing Ubuntu operating system, or if GRUB isn't shown anymore, a few upgrades can break GRUB, etc. In Ubuntu, boot repair enables us to fix these types of issues using a normal click which can restore access to the OSes that we had installed before this issue. Also, boot repair has various advanced options for backing up boot sectors, table partitions, creating a Boot-Info (for getting help by forum or email), or changing the default parameters of repair: add kernel options, configure GRUB, restore an MBR (Windows-compatible), modify the default operating system, purge GRUB, describe the disk in which GRUB must be installed, repair the broken file system, etc. Boot repair will establish a Pastebin link of Ubuntu for us to distribute that permits experienced members to check what is wrong with our boot for the goal of helping the IRC and forum members help us recognize issues with our boot setup. The Pastebin of Ubuntu is not searchable or indexable easily, and the goal of the tool that establishes the Boot-Info page is meant to be a helpful solution to the issue. Neither the intention is to violate our privacy nor it is meant to make us a target. But this tool is entirely focused on those new users of Ubuntu who wish to get past the issues of their booting and easily using Linux. If we would like to, we may opt out of every internet usage completely including the generation of Pastebin link by checking the section of Advanced Options. Note: Boot repair is licensed upon GNU-GPL and it is free software.Advantages of boot-repairSome of the main advantages of using boot-repair are mentioned below: 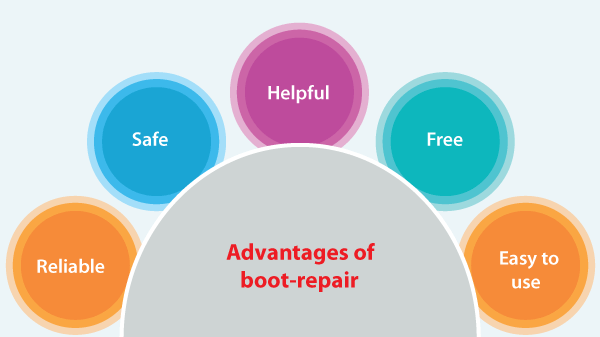
What is GRUB?GNU GRUB is a package of bootloaders from the project of GNU. It is a reference implementation of the Multiboot Specification of the Free Software Foundation which facilitates a user the selection for booting one of more than one OS installed on a system or choose a particular configuration of kernel available on a specific partition of the operating system. GNU GRUB was designed with a package known as the Grand Unified Bootloader (based on Grand Unified Theory). Predominantly, it is used for many Unix-like systems. The GNU OS applies GNU GRUB as a bootloader, as implement most Solaris OS on x86 systems and LINUX distributions, beginning with the release of Solaris 10 1/06. There is also a term called GRUB 2. GRUB 2 can be defined as the default manager and bootloader since the 9.10 version of Ubuntu (Karmic Koala). GRUB 2 either automatically sends the control to the Kernel of the operating system or represents a menu and then awaits the input of the user. GRUB 2 can also be described as a descendant of GRUB (short for GRand Unified Bootloader). Also, it has been fully rewritten to facilitate the user significantly high performance and flexibility. GRUB 2 is freely available software in the market. Introduction to Boot-InfoA Boot-Info can be described as the diagnosis report that supports finding anomalies in our computer or boot parameters. It's not a backup, it is a type of "instant picture of our system". Often, we will be asked for indicating our Boot-Info to support people who know the problem in the Ubuntu forums. Two methods are suggested to easily make this report:
Some of the important key points of Boot-Info are mentioned below:
Boot repair can: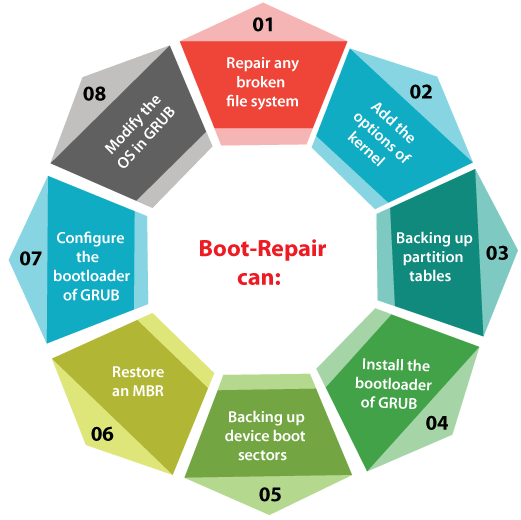
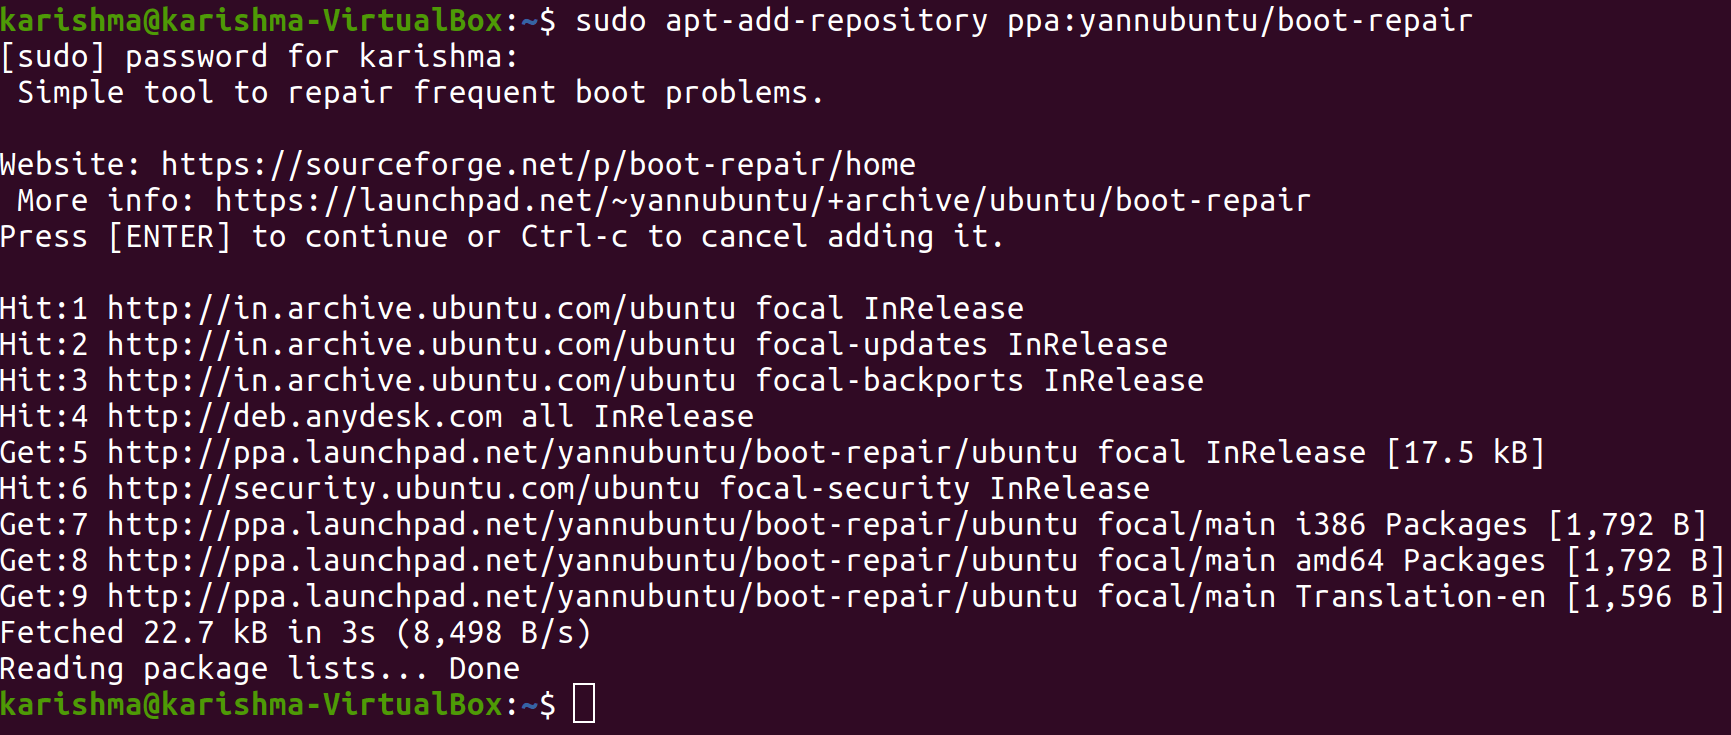
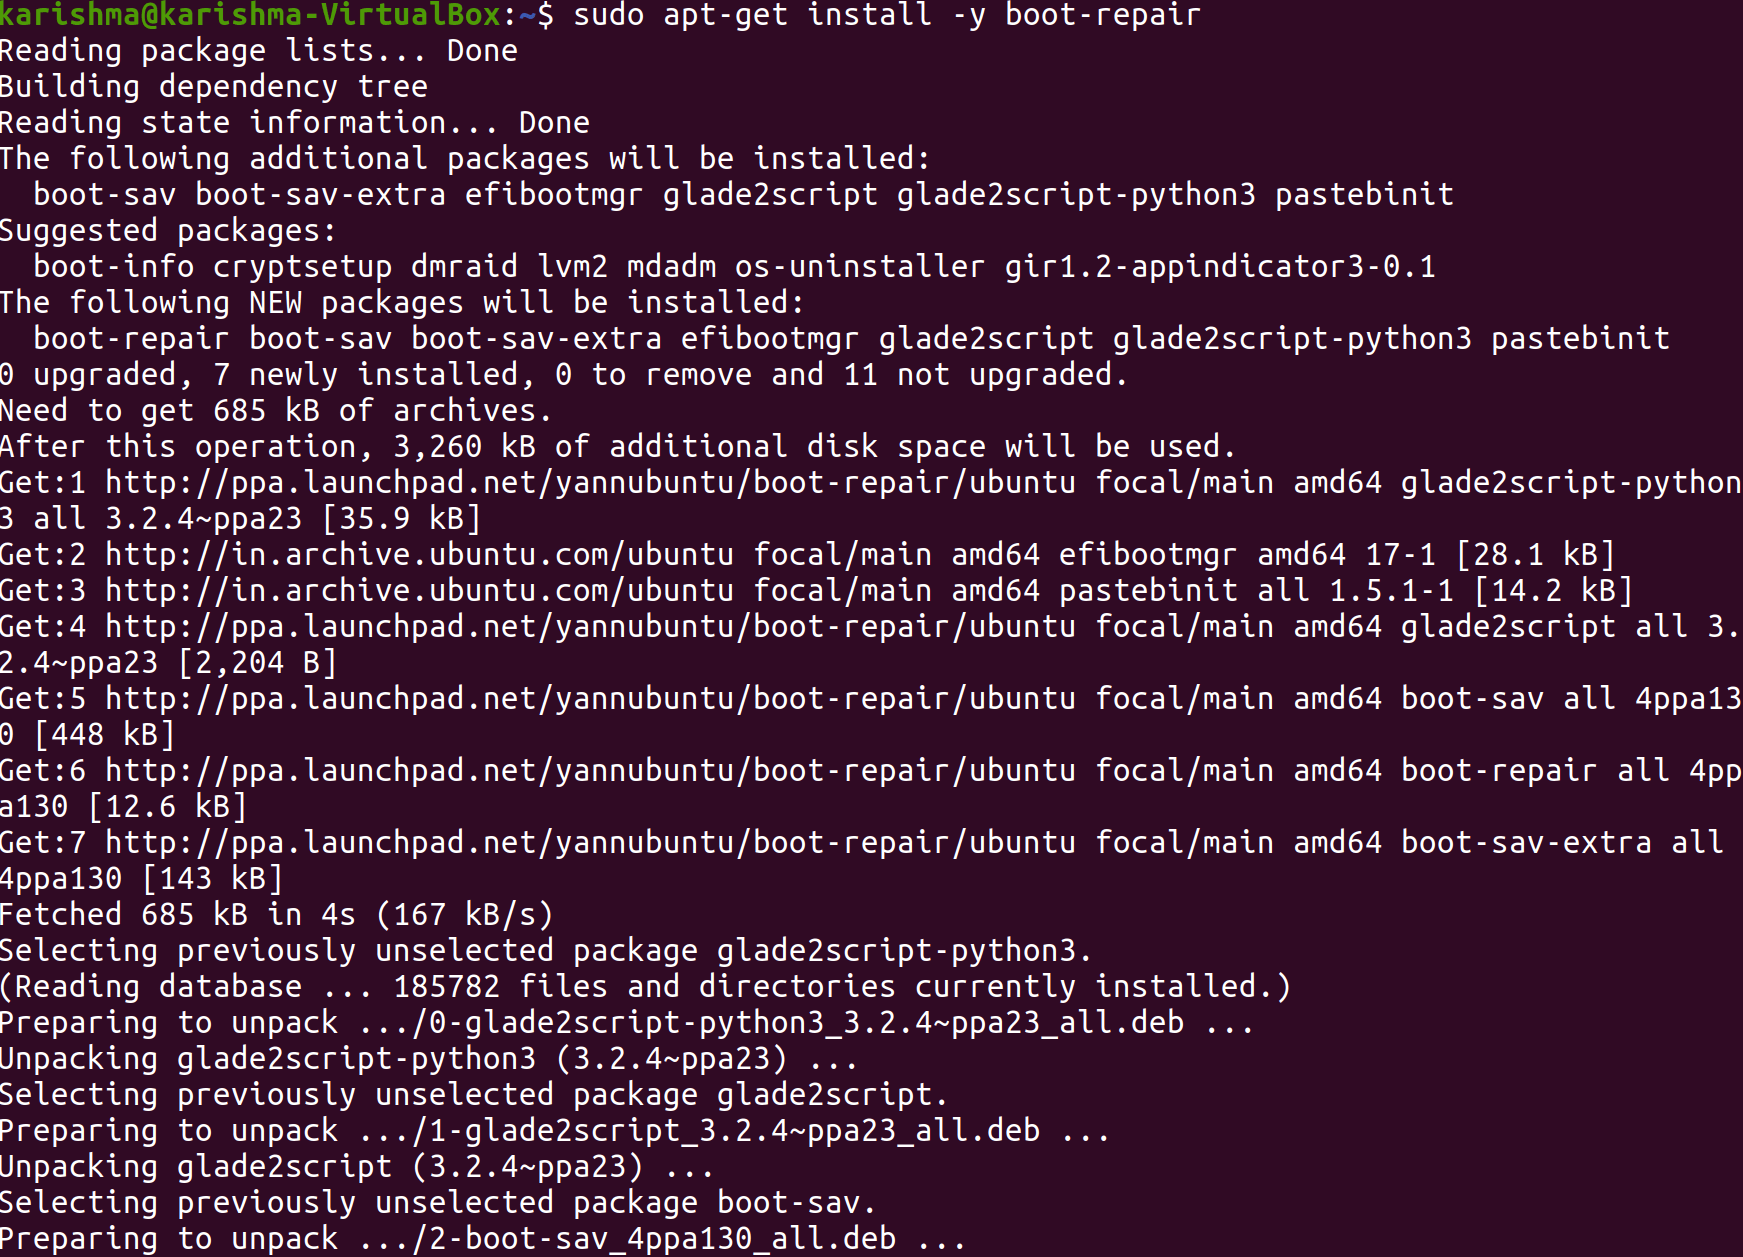
Now, we need to press y and after that click the Enter button to proceed. Backup partition table using boot-repairWe can back up our partition table with the help of boot repair. It's important because if our partition table somehow gets corrupted, we will be able for recovering the partitions and also get our data back. We might lose all our data otherwise. We need to just press on the button, i.e., Backup partition tables, boot sectors and logs for backing up our partition tables. We need to choose a location in which we wish to save the data of our partition and press on the Save option. We should find a message when the partition table is saved. Just press on OK. We should now be able to see a zip file inside the directory that we chose earlier. Repair file systems using boot-repairOur file systems might get infected at times and Ubuntu would not be able to solve it on boot automatically. It might result in many boot failures. We can fix our file system using Boot Repair. We only need to check an option, i.e., Repair file systems in the tab, i.e., Main options, and then press on the Apply option. It should take a few minutes to repair our file system and solve the problems of the boot. We should be capable of booting into our installed OSes as usual again when it is done. Modifying GRUB location using boot-repairWe can define where GRUB has been installed on our hard drive with the Boot Repair advanced options. If we have more than one hard drive that is installed on our system that has installed GRUB, then we might wish to fix which hard drives we wish to repair here. For modifying the location of GRUB, we need to go to the tab, i.e., GRUB location of boot repair. Now choose the partition of the hard drive from a drop-down menu, i.e., OS to boot by default. Also, choose the partition of the hard drive which is applied as EFI System Partition from a drop-down menu, i.e., Separate /boot/efi partition if we are applying a UEFI-based motherboard. Modifying the options of GRUB using boot-repairAlso, we can change several options of GRUB using a tab, i.e., GRUB options of Boot Repair. Getting boot-repairFirst option: a disk having Boot-RepairOne of the easiest ways for using Boot-Repair is to establish a disk including the tool (e.g., a disk automatically starting Boot-Repair, Boot-Repair-Disk) and boot over it. Note: It is suggested to install an ISO over live-USB (e.g., via a Universal USB Installer, LiliUSB, or Unet Bootin). Don't burn it over a DVD if our system has Windows 8 operating system pre-installed, or if our boot is in the mode of EFI.Second option: installing Boot-Repair on Ubuntu

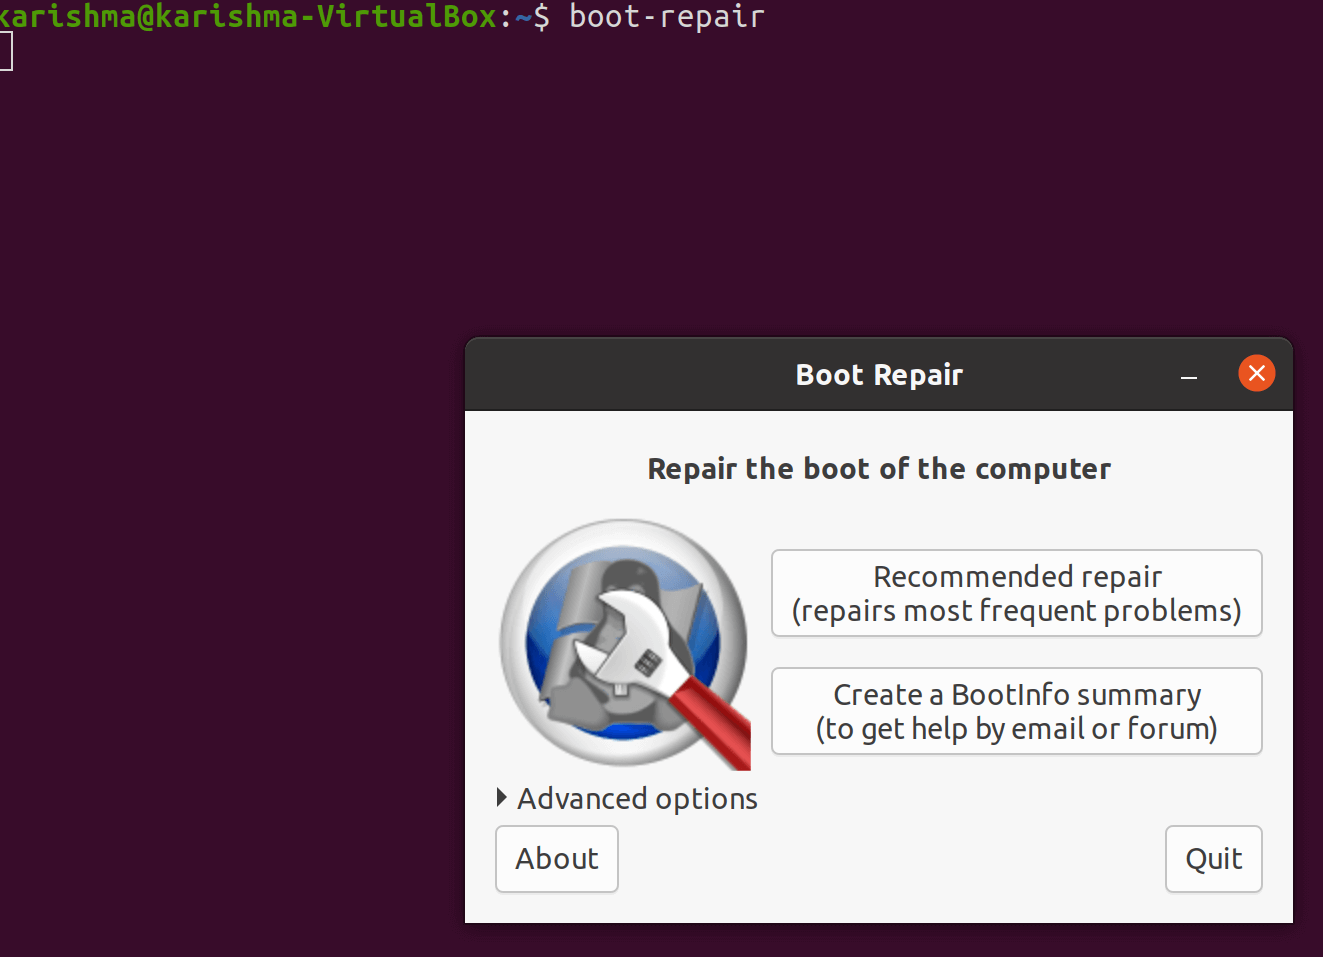
Applying boot-repairSuggested repair
Warning: The settings (default) are those that are applied by the "Recommended Repair". Modifying them might worsen our problem. Do not change them before establishing a Boot-Info URL, and prompting for advice in Ubuntu forums Installation and Upgrades or Absolute Beginners Section. Recovering Ubuntu after install WindowsThis article specifies how to recover or restore the boot-loader after installing Windows operating system. A few reasons for repairing our boot loader may contain installing Windows operating system after we have installed Ubuntu, removing or adding a hard drive, or modifying the settings of the hard drive. Important: This article doesn't help if we had installed Ubuntu in Windows (by the Wubi installer). With the Ubuntu CD (Suggested)Using the graphical way
Using the terminal wayWe need to open our terminal. As of the 11.10 version and 11.04 version of Ubuntu, it could be implemented by opening a Unity Dash (we can select the logo of Ubuntu inside the top panel or we can also use the Windows key on our keyboard) and entering in "Terminal", and pressing what comes up. We can do it by going to the Applications > Accessories > Terminal on the previous versions. Alternatively, we can apply the shortcut of the keyboard, i.e., Ctrl+Alt+T. With the Ubuntu alternate CD
Next TopicInstall AWS CLI Ubuntu
|
 For Videos Join Our Youtube Channel: Join Now
Feedback
- Send your Feedback to [email protected]
Help Others, Please Share


