| |

Ping command in LinuxIntroduction to Ping CommandPing is short for Packet Internet Groper. This command is mainly used for checking the network connectivity among host/server and host. The ping command takes the URL or IP address as input and transfers the data packet to a specified address along with a "PING" message. Then, it will get a reply from the host/server. This time is known as "latency". Note: Low latency and fast ping means faster connection.Most of the users of Linux are used to for the ping command. Almost every user know how to use this command in its common form. But, there are several addition variations and options in ping command. In this article, we will explain by using some of the most helpful ping commands of Linux with examples. These ping commands will work with any Linux or Unix distribution. The test system that we used for providing the output samples and examples is Ubuntu 20.04 LTS. Prerequisites
Working of Ping CommandIn Linux, the ping command is a general utility which is used for checking whether any network is present and if a host is attainable. We can test if the server is up and executing using this command. Also, it helps several connectivity issues with troubleshooting. The ping command permits us to:
When we try to "ping" the remote host, our machine starts transferring ICMP echo requests and delays for a response. We will get an echo response for all requests when the connection is made. The result of the ping command includes the times it takes for all packets for reaching its target and return. Besides, the terminal prints the reply until interrupted. There are some lines using ping statistics after all the sessions. Ping Command UsageThe basic syntax of the ping command contains ping pursued by the hostname, a website name, or exact IP address. Syntax: So, we can type inside our terminal for checking whether the remote host is up: 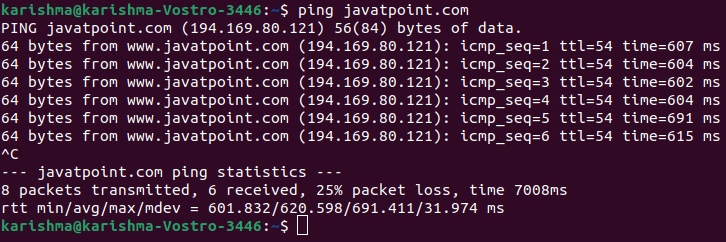
For stopping the process, we can use the Ctrl+C keys.
Examples of ping commandping "localhost" for checking Local NetworkIf we find issues reaching a remote machine or a website, we can ping the localhost to ensure that we have a network connection. We can use anyone of the following ways for checking the interface of the local network:
Note: The ping result will look the similar whichever option we select.Example is as follows: 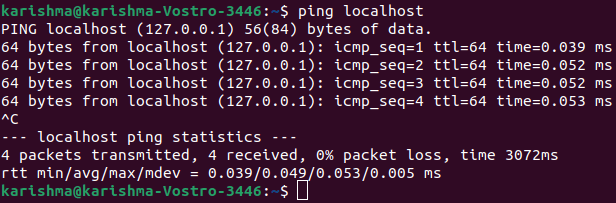
Internet Protocol SpecificationIPv6 is an alphanumeric format of the IP address that supersedes IPv4. The causes for it is that there is a restricted IPv4 address number. To request IPv4 or IPv6 address, we can add -4 or -6 before IP/hostname or after ping command. Modify Time Interval among Ping PacketsThe interval (default) among all ping requests is one second. We can decrease or increase the time with the help of a switch known as '-i'. We use the values which are lower than 1 for decreased the ping time interval: 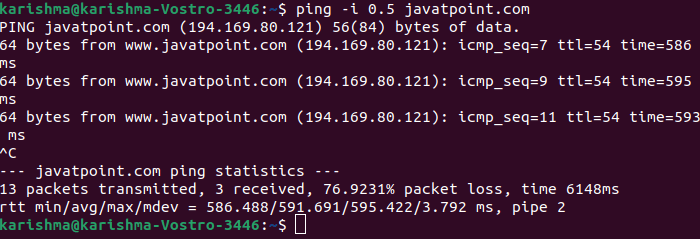
We can use the values which are higher than 1 for increased the ping time interval. Flood the Network with pingWe can apply ping flood for testing the performance of our network under heavy load. An option in ping flood, i.e., -f needs root to run. Otherwise, we can also use the sudo option to our ping command for flooding a host. It transfers several packets as soon as possible. The command is as follows: The result prints a dot for all transferred packets and backspace for all responses. The statistics line displays the ping command summary. Change the size of the ping packetWe may wish to apply -s for increasing the size of the packet through the 56 (84) bytes default value in this scenario. In parenthesis, the number illustrates the ping bytes transferred including the header packet 28 bytes. For example, for increasing the size of the packet to 1000 bytes, we can use the following command: 
This command is helpful if analyzing network performance. We can analyze when a network link throttles if we increase the size of the packet to some thousand bytes. How to fix the ping numberThe setting (default) for the ping command is for keeping the request until we interrupt it. We can fix the ping number with the help of the following two methods: 1. Limit Count of Ping PacketWe can use the -c option and a number for automatically making the ping command stop after it transfers a possible number of packets. It sets the desired ping requests amount is represented in the following example: 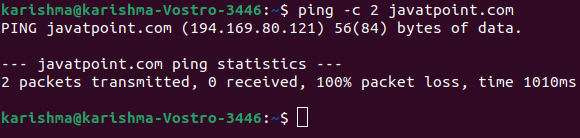
The ping command will stop transferring packets after any two requests as we can see in the screenshot above. 2. Fix time limit in the ping commandWe can include -w and a time interval in seconds to our command for stopping getting a ping result after a particular time amount. For example, we can type the ping command for stopping printing ping outputs after 25 seconds: 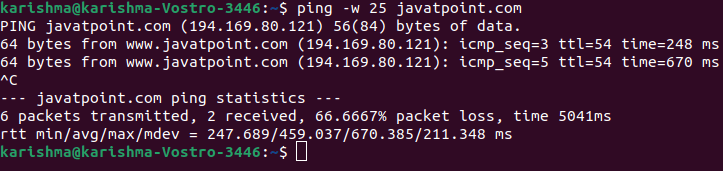
Other uses of the ping commandSuppress Ping Result for Printing Summary Statistics Only If we don't wish to clog our screen with details for all the packets, use the -q option for displaying the only summary. The -q switch prints a single line along with the regular ping details and after that gives the statistics in the end. In this command, the "q" letter is short for the "quiet" result. 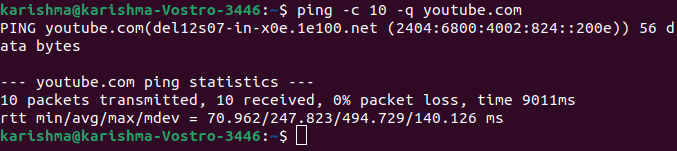
Usually, we add the quiet result with other options. We will fix the ping for sending 10 packets in this case and suppress the result. Include Timestamp Before Every Line in ping resultIf we wish to remember the daytime when we run the ping command, we can add the -D switch as follows: 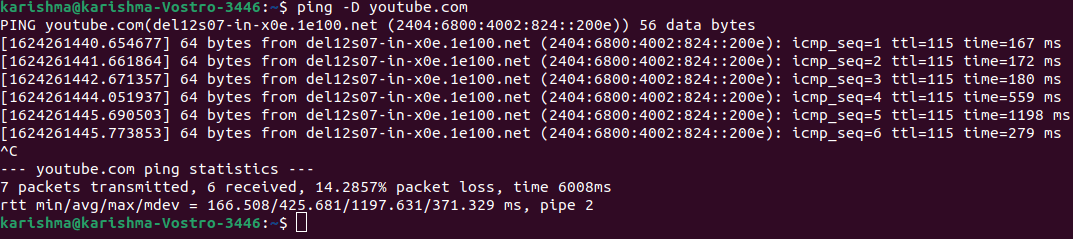
It will print the timestamp in the Unix format before every line. Note: We require to use the D uppercase because these commands are case-sensitive.Audible Ping if a Host is AttainableWhen we use the -a option, the system will play a sound if there is a reply from the host. The audible ping is helpful if we are troubleshooting network problems and don't wish to look at our screen until there is a reply. 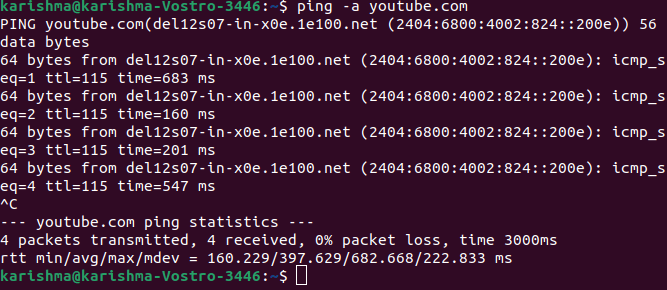
The result looks similar to any regular ping command result. Display Ping VersionWe can check the ping tool version on our system. We can also append the -V option to the ping command for displaying this utility version. The command is as follows: 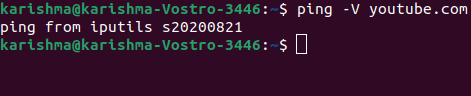
Mostly Used Ping CommandThe following are some generally used ping commands: a- It produces a sound if the peer could be reached. b- It permits ping the IP address of a broadcast. B- It prevents the ping from changing the probe source address. c- It limits the number of transferred ping requests. d- It sets an option, i.e., SO-DEBUG over the used socket. f- It floods the network by transferring several packets per second. i- It describes the interval among the successive transmission of the packet. One second is the default value. I- It sets the IP address of the source to the described IP address of the interface. This option is needed if pinging the lack address of IPv6 link. We can use the name of the device or IP address. l- It specifies several packets to transfer without delaying a response. q- It shows IP addresses in the output of the ping instead of hostnames. T- It fixes the Time To Live. v- It gives verbose output. V- It shows the version of the ping and exits to a newer command prompt line.
Next TopicLinux Source Command
|
 For Videos Join Our Youtube Channel: Join Now
Feedback
- Send your Feedback to [email protected]
Help Others, Please Share


