| |

Automatic Numbering in ExcelUsers can instantly AutoFill series, including numbering, dates, months, a series of numbers, a pattern, etc., with the use of Excel's Auto Numbering tool. We individually enter serial number information for the cells in a dataset while doing an essential numbering task in Excel. As a result, we can avoid human entry by utilizing the Auto Numbering tool.
Another option is the Excel ROW operation =ROW() equation, which yields the row identifier for reference. For instance, since A3 is the third entry in the spreadsheet, ROW(A3) delivers 3. Without a connection, ROW produces the cell's row number containing the formula. Top 3 ways to get auto numbering in ExcelIn Excel, there are three methods to obtain automatic numbering:
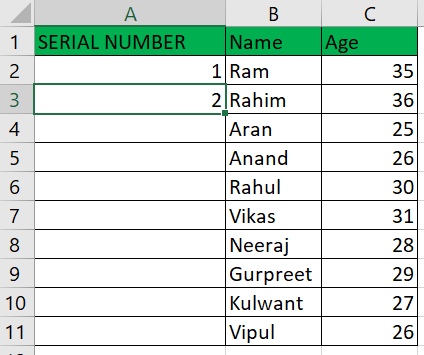
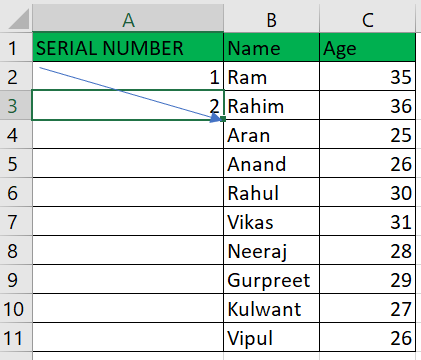
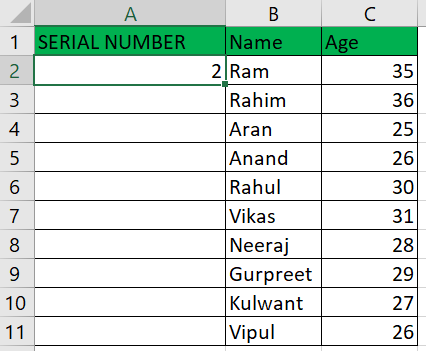
Examples:Let's talk about each of the techniques above with concrete examples. Example 1: Fill a Column with a Series of numbersThe information we possess is as follows: 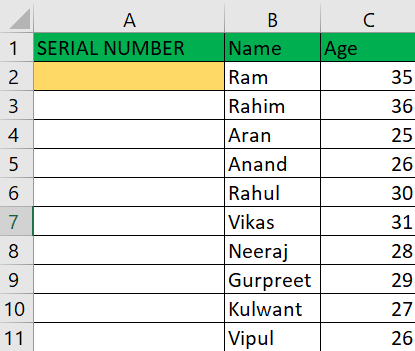
To add autonumbering to "column A," follow these steps:
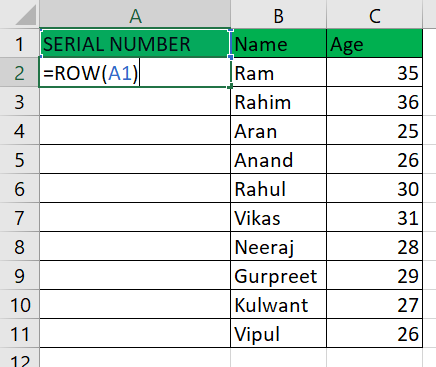
Example 2: Use the ROW() Function:Using the same data set, we will utilize the Row () function to show the numbering order.
As a result, it provided us with the numbered from integer 2 since the Row method tosses the integer for the present Row.
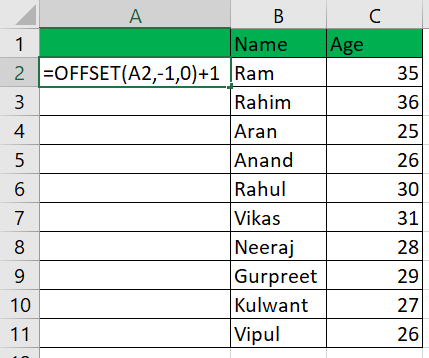
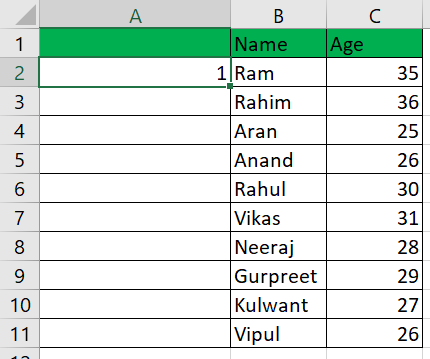
Example 3: Using the Offset() Function:We can also accomplish auto-numbering with Excel by utilizing the Offset() function. Let's illustrate the Offset function with the same set of data. Here is the information: 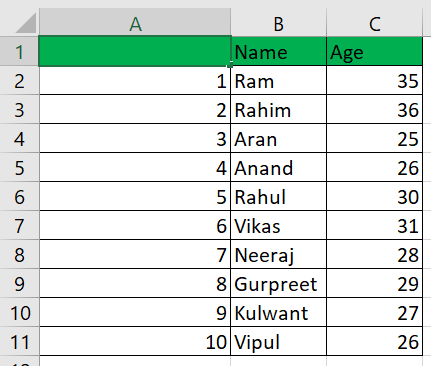
As you can see, we have erased the information entered in cell A1 under "Serial Number," as the Offset function requires a blank reference. 
The function parameters used by the Offset function are seen in the screenshot above.
The reference cell address at this time is cell A2.
Advanced Techniques:1. Dynamic Numbering with Formulas:
2. Numbering in Non-Numeric Formats:
Conclusion:Finally, becoming proficient with Excel's automatic numbering shows a crucial ability that empowers users at all skill levels. A wide range of methods have been explained in this thorough tutorial, from the ease of use of the Fill Handling to the intricacy of dynamic equations and unique number formats. These techniques' adaptability to various situations makes Excel an agile instrument for effective data organization. The real-world uses, from organizing lists to handling large datasets, highlight how essential automatic numbering is to improve data management processes. The guide gives users the tools to preserve a consistent number system and overcome obstacles by strongly emphasizing troubleshooting advice. Excel's flexibility is shown in its ability to accommodate various numbering needs, which promotes personalization and user-friendliness. The encouragement of further investigation as users set out on this learning journey guarantees that mastering automatic numbering is a continuous process of learning and advancement in Excel skills rather than a final goal.
Next TopicCalculate the Cost Of Common Stock
|


 For Videos Join Our Youtube Channel: Join Now
Feedback
- Send your Feedback to [email protected]
Help Others, Please Share


