| |

How to lock cells in Microsoft Excel?Locking the cells in Microsoft Excel means restricting the particular cells from being edited by someone without access to that particular cell. When we lock the cells in Microsoft Excel, no one can change that particular cell, and it was well known that the particular user cannot make any kind of the changes in the given formula and the content of the protected cell. And the Locking of the cell is specifically beneficial in cases where an Excel worksheet needs to be shared among several colleagues. Important Note: It should be noted that the respective "Lock function" works with Protect cell function. And both functions together make complete sense. Moreover, in Excel, we can easily lock the cells to make them in an uneditable format. And this will save our data from the various unwanted changes in the Excel sheet efficiently; in Microsoft Excel one can easily lock an individual cell, the range of the cells, or even all the respective cells. By default, all the cells are locked in Microsoft Excel; we must need to protect them to completely lock them as well.
Furthermore, Mr. Amit has been asked to share the worksheet with the marketing department to assist it in revising plans as well. For such inter-departmental collaboration, Mr. Amit usually wants his Microsoft Excel data to be getting untouched as it circulates respectively. This is where the cell locking property of Microsoft Excel is used. And when working on the shared files, the chances of making accidental changes to the respective data will increase. Moreover, even single modifications to Microsoft Excel formulas can effectively lead to entirely different and erroneous results. And to address such issues, Microsoft Excel provides a lock feature, which is always enabled by default option. And to confirm that the Excel cells are locked, we are required to perform the following steps respectively: Step 1: First of all, we are required to right-click on a cell, and then we are required to select "format cells." Step 2: And in this step we must need to click on the "protection" tab that are available in the "format cells" window. Step 3: After performing the above steps, the checkbox for "locked" is already selected, implying that the cells are locked effectively. Important Note: It should be noted that only locking or only protecting cells does not prevent them from being changed or altered by an individual, so to secure a particular cell, it must be locked first and then protected respectively. And in this tutorial, we will describe each step required for locking the cells in an Excel sheet. But remember that only locking the cells will works once until and unless we protect these cells. Why should one lock the cells in a Microsoft Excel sheet?And now, in this particular tutorial we are specifying out the two most common but essential reasons for the purpose of locking out the cells or the entire worksheet. Reason 1 More often, when we are eventually working with an Excel worksheet, and we accidentally press out the DELETE, BACKSPACE, or any other alphabet as well as the number key, then in that case, either our whole data get lost, or it will get edited wrongly. And if we spot the error, then it would be fine as we can easily rectify or correct it, and if we cannot detect or spot the error, we can get an erroneous or wrong result. Reason 2 And other most important reason behind the Locking of the cells may be that we would only like people to edit our respective Excel worksheets with our permission and knowledge. Hence, we can easily lock the cells so that the particular user can only open and can read our worksheet but they are not liable (have permission) to edit it. Solution And it was well known that, the respective Microsoft Excel basically provides a unique way in order to protect our data from this happening. So we can easily lock the cells and can also protect them from being edited by any unauthorized user, and after that, we can then save the file from the various unwanted changes. Besides all this, we can easily customize the protection of the selected worksheet, and then allowing particular users to perform basic operations on the worksheet, even when it is locked or protected. What operations need to perform to lock the cells in Microsoft Excel?If we want to protect our Microsoft Excel worksheet from the unwanted changes, then in that scenario we are required to perform the following operations on our respective worksheets just one after other.
And it is well known that the operations' sequence is essential. We will be now describing both methods in detail by just taking a proper example for its better understanding. And first of all we are needed to instruct an individual to lock all the cells of an Excel sheet and then a few specific cells. Lock all cellsPreviously, we told an individual that all the cells were "locked" by default. And before diving deep into the next step to protect the particular cells, we need to verify once that the all the selected cells are locked or not. If the cells are not locked, then, in that case, we need first to lock them. And besides all this we all are required to verify that all cells are locked initially. And to achieve this, we are required to follow the below-mentioned steps effectively: Step 1: Firstly, we need to select all the particular cells of the Microsoft Excel worksheet by making use of the Ctrl+A shortcut key from our keyboard. 
Step 2: Now in this step, we will be right-clicking on any of those selected cells and choose Format cell from the opened list respectively. 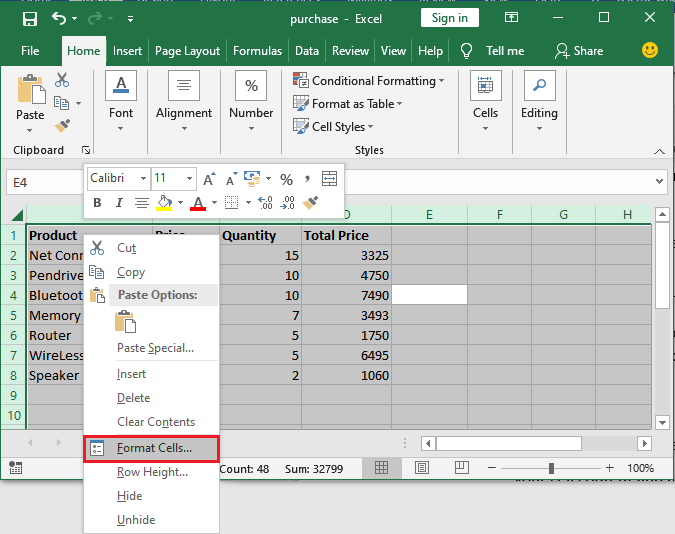
Step 3: After performing the above step, a format cell panel will open on our screen where we need to go to the Protection tab, and then we will verify that all cells are already locked currently respectively. 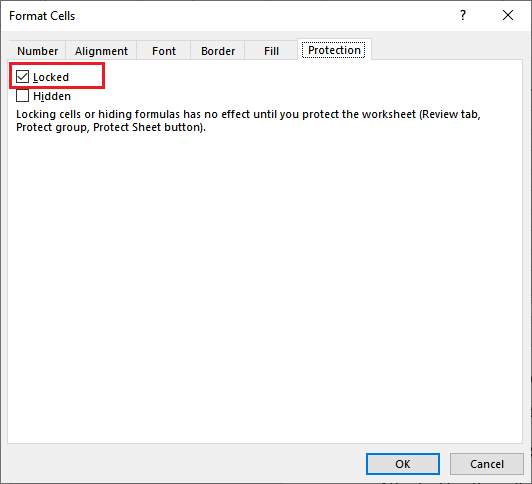
After that, we must press the Ctrl+1 shortcut key from our keyboard to directly open the Format cells panel. Step 4: And if, in case, the locked cell checkbox is not marked, which means that the respective cells are not locked effectively. Hence, lock the cells by marking this checkbox. 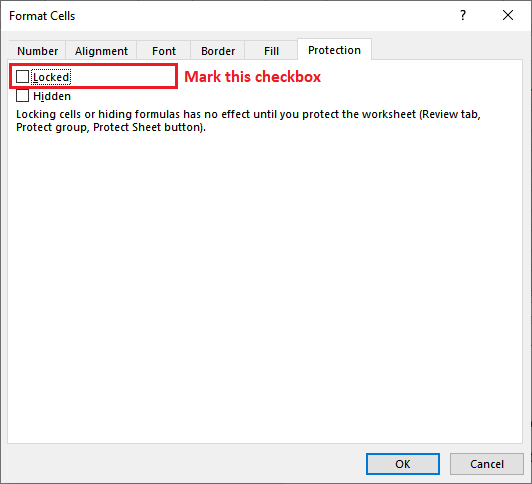
Step 5: At the end, we must also click on the OK button to complete the cell locking process. 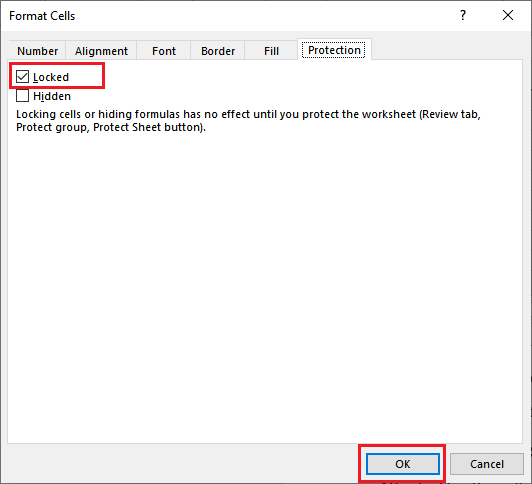
Now, we will move further to protect our respective cell content and then apply formulas to it respectively. Protecting all cellsAnd just after locking the entire cell, we are needed to follow one more step to achieve our goal. Protecting the cells is an important step as compared to the locking of the cells, or both are equally important. And if in case we are unable to lock the cells, then this (protect function) will not work, and the cell content will remain in an editable format. Hence, we should first of all lock the cell without any delay. And the protection of the cell content can be easily achieved by the below steps effectively: Step 1: In this step, on the same worksheet, we need to go to the Review tabs, which are present under the "Excel ribbon." 
Step 2: Now, in the Review tab, we need to click on the Protect Sheet option that is available under the Protect group. 
Step 3: After performing the above steps, a protect cell window panel will get appears on our screen where we can easily customize out the cell restriction if we want to give some permissions to the users even when cells are locked. Mark the checkboxes here to permit respective operations. 
By default, the top 2 options are marked in this list. Step 4: In this step, we can either set a password or directly protect the respective cells without setting a password, and then after that, we need to click on the "OK" button. And for the fully protected cells, we are required to make the worksheet password protected. 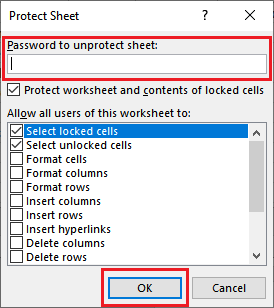
Moreover, this password is required when unprotecting the Microsoft Excel cells. And in addition to that, we can also protect the cells without setting up a password. Step 5: Now in this step, we are required to check that all cells are locked successfully and they are in un-editable format. Once the cells are locked and protected, then after that we are not allowed to make any changes to the respective cell without unprotecting them. 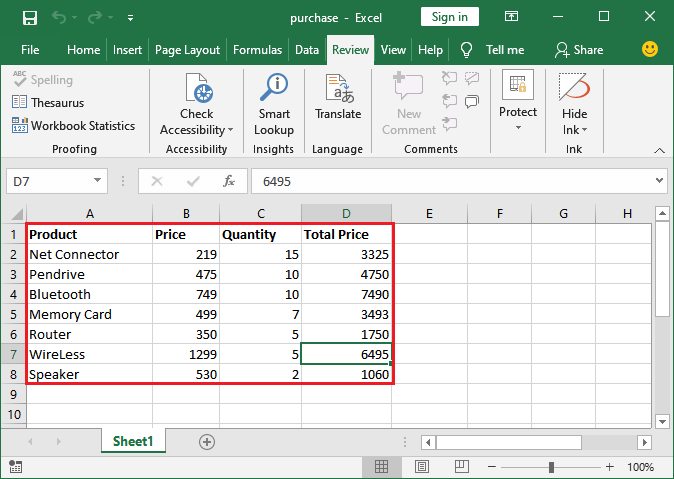
Step 6: After performing the above steps, we will encounter a warning message, as depicted below, if we try to edit the locked-protected cells. 
Lock specific cells of the Excel worksheet.If in case, we do not want to lock all the cells of an Excel sheet, instead of that we only want to lock two or three cells respectively. So in this particular scenario, we are required to lock and protect only some of the specific cells and leave the rest of the cell to be unlocked. Besides all this, Microsoft Excel allows the Locking of only and only some of the specific cells as well. So, making the entire sheet un-editable allows us to lock only those particular cells whose data or content we would not like to be get changed as well. What must be remembered before locking a few cells in Microsoft Excel?And it was well known that, all the respective cells in an Excel worksheet are usually locked by default; therefore, before starting or proceeding forward, we must need to ensure that only the cells which we want to protect are locked, and the rest remain unlocked. And before proceeding to the next step, we must keep locked all the cells we want to protect and unlock others as well. And if we are trying to protect the worksheet with all locked cells, then all the cells will get locked in an effective manner. Now for its better understanding, let us begin with an example: Steps to lock specific cells in Microsoft Excel And to lock out the specific cell in Microsoft Excel, we are required to follow the below-mentioned steps: Step 1: First of all, we are required to select only the cells or the range of the cells (A to C column cells) that we don't want to be get "locked," which means that: at this time, we are required to select only those particular cells whose content allowed to be changed by us. 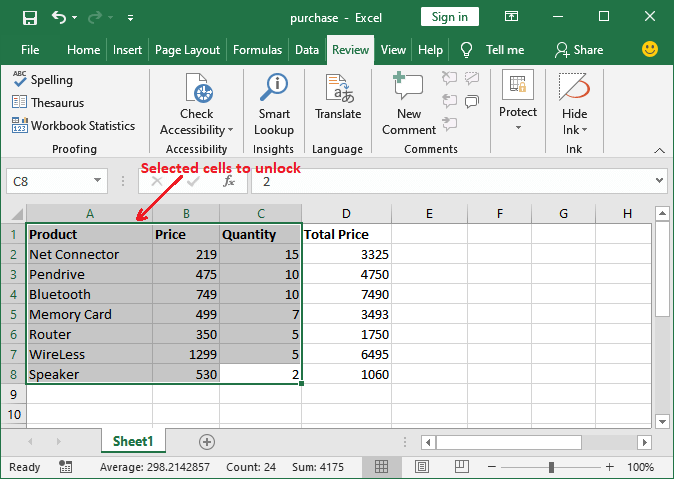
Step 2: After that, we need to right-click on the selected cell and will then choose the Format Cells option from the list, which will open a format cells panel respectively. 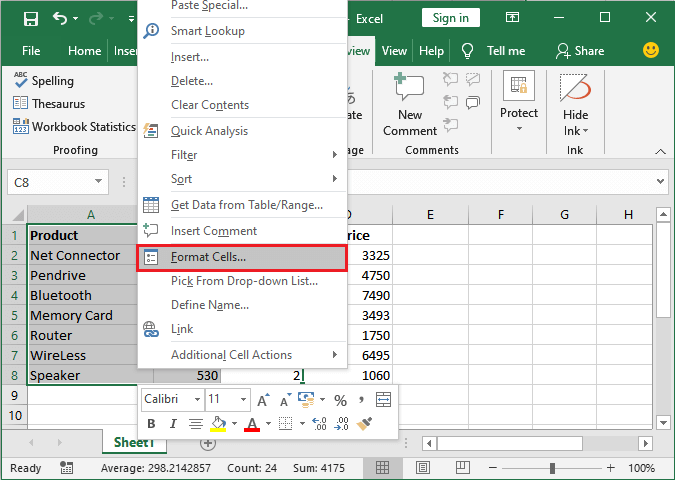
Step 3: And now, in the respective "format cells window," we just need to go to the Protection tab and then will unmark the Locked checkbox to make the selected cells unlocked, and then we need to click on the OK button. 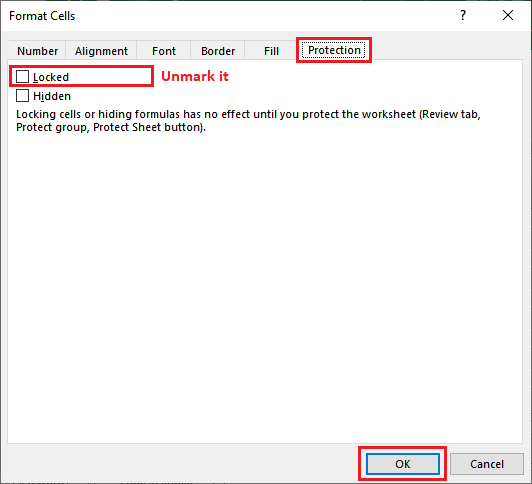
And just after applying the above steps, we will be able to see that only the cells we want to protect are locked, and the remaining are unlocked. So, when we follow the process to protect the cell, it will work only on locked cells rather than the entire worksheet. Step 4: And on the same worksheet, we also need to go to the Review tab available in the Excel ribbon. 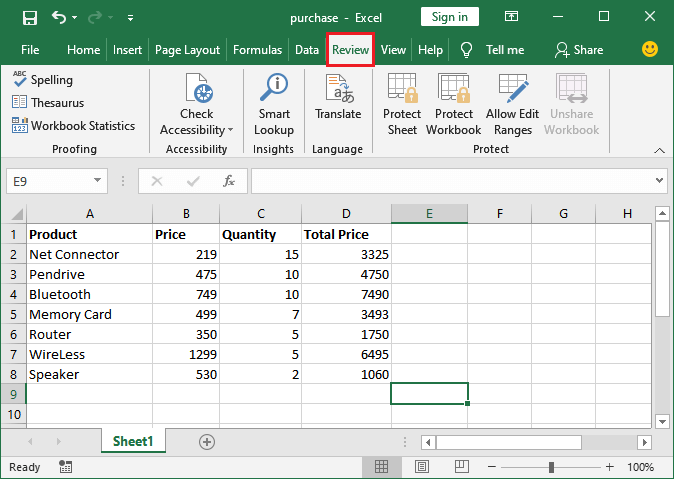
Step 5: In the "Review tab," we must click on the Protect Sheet option, which is effectively present just under the Protect group respectively. 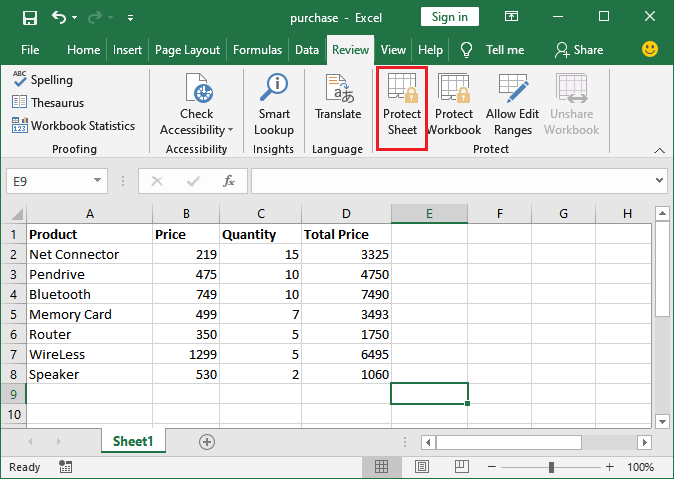
Step 6: And a "Protect Sheet window" panel where mark the checkboxes to give the respective operations permission. 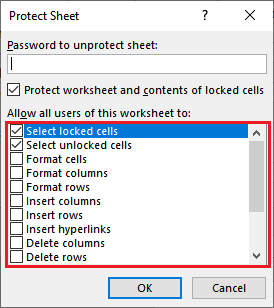
Step 7: This time, we are required to enter a password that we want to set and click on the OK button, and this password is basically needed when we are unprotecting the cell for the purpose of making it editable again. 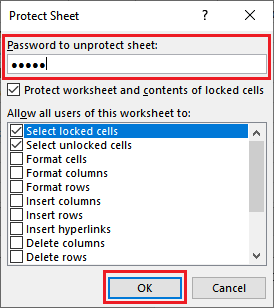
Although we are required to protect out the cell without setting the password, which does not ask for any password while unprotecting the cells again and we can directly unprotect the file with a single click as well. Step 8: Now, in this step, it will then ask us to re-enter the password to confirm and match with the first password which we have entered respectively, and then we need to enter the password again, and then we are required to click on the OK button as well. 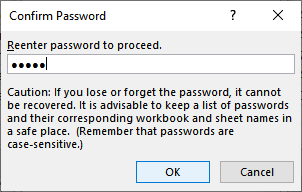
Step 9: Now in this step, all the "Locked cells" are now protected successfully. Hence, unlocked cells are still present in an editable format, whereas locked cells are not. We can also check that they are in an editable format if we want to click on any cell in A, B, or C column. But in column D, cells are not in an editable format. As it can be easily seen in the below-attached screenshot: 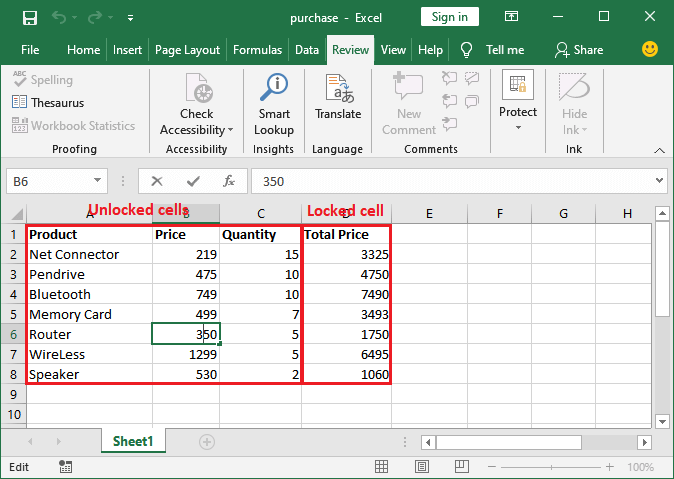
Step 10: Moreover, if we want to edit any cell of the column D, it will then showing a warning message, as it was clearly depicted below in the screenshot. 
The conclusion is that our chosen cells have been locked successfully. And only one can edit the locked cells by unprotecting them with our set password. Mixed Lock State It was well known that, in an Excel spreadsheet, we can have both "locked" and "unlocked cells," and when we want to protect out a few cells instead of all, then in that case, only protected cells are locked, and others are left to be unlocked. But the question is how we find if a worksheet contains both types of cells. We can also find if a given worksheet contains locked and unlocked cells in Microsoft Excel. Moreover, Microsoft Excel shows it with a solid square box, as could be easily depicted in the steps to get the better insight of the "mixed lock state". Step 1: First, we must select all the respective cells and the range of the cells of a selected worksheet, and then we need to press out the Ctrl+1 shortcut key from our keyboard. 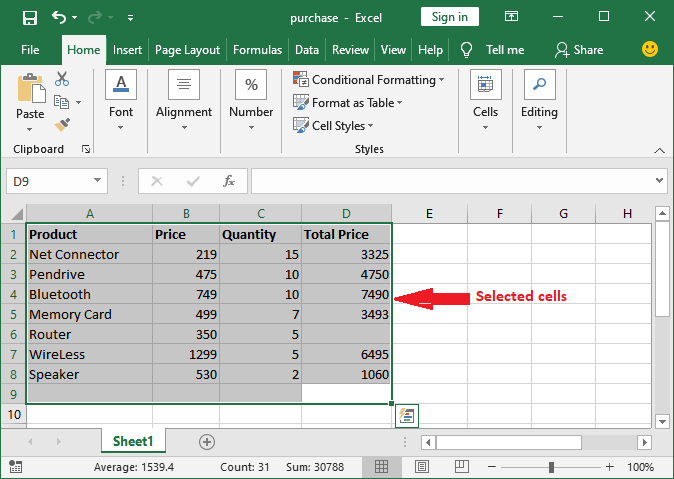
Step 2: And after performing the above step, we will get encountered with the "format cell panel" in which under the "protection tab"; and in, that we will see that if the Locked checkbox contains a solid square box which indicates that the worksheet has both locked and unlocked cells as well. 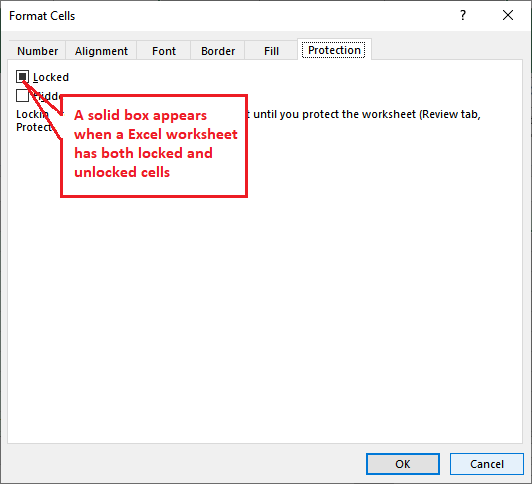
And if in case the "Locked checkbox" is marked, it means that all selected cells are locked. 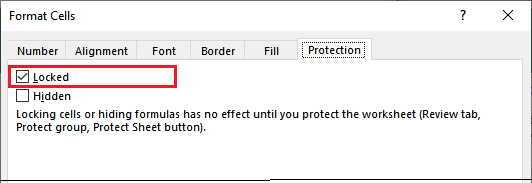
The third and last case is that if the "Locked checkbox" is not marked and appears blank, all the selected cells are unlocked respectively. 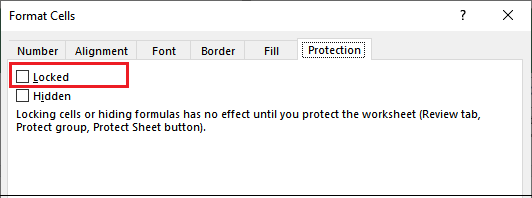
Similarly, we can also check the other worksheets and the range of the cells. These are the various locking representation states in Microsoft Excel as well. Locking state representation in Microsoft Excel Locked cells by marked checkbox. Unlocked cells by unmarked checkbox. Mixed cells by the solid square box. How can one easily find and highlight locked or unlocked cells on a given sheet in Microsoft Excel?If we have been locking and unlocking cells on a given spreadsheet multiple times, we may need to remember which cells are locked and which are unlocked. And to quickly find out the "locked cells" and "unlocked cells," we can easily make use of the "CELL function," which usually returns information about the formatting, location as well as other properties in a given specified cell, respectively. Besides all this, if we want to determine a cell's protection status, we must enter the word "protect" in the first argument of our respective CELL formula and the cell address in the second argument.
=CELL ("protect," A1) If in case of cell A1 is locked, then the above formula will return 1 (TRUE) as an output. If it's unlocked, then in that case, the above formula will return 0 (FALSE) as an output, as it was demonstrated in the below-mentioned figure (the formulas are depicted in cells B1 and B2): 
And it cannot be easier. However, if we have more than one column of the data, then the above approach is not considered to be the best way to proceed further. It would be far more convenient to see all locked or unlocked cells at a glance rather than sorting out numerous 1s and 0s, respectively. The solution for the above problem is to highlight locked or unlocked cells by creating a conditional formatting rule that is effectively based upon the following formulas as well: For the purpose of highlighting out the locked cells: =CELL ("protect", A1) =1 And also, to highlight the unlocked cells: =CELL ("protect," A1) =0 Cell A1 is the leftmost cell of the range, covered by our conditional formatting rule. As an example, we have created a small table. After creating the table, we have just locked cells B2:D2 that contain the SUM formulas, and the following screenshot will quickly demonstrate a rule that will easily highlight only those particular locked cells: 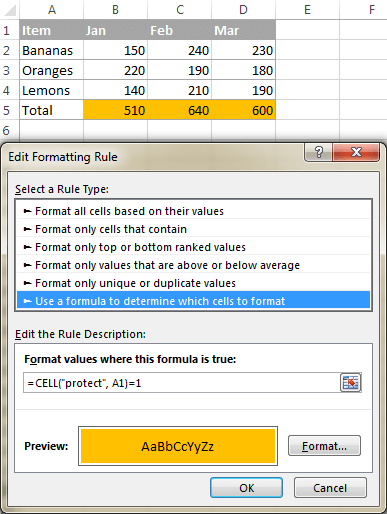
Important Note: It should be noted that the respective conditional formatting feature is primarily disabled on a protected sheet. So, we must turn off the worksheet protection before creating a rule (Review tab > Changes group > Unprotect Sheet). What are the Frequently Asked Questions related to the Locking of the cell in Microsoft Excel?1. What is meant by locking the cells in Microsoft Excel, and how is it done?
2. How to lock and protect specific cells in Microsoft Excel? The steps that can be used to lock and protect the specific cells in Microsoft Excel are listed below: a. First of all, we are required to unlock all the cells of the Excel worksheet
b. Select the cells or ranges to be locked.
c. Lock the selected cells
d. Protect the worksheet
The specific cells are locked and protected, while the remaining cells are editable. Note: While entering the password, you can select the actions the users can perform.3. How to lock multiple cells and protect them without using a password in Excel? An important point to consider for locking multiple cells is the selection of cells. It is possible to select a range of cells that can be either adjacent or non-adjacent. The selection of ranges is carried out as follows:
Once the cells are selected, they can be locked and protected. This is done by pressing "Ctrl+1" and selecting the "locked" option in the "protection" tab. Further, click "protect sheet" under the Review tab. Cells can be protected without supplying a password as well. For this, omit to supply the password while protecting a sheet in the Review tab. However, one must remember that if a password is not provided, the worksheet content can be changed by anyone. This is because any user can use the "unprotect sheet" option.
Next TopicHow to unlock cells in Excel
|
 For Videos Join Our Youtube Channel: Join Now
Feedback
- Send your Feedback to [email protected]
Help Others, Please Share


