| |

Alexa Python Development: Build and Deploy an Alexa SkillAmazon Alexa is a virtual assistant developed by Amazon. It can voice-interact, play music, create to-do lists, set alarms, stream podcasts, play audiobooks, and provide real-time weather, news, and traffic information. Alexa is also capable of controlling various smart devices, including lights, switches, thermostats, and more. Python is a popular programming language used to build various applications, including voice-based applications for virtual assistants like Alexa. Developers can use the Alexa Skills Kit (ASK) SDK for Python to create custom skills for Alexa that can handle voice commands and produce voice responses. Alexa Python Development is the process of building and deploying an Alexa Skill using Python. It involves using the Alexa Skills Kit SDK for Python, AWS Lambda, and the Alexa Developer Console to create and publish custom skills for Alexa. In this process, you will create a new skill in the Alexa Developer Console, write the Python code for your skill's logic and response handling, deploy the code to AWS Lambda, and test your skill using the Alexa Developer Console or an Alexa-enabled device. To get started with Alexa Python Development, you must have a basic understanding of Python programming, AWS Lambda, and the Alexa Skills Kit SDK for Python. You will also need an AWS account and an Alexa-enabled device to test your skill. By the end of the development process, you will have created a custom Alexa Skill using Python that can handle voice commands and produce voice responses, allowing you to interact with Alexa in new and exciting ways. The free Alexa developer profile must be created. Here are the general steps you can take to create a free Alexa developer account:
Required Alexa SkillsTwo of the most important components of an Alexa skill are the skill interface and the skilled service. The skill interface defines the voice interactions between the user and the skill, while the skilled service handles the processing and generation of the skill's responses. Both components are essential for the development of a successful Alexa skill.
The skill interface defines how the user interacts with the skill. It includes the invocation name, intents, and utterances. The invocation name is what the user says to activate the skill, such as "Alexa, open [skill name]". The intents define the actions that the user can perform within the skill, such as "play a song" or "tell me the weather". The utterances map the user's spoken phrases to specific intents. A well-designed skill interface is critical to the success of an Alexa skill. It should be easy to use and understand and provide a natural and intuitive interaction experience for the user.
The skill service should be designed to handle a variety of scenarios and provide robust error handling. It should be optimized for performance to ensure users receive fast and reliable responses. The skill service may also need to integrate with other systems and services, such as a database or a third-party API, to provide the necessary functionality. The skill service can be hosted on an AWS Lambda function or a web service. When a user interacts with an Alexa skill, the request is sent to the skilled service, which processes the request and sends the response back to Alexa for playback. Some advantages of using Python for Alexa development include its ease of use, simplicity, and flexibility. Python is a high-level programming language that offers a variety of libraries and tools that can simplify the development process and make it easier to build custom skills. Setting up the EnvironmentBefore you start building and deploying Alexa skills using Python, you need to set up your environment. Here are the steps to set up your environment:
After setting up your environment, you can start developing and distributing Alexa skills using Python. Registering for an accountYou need an Amazon developer account to sign up for the Alexa Developer Console. If you already have an Amazon developer account, you can sign in by following these steps:
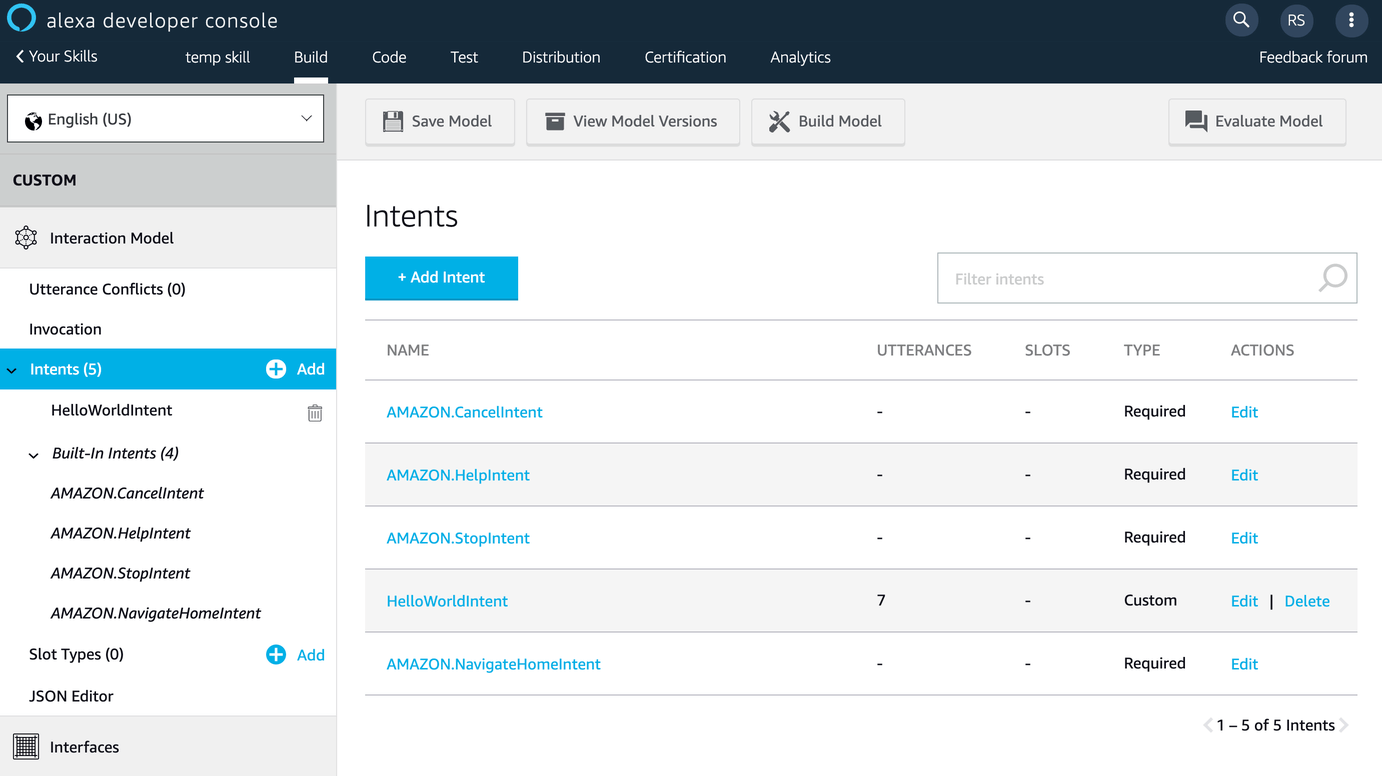
Understanding the Alexa Skill ModelThe Alexa Skill Model is a visual representation of the voice user interface (VUI) for your Alexa skill in the Alexa Developer Console. It consists of three main components: Invocation Name, Intents, and Slots.
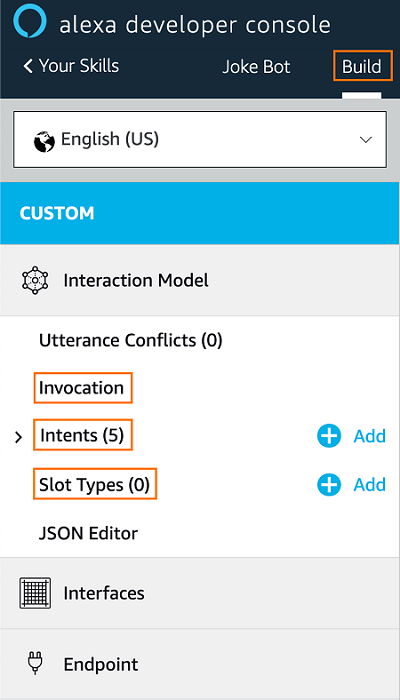
To create a new skill model in the Alexa Developer Console, you need to follow these steps:
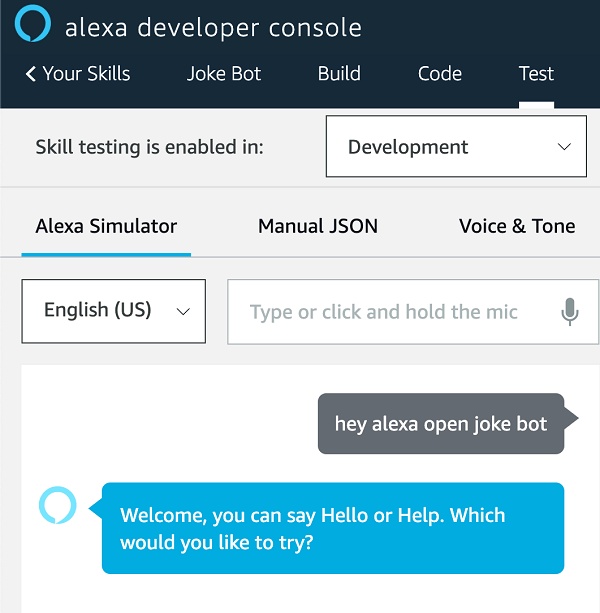
Once you have defined the skill model for your Alexa skill, you can test the interaction model using the Alexa Developer Console's testing tool. The testing tool allows you to simulate voice interactions with your skill and validate the responses. Sign in to the Alexa Developer Console and click the "Create Skill" button.
Choose a skill model (custom or pre-built) and select a language
Define the invocation name for your skill.
Define the intent for your skill.
In this process, we use these to process the user input.
The JSON input object is constructed from the input data when a user enters voice or text input. The JSON input object includes information such as the type of request, the user's input intent, and any associated slot values. 
Define the slots for your skill.
Build your skill
Building a skill BackendBuilding a skill backend involves developing the code that powers the skill's functionality. This typically involves writing code that can handle the user's input, process it, and provide an appropriate output response. You can use tools like the Alexa Skills Kit SDK for Python to build a skill backend. This SDK provides a set of Python libraries and tools that can help you write code that can interact with the Alexa service. When building the backend for your skill, you will typically start by defining the intents and slots for your skill in the Alexa Developer Console. These intents and slots provide a framework for your backend code to work within, allowing you to process the user's input in a structured way. Code snippet: This imports necessary classes and functions from the Alexa Skills Kit SDK for Python. The SkillBuilder class builds a skill's request and response handlers. The Response class defines the response to be sent back to the user. The AbstractRequestHandler and AbstractExceptionHandler classes are used as base classes for intent handlers and exception handlers, respectively. Code snippet: This defines a SkillBuilder object called sb and a class called HelloWorldIntentHandler. The can_handle method of HelloWorldIntentHandler returns True if the incoming request is for the HelloWorldIntent intent: otherwise, it returns False. The is_intent_name method of the ask_utils module is used to check the name of the intent. ask_utils is a module that provides utility functions for Alexa Skill Kit SDK for Python. It is imported as follows: Code snippet: handler_input is a parameter passed to the can_handle method, representing the incoming request. Code snippet: This defines the handle method of an exception handler class. This method is called when an exception occurs while handling the request. The handle method defines the output message to be spoken back to the user as "Sorry, there was an error. Please try again later." using the speak_output variable. The response_builder attribute of the handler_input object is used to construct the response that will be sent back to the user. The speak method of the response_builder is used to set the message that Alexa will speak back to the user. Code snippet: We also define an exception handler called "CatchAllExceptionHandler" that catches any errors that might occur during the execution of the skill. This exception handler responds with a message that indicates an error has occurred and suggests that the user try again later. Finally, we add the intent handler and exception handler to a SkillBuilder object and define a Lambda function handler that uses this SkillBuilder object to handle incoming requests. Code snippet: This creates an instance of the SkillBuilder class and assigns it to the sb variable. Next, it registers an instance of the HelloWorldIntentHandler class as a request handler for the skill using the add_request_handler method of the SkillBuilder instance. When the skill receives an incoming request with an HelloWorldIntent, the HelloWorldIntentHandler instance will handle the request. Then, it registers an instance of an exception handler class, CatchAllExceptionHandler, using the add_exception_handler method of the SkillBuilder instance. This exception handler will be called when an exception is thrown in the skill's intent handlers. Submit your skill for certification.Once you've built and tested your skill, you can submit it to Amazon for certification. The certification ensures your skill meets Amazon's quality standards and works correctly with Alexa. After your skill has been certified, it will be available to users through the Alexa Skills Store. Creating a joke intent handlerTo create a JokeIntent handler, you can follow a similar process to the HelloWorldIntent handler we previously discussed. Here's an example code block that demonstrates how to create a JokeIntentHandler: Code snippet: In this, we create a JokeIntentHandler class that extends the AbstractRequestHandler class. Like the HelloWorldIntentHandler, we define a can_handle method that returns True if the incoming request has an intent name of JokeIntent. If the intent matches, the handle method will be called to process the request. We call a custom function get_random_joke() to retrieve a random joke inside the handle method. We then build a string speak_output that includes the joke and use the response_builder object to build a response with the joke as the speech output. Finally, we return the response object by calling the response method of the response_builder object. To use this handler in your skill, you would register it with the SkillBuilder instance in the same way as the HelloWorldIntentHandler. The code looks in the editor like this: 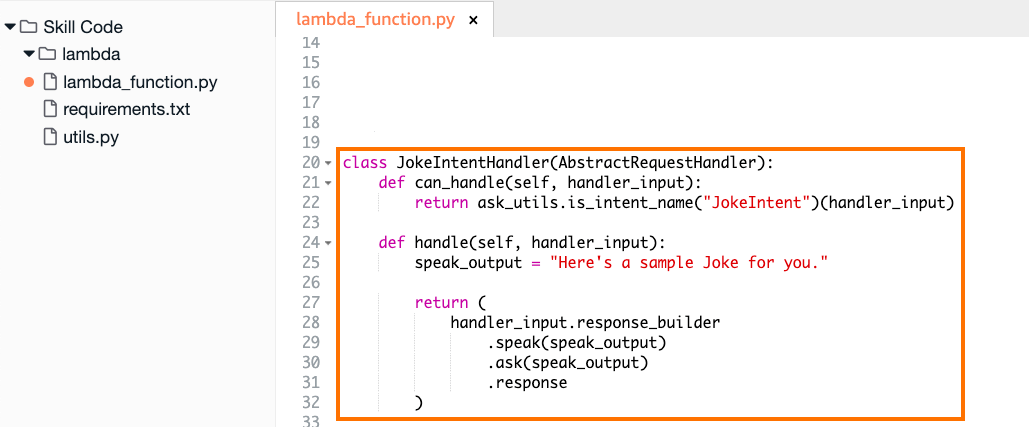
After creating an intent handler class, you must send it as an argument to SkillBuilder.add request handler. Add the next line to lambda function.py by scrolling to the bottom: Code snippet: Given that the code is read from top to bottom, it is crucial to keep in mind where this line is placed. Thus, make sure that the call to the InstantReflectHandler() class comes before the call to your custom intent handler. This is how it should look: Code snippet: Alright, it's time to test your code! To build the backend service and save the modifications, click the Deploy button. You'll verify your Alexa skill front end to see if it performs as planned. Adding jokesAdding jokes to an Alexa skill is a fun way to enhance the user experience and add a touch of humor to the conversation. Jokes can be added to the skill by defining a new intent and creating a custom intent handler to handle the intent request. The handler can be programmed to generate random jokes from a predefined list or to fetch jokes from an external API or database. The jokes can then be returned as a response to the user's request, making the conversation more engaging and entertaining. Jokes can also showcase the skill's capabilities and features while providing a unique user experience. Adding jokes to an Alexa skill can also create a more natural conversation flow, allowing the skill to respond to the user's request with a more conversational tone. It can also help increase user engagement and retention, as users are more likely to return to a skill they found entertaining and enjoyable. Here is an example of adding jokes to a joke intent handler: Code snippet: This is the definition of the JokeIntentHandler class. This class is a request handler responsible for handling requests to the "JokeIntent" intent.
Code snippet: In this part of the code, a list of jokes is defined. The list's elements are all strings that each contain a joke. These jokes will be randomly chosen and returned as the skill output when the JokeIntent is triggered. The jokes included in this list are puns and play-on words, which are common jokes used in many Alexa skills. Code snippet: In this part of the code, we are creating a variable speak_output that randomly chooses a joke from the jokes list using the random.choice() method. This will ensure that a different joke is told each time the intent is triggered. We call the speak() method on it to set the speech output as the selected joke and then call the response() method to build and return the response. Then, we return a response using the handler_input.response_builder object. The code in the Editor, looks like this: 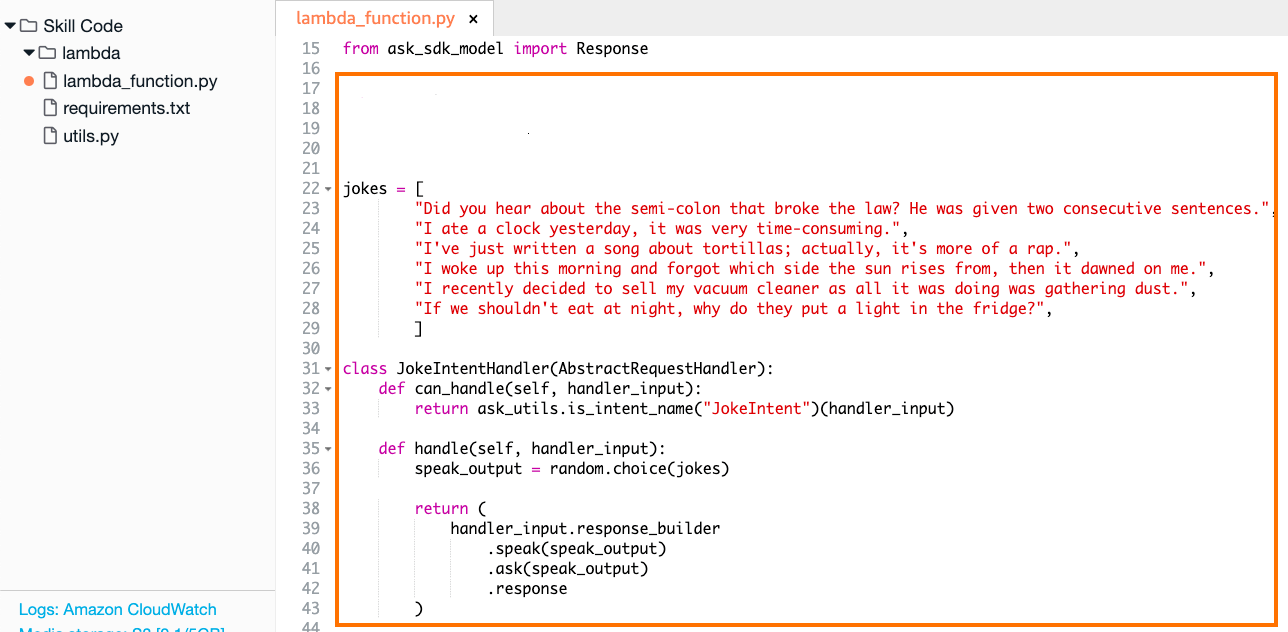
Remember You can write your code with any kind of jokes you like, but the code in the class JokeIntentHandler must be accurate. ConclusionCongrats on starting your Alexa Python developer career! Your own exclusive Alexa Python skill has now been created successfully. You now understand how to develop a new skill, produce intents, implement Python code to manage those intentions, and provide the user with useful data.
Next TopicAppConfig Python
|
 For Videos Join Our Youtube Channel: Join Now
Feedback
- Send your Feedback to [email protected]
Help Others, Please Share


