| |

Image Viewer Application using PyQt5 in PythonAn Image Viewer is a software application that allows users to browse and view an image file. Different kinds of Image Viewing Applications are available in the market for different purposes. For example, most image-viewing software, like Windows Photo Viewer, is designed for viewing only. However, other image viewer applications, like MS Paint, Adobe Photoshop, PhotoDirector 365, and a lot more, offer image editing features in addition to simply viewing. These basic to advanced features include enlarging, shrinking, cropping, or painting on an image. In the following tutorial, we will build an Image Viewer Application with the help of the PyQt5 library in the Python programming language. But before we get started, let us briefly understand what PyQt is. What is PyQt?PyQt is a python binding of the open-source widget-toolkit Qt, which also operates as a multi-platform application development framework. Qt is a famous C++ framework for writing Graphical User Interface (GUI) applications for all major desktop, mobile, and embedded platforms (supports Windows, Linux, MacOS, iOS, Android, Raspberry Pi, and more). PyQt is an open-source software developed and maintained by Riverbank Computing, a company based in England, whereas Qt is developed by a Finnish firm called the Qt Company. Some Features of PyQtPyQt consists of more than six hundred classes covering a wide range of features like:
We can combine these features to create advanced UIs and standalone applications. A lot of major companies across the globe make use of Qt. Some examples are LG, Panasonic, Harman, AMD, Mercedes, and many others. Versions of PyQtThere are two versions of PyQt available for the users - PyQt4 and PyQt5. PyQt4 offers glue code to bind the '4.x' and '5.x' versions of the Qt framework, whereas PyQt5 offers a binding for only the '5.x' versions. Therefore, PyQt5 is not backward compatible with the deprecated modules of the older version. In the following tutorial, we will be using PyQt5 to build the project. How to install PyQt5?In order to install the Python module, we need 'pip', a framework to manage packages required to install the modules from the trusted public repositories. Once we have 'pip', we can install the pyqt5 module using the command from a Windows command prompt (CMD) or terminal as shown below: Syntax: Verifying the InstallationOnce the module is installed, we can verify it by creating an empty Python program file and writing an import statement as follows: File: verify.py Now, save the above file and execute it using the following command in a terminal: Syntax: If the above Python program file does not return any error, the module is installed properly. However, in the case where an exception is raised, try reinstalling the module, and it is also recommended to refer to the official documentation of the module. Let us now start building the project. Prerequisites of the ProjectIn order to start building Image Viewer using PyQt5 in Python, a basic knowledge of the language's syntax and functions is required. Since Python is a High-level Interpreted Object-Oriented Programming language, we will also use the concept of Classes and Objects. Moreover, the following are the modules we will be using throughout the Project:
Building the Image Viewer App in PythonWe will start by creating a new folder as - 'Image Viewer'. Inside this folder, we will create another folder as - 'icons' that will contain all the icons we require for the project and a Python program file as - 'main.py', where we will write the source code of the project. The icons are optional and can be used to make the application look attractive. One can either use the icons of their choice or download the ZIP file containing the icons which we have used in this project from the following link: Click here to download Now that we have set up the structure for the application, it is time for us to open the 'main.py' file and start the coding part. To keep the concept clear and understandable, we have divided the complete project code into different segments. The followings are the steps that we will opt to work on the project. Step 1: First of all, we will import the required modules and classes for the project. Step 2: Secondly, we will create the main window of the application. Step 3: We will then add the text editor and container to the window. Step 4: After that, we will create the Menus and Toolbars. Step 5: At last, we will define the necessary methods and set the event triggers. Let us understand these functions in detail. Importing the necessary modules and classes for the projectWe will start by importing the sys module along with the various classes from different modules of the PyQt5 module. Let us consider the following snippet of code illustrating the same. File: main.py Explanation: In the above snippet of code, we have imported the sys module. We have then imported all the necessary classes from the QtCore, QtWidgets, QtGui, and QtPrintSupport modules of the PyQt5 module. Creating the main window of the applicationNow that we have successfully imported all the required modules and classes for the project, it is time for us to create the main window of the application. We will create a QMainWindow subclass and define an initializing function to configure the window's title, geometry, and icon. File: main.py Explanation: In the above snippet of code, we have defined a subclass of the QMainWindow class. Within this class, we have defined an initializing function to initialize some variables with their default values. We have also inherited the methods from the parent class. Within this function, we have configured the application's title and defined the initial width and height of the application. We then set the window icon and used the resize() function to set the geometry of the application. We have then instantiated the class we created and used the show() method to display the resulting window. We have also used the exit() function of the sys module to operate the closing of the application. Adding the label and the scroll area to the ApplicationWe will now create an object of the QPrinter class that will allow us to print the image. We will define an initial scaling factor. We will then add a label to display the image using the QLabel class. We will also create a scrolling area using the QScrollArea class to enclose the main layout of the application. Let us consider the following snippet of code illustrating the same. File: main.py Explanation: In the above snippet of code, we have created an object of the QPrinter class and defined a variable to store the initial scaling factor. We then created an object of the QLabel class to display the label. We have used the Base constant of the QPalette class as an argument of the setBackgroundRole() method to set the label's background color to display the image. We have then set the size policy of the label with the help of the Ignored constant of the QSizePolicy class passed to the setSizePolicy() method. Then, we created an object in the QScrollArea class to display a scroll bar. We have used the Dark constant of the QPalette class as an argument of the setBackgroundRole() method to set a darker background color for the scroll bar. We have then specified the area to be scrolled by passing the image label to the QScrollArea object's setWidget() method. We have also set the visibility of the scrolling area to False with the help of the setVisible() method. At last, we have used the setCentralWidget() method to set the scroll area as the central widget of the application. Creating the Menus and the ToolbarsWe will now create the menus and the toolbars. These menus and toolbars will help us perform different operations on the text. To keep things simple, we will create a 'File' menu with the file handling operations and a 'View' menu with the operations managing the display of the image and their respective toolbars. We will include the operations such as Open, Print, and Exit in the 'File' menu, whereas the operations like Zoom In, Zoom Out, Normal Size, and Fit to Window in the 'View' menu. File Menu and its toolbar Let us start by creating the File menu and its toolbar consisting of the operations to perform file handling. File: main.py Explanation: In the above snippet of code, we have created the 'File' menu using the addMenu() method and a toolbar using the QToolBar() method. We have then used the setIconSize() method and set the primary size of the icons to be displayed in the toolbar and set this toolbar to the top. We have then created different actions like Open, Print, and Exit using the user-defined make_action() method we will define later in this tutorial. We have also used the setShortcut() method to set a shortcut for the actions. We have also used the addSeparator() method to add a separator between the actions. Moreover, we have passed False to the setEnabled() method to initially disabled the Print action. At last, we have used the addAction() method to add all the created actions to the 'File' menu and toolbar. View Menu and its toolbarWe will now create the View menu and its toolbar consisting of the operations managing the display of the image. File: main.py Explanation: In the above snippet of code, we have created the 'View' menu using the addMenu() method and a toolbar using the QToolBar() method. We have then used the setIconSize() method and set the primary size of the icons to be displayed in the toolbar and set this toolbar to the top. We have then created different actions like Zoom In, Zoom Out, Normal Size, and Fit To Window using the user-defined make_action() method we will define later in this tutorial. We have also used the setShortcut() method to set a shortcut for the actions. We have also used the addSeparator() method to add a separator between the actions. Moreover, we have passed False to the setEnabled() method to initially disabled all the actions. At last, we have used the addAction() method to add all the created actions to the 'View' menu and toolbar. Defining the required methods of the classWe will now define all the necessary methods that we need to execute every action in the application. These methods include opening the image file, printing the image, zooming in, zooming out of the image, setting the normal size, and setting the image to window size. Let us now understand the implementation of each method in detail. Method to open the Image file We will now define the method to open the image file from the directory. Within this method, we will use the QFileDialog class to select the image file from the directory. We will then display the selected image file in the application window. Let us now consider the following snippet of code illustrating the same. File: main.py Explanation: In the above snippet of code, we have defined the method as openImage(). Within this method, we have created an object of the QFileDialog.Options class. We then called the getOpenFileName() method in order to browse the image from the directory. We then checked if the file name was not an empty string and created the object of the QImage class by passing the file name as its parameter. We also checked whether the image file was empty and returned the message box displaying the information. We have then used the setPixmap() method to create an off-screen image representation that can be used as a paint device. We have also set the scale_factor to 1.0 and enabled visibility of the scroll area. We have also enabled the initially disabled different actions and called the user-defined fit_to_window() and update_actions() methods. At last, we have called the adjustSize() method in order to adjust the size of the image if the "Fit To Window" action is unchecked. Method to print the Image file We will now define the method in order to print the image. Within this method, we will use the QPainter and QPrintDialog classes to configure the size of the image as per the aspect ratio and print it. Let us consider the following snippet of code illustrating the same. File: main.py Explanation: In the above snippet of code, we have defined the method as printImage(). Within this method, we have created an object of the QPrintDialog class. We have then checked if the "Print" action is executed and created an object of the QPainter, passing the QPrintDialog's object as its parameter. We then created and used the viewport() method to display the image. We then defined the size of the image and scaled the image to the aspect ratio. We have then set the viewport of the image by calling the setViewport() method. At last, we have also called the setWindow() and drawPixmap() methods. Method to zoom in on the image We will now define the method to zoom in on the image. Within this method, we will call the user-defined scale_image() method to scale the image size per the value passed to it as the parameter. Let us consider the following snippet of code demonstrating the same. File: main.py Explanation: In the above snippet of code, we have defined the method as zoom_in(). Within this method, we have called the user-defined scale_image() method, passing a scaling factor of 1.25 as its parameter. Method to zoom out of the image We will now define the method to zoom out of the image. Within this method, we will call the user-defined scale_image() method to scale the image size per the value passed to it as the parameter. Let us consider the following snippet of code demonstrating the same. File: main.py Explanation: In the above snippet of code, we have defined the method as zoom_out(). Within this method, we have called the user-defined scale_image() method, passing a scaling factor of 0.8 as its parameter. Method to set the size of the image to normal We will now define the method to set the size of the image to normal. Within this method, we will call the adjustSize() method to adjust the size of the image and set the scaling factor to 1.0. Let us consider the following snippet of code demonstrating the same. File: main.py Explanation: In the above snippet of code, we have defined the method as normal_size(). Within this method, we have called the adjustSize() method to adjust the size of the image. At last, we have set the scaling factor to 1.0. Method to set the size of the image to befit the window We will now define the method for setting the image size to befit the window. For this, we will store the retrieved Boolean value from the "Fit To Window" action and configure the scroll area to resize accordingly. We will call the user-defined normal_size() method if the retrieved value is False. Let us consider the following snippet of code illustrating the same. File: main.py Explanation: In the above snippet of code, we have defined the method as fit_to_window(). Within this method, we have defined a variable storing the Boolean value retrieved from the "Fit To Window" action and used the setWidgetResizable() method to resize the scroll area accordingly. We have also called the user-defined normal_size() method if the retrieved value is False. At last, we have called the user-defined update_actions() method. Method to update the actions We will now define the method to enable the actions like "Zoom In", "Zoom Out", and "Normal Size". File: main.py Explanation: In the above snippet of code, we have defined the method as update_actions(). Within this method, we have used the setEnabled() method to enable the actions like "Zoom In", "Zoom Out", and "Normal Size". Method to scale the size of the image We will now define the method to scale the size of the image. This method will accept a parameter as a scaling factor. Within this method, we will multiply the scaling factor every time the user clicks on "Zoom In", "Zoom Out", and "Normal Size" actions and resize the image accordingly. We will also adjust the scroll bar size per the image size. Let us consider the following snippet of code demonstrating the same. File: main.py Explanation: In the above snippet of code, we have defined the method as scale_image() that accepts an argument as sf. Within this method, we have initialized the scaling factor by multiplying it with the value passed to the method. We have used the resize() method to resize the image according to the scaling factor. We have also called the user-defined adjust_scroll_bar() method to adjust the length of the horizontal and vertical scrollbars as per the scaling factor. At last, we have toggled the "Zoom In" and "Zoom Out" accordingly. Method to adjust the length of the scroll bar We will now define the method to adjust the length of the scroll bar as per the scaling factor. This method will accept multiple parameters like the scrollbar that requires adjustments and the scaling factor according to which the scrollbar is adjusted. Inside this function, we will define the formula for adjusting the scrollbar's length. Let us consider the following snippet of code illustrating the same. File: main.py Explanation: In the above snippet of code, we have defined the method as adjust_scroll_bar() that accepts multiple arguments as scroll_bar and scaleFactor. Within this method, we have used the setValue() method passing the formula to adjust the length of the scrollbar according to the scaling factor. Method to create the actions of the menu and toolbar We will now define the last method allowing us to create different actions to handle the files and the text editor. Let us consider the following snippet of code demonstrating the same. File: main.py Explanation: In the above snippet of code, we have defined the function as make_action() that accepts multiple parameters like the object of the parent class, the path where the action icon is located, the name of the action, the message to be displayed in the status bar, and the function to call. Inside the function, we have instantiated the QAction() class in order to create the action. We then used the setStatusTip() method to display the message designated to each action in the status bar. We have then used the triggered.connect() method to call the functions associated with different actions. At last, we have returned the object of the QAction() class. Hence, the project code is now completed. We can save the file and run the following command in a command shell or terminal to see the output. Syntax: Before we see the output, let us consider the complete code of the "Image Viewer using PyQt5" project in Python. The Complete Project CodeThe following is the snippet of code of the "Image Viewer using PyQt5" project in the Python programming language. File: main.py Output: 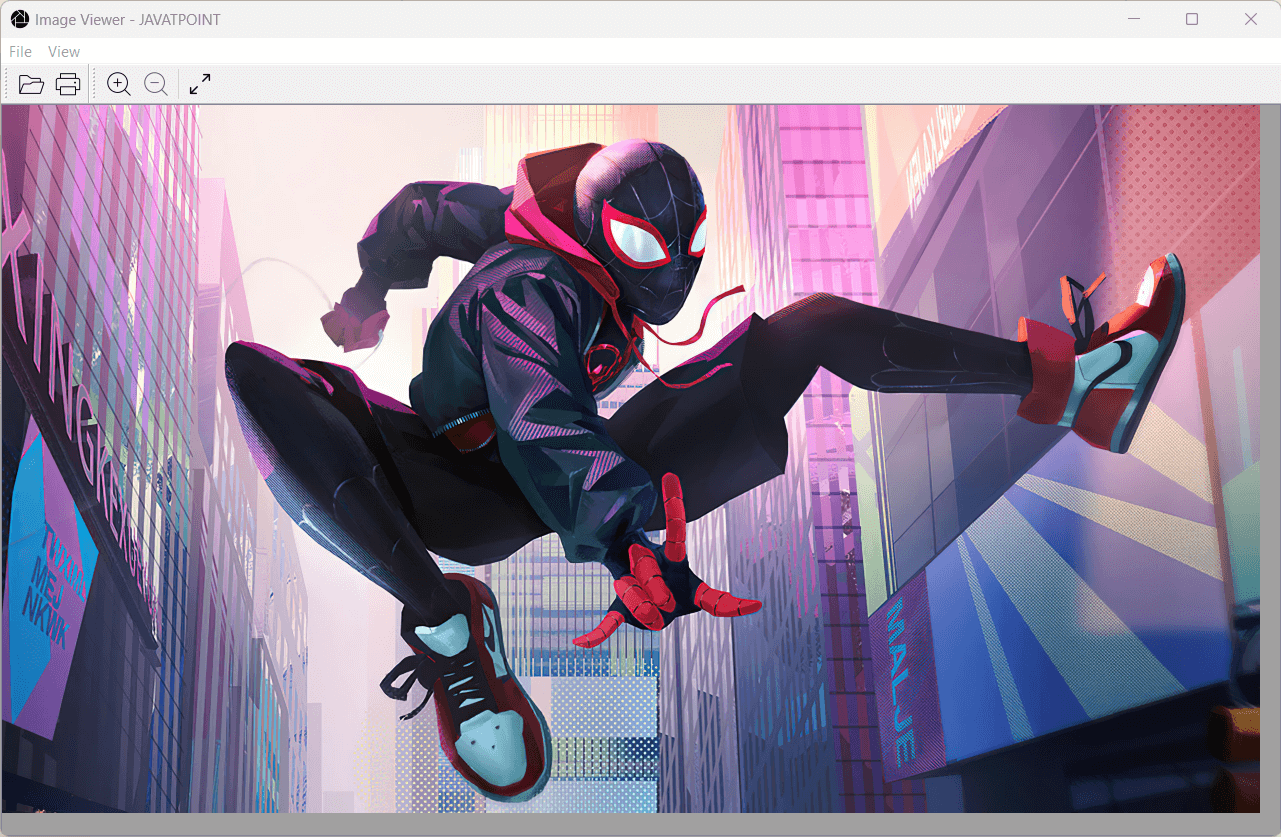
Next TopicBest Compilers for Python
|
 For Videos Join Our Youtube Channel: Join Now
Feedback
- Send your Feedback to [email protected]
Help Others, Please Share


