| |
Python Tutorial
Python OOPs
Python MySQL
Python MongoDB
Python SQLite
Python Questions
Plotly
Python Tkinter (GUI)
Python Web Blocker
Python MCQ
Related Tutorials
Python Programs

Visualizing DICOM Images using PyDicom and Matplotlib in PythonDICOM, Digital Imaging and Communications in Medicine, is the standard language of Medical Imaging Systems. Whenever we hear the term "DICOM", some might think of it as just medical images. However, Healthcare Analysts/Data scientists may consider it as treasury as any other medical Dataset as it goes beyond pixels data. A DICOM file consists of valuable data associated with the patient, the imaging modality, and other important stuff. Working with DICOM metadata and accessing particular attributes is advantageous for anyone, including the analysts/data scientists handling the DICOM files. Fortunately, PyDicom offers various functions, methods, and attributes on DICOM files. PyDicom is a powerful Python package to work with DICOM files like medical reports, images, and radiotherapy objects. The PyDicom package allows the user to read and write these complex files easily into natural pythonic structures for easy manipulation. In the following tutorial, we will learn how to visualize DICOM Images in the Python programming language using the PyDicom and Matplotlib packages. Installing the Required PackagesFirst of all, we will install the following packages:
Let us install these packages using the PIP installer by running the following commands in the command prompt: Syntax: Verifying the InstallationOnce the module is installed, we can verify it by creating an empty Python program file and writing an import statement as follows: File: verify.py Now, save the above file and execute it using the following command in a terminal: Syntax: If the above Python program file does not return any error, the package is installed properly. However, in the case where an exception is raised, try reinstalling that package, and it is also recommended to refer to the official documentation of both packages. A Step-by-Step Implementation to visualize the DICOM Image in PythonThe following is the step-by-step approach that we will use in order to visualize the DICOM Image using the PyDicom and Matplotlib packages: Step 1: Firstly, we will import the required modules. Step 2: Secondly, we will then read the DICOM data. Step 3: At last, we will visualize the DICOM image in 2D. Let us start understanding the above steps in detail. Importing the Necessary ModulesWe will start by importing the necessary modules. These modules include the pydicom and data module from the PyDicom package and the pyplot module from the Matplotlib package. The following is the snippet of code demonstrating the same: File: example.py Explanation: In the above snippet of code, we have imported the required modules like pydicom, pydicom.data, and matplotlib.pyplot. Reading the DICOM DataNow that we have imported the necessary modules, we will read the DICOM Data file using the pydicom.data.data_manager.get_files() method. Syntax: Parameters:
We will also use the dcmread() method of the pydicom module to read and parse the DICOM dataset. Let us consider the following snippet of code illustrating the same. File: example.py Explanation: In the above snippet of code, we have defined some variables specifying the base address of the DICOM data file. We have then used the pydicom.data.data_manager.get_files() method to select the DICOM image name for the pattern and use the dcmread() method to read and parse the DICOM dataset. 2D Visualization of DICOM Image Moving onto the final step, we will now visualize the DICOM Image in 2D using the imshow() method of the matplotlib.plot module. We will also use the show() method to display the final 2D image. Let us consider the following snippet of code illustrating the same. File: example.py Explanation: In the above snippet of code, we have used the plot.imshow() method to visualize the DICOM dataset in 2D and set the color map to the bone. We then used the plot.show() method to display the final 2D image. Now that we have successfully written the code, it is time to see the output. But before that, the complete program code is given below for convenience. The Complete Program CodeFile: example.py Output: $ python example.py 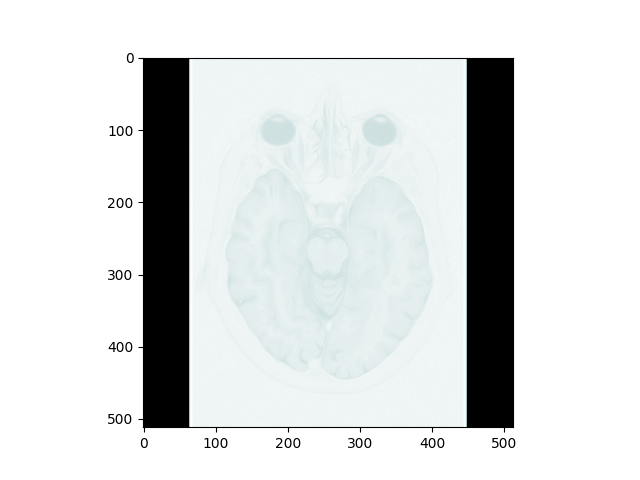
The ConclusionIn the above tutorial, we learned how to visualize the DICOM Image file in 2D using the PyDicom and Matplotlib packages in Python. |
 For Videos Join Our Youtube Channel: Join Now
Feedback
- Send your Feedback to [email protected]
Help Others, Please Share


