| |
Python Tutorial
Python OOPs
Python MySQL
Python MongoDB
Python SQLite
Python Questions
Plotly
Python Tkinter (GUI)
Python Web Blocker
Python MCQ
Related Tutorials
Python Programs

Spell Corrector GUI using Tkinter in PythonWhen we write letters, emails, etc., we all commit spelling errors, or what we call typos. Even while writing this piece, many errors were made. To aid that, in these situations, we rely on the assistants or some applications. Do you know that using Python, you can create a system to fix your spelling by going through a few easy steps? In this Python Spell Corrector Application, we will follow this example only. A Python programme called Spell Corrector, often known as Spell Checker, determines if a word has the right spelling or not. In this Python project, we'll build a spell checker and corrector that can input a word and produce a term that sounds close to it. Python provides a variety of choices for GUI development (Graphical User Interface). Tkinter is the approach used the most frequently among all GUI approaches. The fastest and simplest approach to construct GUI apps is with Python and Tkinter. This article will provide a step-by-step tutorial on how to develop a GUI Spell Corrector application using Tkinter. Let's get going! The Spell Corrector Application :The goal of Spell Corrector is to identify terms that are similar to a word that is entered. A list of terms that most closely resemble the input word is shown by a spell checker entry box. The same term is shown if the input word is correct. We may locate terms that are comparable to the input words by clicking a button present on the screen. Details about the Python Spell Checker project :The application's goal will be to develop a spell-correcting application. There will be a GUI for the programme. We'll include a place for entering the term in the GUI. When a button is pressed, the terms that is most similar to the input word will be displayed in the entry box. Requisites of the Project :We'll be utilising the Python TextBlob and Tkinter libraries to develop this project. The GUI for gathering the user's input and displaying the output depending on the entered spelling is built using the Tkinter module. And we'll use the TextBlob module to do this check. When creating this module, previous Python and Tkinter module expertise would be beneficial. The following commands can be used to install the two modules as it is shown just below. Steps to be followed to develop the Python Spell Corrector GUI :Every project needs a step-by-step flow from the developer to make the work easier. We will now talk about how this Python project flows.
So, let's get started. Importing Tkinter and TextBlob modules :The Tkinter and the TextBlob modules were imported from the standard Python library to be used in our code. Tkinter module will be used for creating the GUI window and adding widgets to our application and the TextBlob module will be used correcting the incorrect word provided by user. Creating the functions that verifies the spelling and outputs correct result :Here, we first created the clrAll() method to clear all the text from the entry box containing texts from the previous entries. This was done using the delete() method on the entry boxes word1_place and word2_place, for emptying the entry boxes. Then, we created a function called crction() in order to display the correct word in an entry box. Along with that, the input word from the user was stored in the input_wrd variable. Then using a TextBlob object was created and stored in the variable blob_objct. Next, the blob_objct was used to correct the wrong word and was stored in the variable crctd_word. And finally, the corrected word was displayed in the entry box allotted for it by the help of the insert() method. Develop the GUI and incorporate the necessary widgets :Then, we created the GUI window, by creating an instance or object of the Tkinter module. Then we used the configure() method in order to set colour of the background of the window to light green. We also used the geometry() method which helped to set the dimensions of the window to be displayed on the screen. Lastly, with the help of the title() method, we were able to give a title to our window created as "Spell Corrector" . Next, we started creating the labels. First of all, we created a heading label for the application using the label() method and was stored in the variable headlbl. The various specifications of this label were set using the keyword text to provide display text, fg to give text colour as black and bg to give background colour as red. Then, we created another label, for the input of a word using the label() method and that was stored in the variable lbl1. The various specifications of this label also were set using the keyword text, fg and bg similar to the previous label. And lastly, we created another label, for the corrected word to be displayed, using the label() method and that was stored in the variable lbl2. The various specifications of this label also were set using the keyword text, fg and bg similar to the previous label. Then, we used the grid() method in order to position the created labels appropriately, by mention row, col, and padx, the padding along the x-axis. After that, we created two entry boxes word1_place and word2_place using the Entry() method. Here, word1_place was used for entering a word by the user and the word2_place was used to display the corrected word for the user entered word. These boxes were also positioned appropriately using the grid() method along with its keywords row, col, padx and pady. Next, we created two buttons, btn1 and btn2, to act as event triggers. The btn1 was used to show the corrected word for the user entered word and the btn2 was used to clear all the entry boxes before entering a new word. Both of these buttons were positioned using the grid() method along with its keywords like text, bg, fg and command. The command keyword was used to call a previously created function after the clicking of the buttons, i.e triggering a function. Complete Code :Output : The screenshots of the output of the above created Spell Corrector Application are attached below. 1. The initial window when it is first loaded or after we click the Clear button. 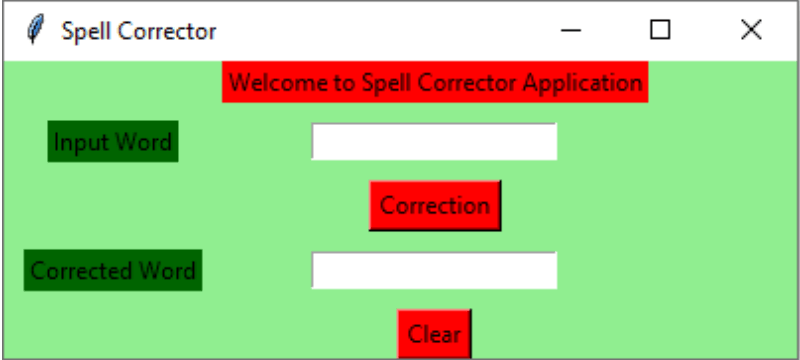
2. View of the window after we enter a word and click the Correction button. 
Next TopicData Structures and Algorithms in Python
|
 For Videos Join Our Youtube Channel: Join Now
Feedback
- Send your Feedback to [email protected]
Help Others, Please Share


