| |

File Explorer using Tkinter in PythonIn the following tutorial, we will learn how to build a GUI-based File Explorer with the help of the Tkinter, OS, and Shutil modules of the Python programming language. This project is suitable for beginners, and all we need is some brief knowledge associated with all the libraries. We will get to apply them in real life with this project. So, let's get begun. What is a File Explorer?A File Explorer or File Manager is an application that allows users to manage files and folders on the device. File manager applications allow the users to view, edit, copy, delete, or move files and folders. The users can also manage files and folders on the attached disks as well as networked storage. Project PrerequisitesIn order to start building the GUI-based File Explorer project in Python, we will require the following libraries.
Since all these libraries come pre-installed with Python, there is no need for us to install them separately. Building the File Explorer using Tkinter in PythonThe procedure of building the File Explorer in Python is divided into several steps for better understanding. The steps we will need to execute are as follows: Step 1: We will start by importing the required modules. Step 2: We will then define the functions to execute different operations in the application. Step 3: We will then create a main window for the application. Step 4: We will add widgets to the window and set the event triggers. Let us now understand these steps in detail. Importing the necessary modulesFirstly, we will import all the required modules for the project. These modules include all the modules and widgets from the Tkinter library, the os module, and the shutil module. Let us now consider the following code snippet illustrating the implementation of the same. File: fileExplorer.py Explanation: We have imported all the modules and widgets from the Tkinter library in the above code snippet. We have also imported the messagebox module from the Tkinter library as mb and filedialog module as fd. The messagebox module is a compilation of functions that display various kinds of messages with different icons. The filedialog module is a compilation of open and saves dialog functions. At last, we have then imported the os module and the shutil module. Defining the functions necessary to implement operations in the applicationOnce all the required modules are imported, it is time for us to define various functions to implement certain operations in the application. We will define the functions to open a file, copy a file, delete a file, rename a file, open a folder, delete a folder, move a folder, and list all the files present in the folder. Let us now consider the following code snippets and understand the implementation of all these functions. Opening a FileThe first function we define will allow us to open any selected file. We will use the askopenfilename() method of the Tkinter's filedialog module to select a file. We will then use the startfile() method of the os module to open the selected file. The following is the snippet of code demonstrating the same. File: fileExplorer.py Explanation: In the above code snippet, we have defined a function as openFile(). Within this function, we have selected a file with the help of the filedialog's askopenfilename() method. We have then used the startfile() method of the os module to open the selected file. We have also used the abspath() method on the selected file to normalize the version of the file path. Copying a fileWe will now define another function to copy a file to a directory. We will start by selecting the file to copy and a destination to paste it. We will then use the copy() method of the shutil module and return a message box displaying the success message. Let us consider the following snippet of code demonstrating the same. File: fileExplorer.py Explanation: In the above snippet of code, we have defined a function as copyFile(). Within this function, we have used the askopenfilename() method of the filedialog module and selected the file to copy. We have then used the askdirectory() method to select the directory where we will paste the selected file. We then used the try-except method and the copy() method of the shutil module to paste the selected file to the desired directory. We have also displayed the message box showing the message for the successful operation using the showinfo() method or failed operation using the showerror() method of the messagebox module. Deleting a fileWe will now define a function to delete a file from the directory. We will start by selecting the file from the directory. We will then delete that file using the remove() method provided by the os module and display a message box showing a success message. Let us now consider the implementation of the same in the following code snippet. File: fileExplorer.py Explanation: In the above snippet of code, we have defined a function as deleteFile(). Within this function, we have used the filedialog's askopenfilename() method to select the file from the directory. We have then used the remove() method of the os module to delete the selected file. We have then used the showinfo() method of the messagebox module to display a success message. Renaming a fileWe will now define a function to rename a file. We will start by creating a pop-up window where the user will select the file from the directory and rename it. Let us consider the following snippet of code illustrating the same. File: fileExplorer.py Explanation: In the above code snippet, we have defined a function as renameFile(). Within this function, we have created a pop-up window using the Toplevel() class, specifying its parameter as win_root, the application's main window. We have then set the title, size, and position of the window. We have also disabled the resizable option of better UI and set the background color to #F6EAD7. We have then created a label, an entry field, and a button with the help of the Label(), Entry(), and Button() widgets of the Tkinter library and set their master parameters to the object of the Toplevel() class, i.e., rename_window. We have then set the positions of these widgets on the window using the pack() method. We have set the textvariable parameter of the Entry() widget to the object of the StringVar() class, i.e., enteredFileName. We have also set the command parameter of the Button() widget to the submitName() function, allowing us to rename the file. We have then defined another function as getFilePath(). Within this function, we have used the askopenfilename() method of the filedialog module and stored the path of the file in a variable named the_file. We have then returned this variable. Last function we have defined is submitName(). This function will be called when the user clicks the submit button we created in the renameFile() function. Within this function, we have used the get() method to retrieve the value from the enteredFileName object and the set() method to set the value to an empty string. We have then called the getFilePath() method and stored the returned path in a variable. We have then used the os.path.join() method and append the directory path with the new file name and the extension. We then used the rename() method to rename the file. At last, we have used the messagebox's showinfo() method to display a success message for the users. Opening a FolderWe will now define a function to open a folder. This function will use the askdirectory() method of the filedialog module to select the folder and open the file using the startfile() method of the os module. Let us consider the following snippet of code illustrating the same. File: fileExplorer.py Explanation: In the above code snippet, we have defined a function as openFolder(). Within this function, we have used the filedialog's askdirectory() method to select the desired folder. We have then used the startfile() method of the os module to open the selected folder. Deleting a folderWe will now define a function to delete the selected folder. This function will use the rmdir() method of the os module to remove the directory from the system. Let us consider the following snippet of code illustrating the same. File: fileExplorer.py Explanation: In the above code snippet, we have defined a function as deleteFolder(). We have then used the askdirectory() method of the filedialog module to select the desired folder. We have then used the rmdir() method of the os module to remove the select folder from the directory. We have then displayed a success message using the messagebox's showinfo() method. Moving a folderWe will now define a function to move a folder from its location to another location. This function will use the move() method of the shutil library to move the request folder to the desired destination. Let us consider the following snippet of code illustrating the same. File: fileExplorer.py Explanation: In the above snippet of code, we have defined a function as moveFolder(). Within this function, we have used the askdirectory() method of the filedialog twice in order to select the desired folder and the destination where the folder will be moved. We have also displayed a message using the showinfo() method of the messagebox module. We have then used the try-except method, where we utilized the move() method specifying the selected folder and the destination for its relocation. We have also displayed a success message with the help of the showinfo() method and the failure message using the showerror() method of the messagebox module. Listing the files in a folderWe will now define a function to list all the files in a folder. This can be done using the listdir() method of the os module, iterating through all the files and printing them. We can also create a pop-up window to display all the file details. Let us consider the following snippet of code illustrating the same. File: fileExplorer.py Explanation: In the above code snippet, we have defined a function as listFilesInFolder(). We have then initialized the variable with an initial value of 0. We have then used the filedialog's askdirectory() method to select the desired folder. We have then used the listdir() method of the os module and stored the list of files in a variable. We have then created an object of the Toplevel() class of the Tkinter library. We have also set the title, size, position, and background color and disabled the resizable option. We then created a list box using the Listbox() widget and the place() method to place the list box on the window. We then created a scrollbar using the Scrollbar() widget and used the pack() method to place it on the right side of the list box. We have then used the config() method of the Listbox's object and set the value of the yscrollcommand parameter to the the_scrollbar.set attribute. We then used the while loop to iterate through the list of files and the insert() method to insert the details of the files in the list box. Creating the main window for the applicationWe will now create a main window for the application. This window can be constructed using the Tk() class of the Tkinter library. We will also set a title, size, position, and background color. Let us consider the following snippet of code illustrating the same. File: fileExplorer.py Explanation: In the above code snippet, we created an object of the Tk() class. We have then used the title() method to set the title of the application. We have also used the geometry() method to set the size and position of the application. We have also set the parameter values to zeroes of the resizable() method to disable the resizable option. At last, we have set the background color to #D8E9E6 using the configure() method. Adding Widgets to the main window and setting the event triggersOnce the application's main window is created, it is time for us to add some widgets and set the event triggers. We will start by adding the frames to the window to provide the structure to other widgets like labels and buttons. We will then add a label displaying the heading and different buttons manipulating the functions we created earlier. Creating FramesWe will begin by adding some frames to the main window. These frames will provide the structure to the widgets we will define later. We can create a frame with the help of the Frame() widget of the Tkinter library. Let us consider the following snippet of code illustrating the implementation of the Frame() widget. File: fileExplorer.py Explanation: In the above snippet of code, we have created some frames using the Frame() widget. We have also specified the master parameter of this widget to win_root, an object of the Tk() class and set the background color to #D8E9E6. We then used the pack() method to place the frames in the window. Creating a LabelWe will now create a label to display the heading for the application. A label can be created using the Label() widget. Let us consider the following code snippet illustrating the implementation of the Label() widget. File: fileExplorer.py Explanation: We created a label using the Label() widget in the above code snippet. We have set the master parameter of this widget to the header_frame frame we defined earlier. We have also set the text, font style and size, background color, and foreground color. At last, we have used the pack() method to position this label in the window. Creating buttonsWe will now add some buttons to the application using the Button() widget. These buttons will allow us to manipulate the functions we created earlier. The following is the snippet of code illustrating the implementation of the Button() widget. File: fileExplorer.py Explanation: In the above code snippet, we have created various buttons using the Button() widget and set their master parameters to buttons_frame, a frame we defined earlier. We have also set the text to display for each button, along with the font style and size. We have also set the button widget, background color, foreground color, button appearance, and background and foreground color when clicking a button. We have also set the value of the command parameter to the functions they will call. At last, we have used the pack() method and set the value of the pady parameter to 8 to position the buttons in the application. Running the applicationOnce the structure of the application is ready, it is time for us to create an object of the StringVar() class that will accept the string entered in the entry field that we will use for renaming a file. We will then call the mainloop() method of the Tk() class to run the application. Let us consider the following snippet of code demonstrating the implementation of the above statement. File: fileExplorer.py Explanation: In the above snippet of code, we have created an object of the StringVar() class and used the mainloop() method along with win_root, the object of the Tk() class, to run the application. Hence, we have successfully created the file explorer with GUI using Tkinter in Python. We can now save the Python project file and execute the following command to see the result. Syntax: Before we see the output, let us see the complete snippet of code of the "File Explorer using Tkinter" project in Python. The Complete Project CodeThe following is the complete snippet of code for the "File Explorer using Tkinter" project in Python. File: fileExplorer.py Output: Image 1: The main window of the File Explorer Application 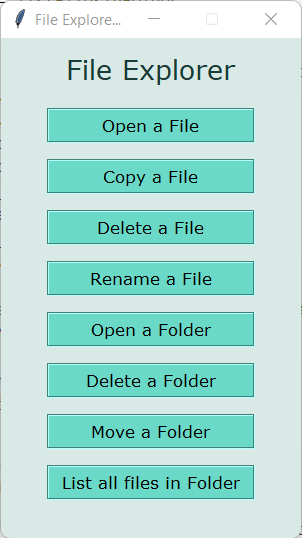
Image 2.1: Opening a File 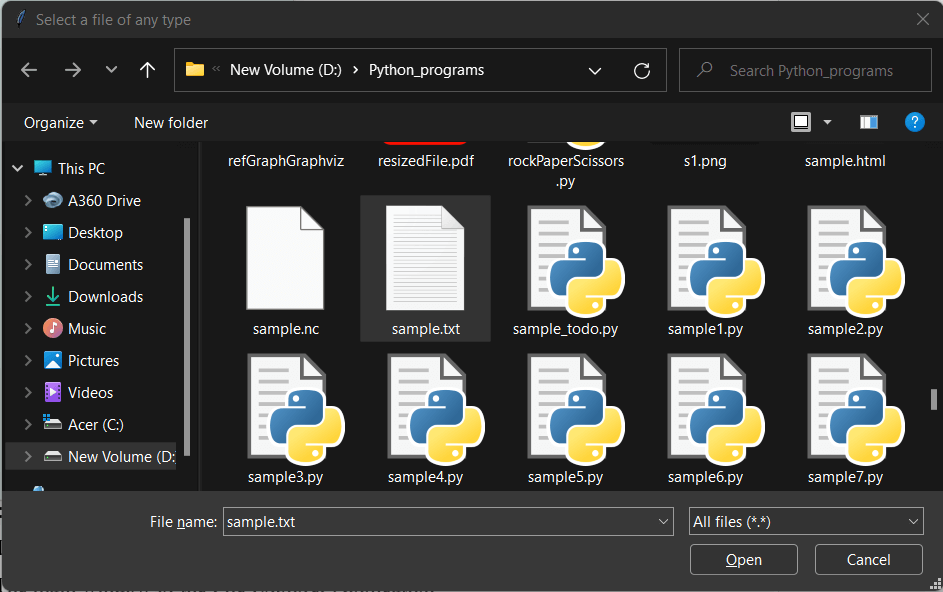
Image 2.2: Displaying the selected file 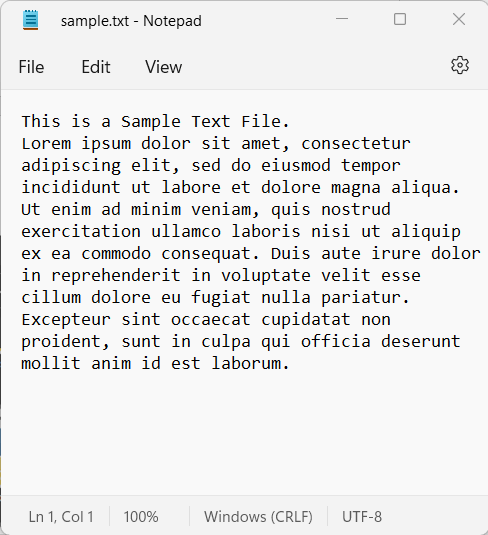
Image 3.1: Copying the file 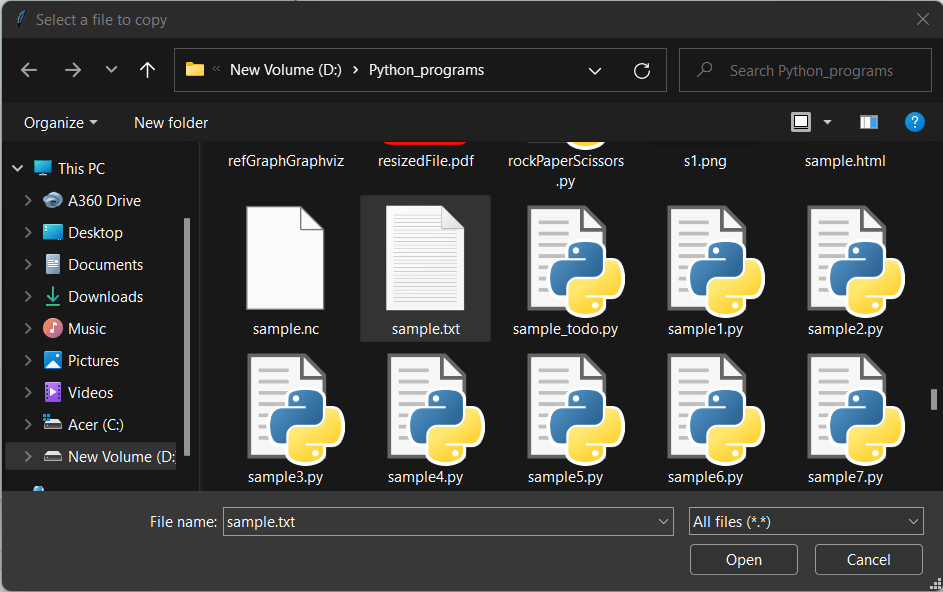
Image 3.2: Selecting the folder to paste the file 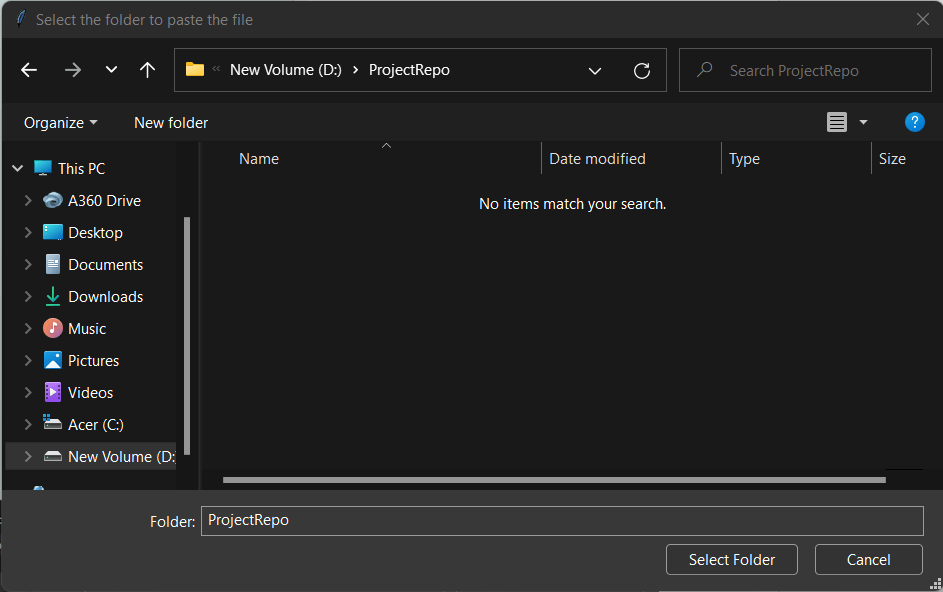
Image 3.3: Displaying a message box to print a success message on copying the file to the destined location. 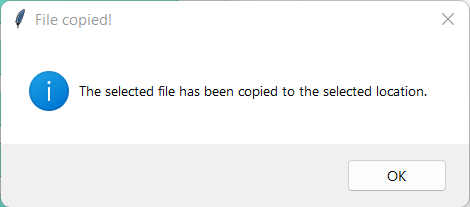
Image 4.1: Deleting a file from the directory 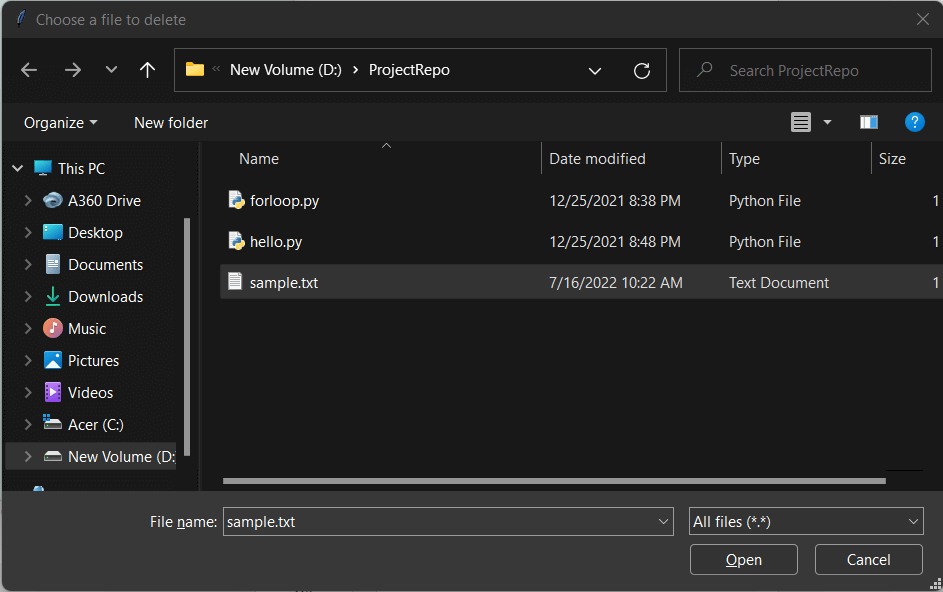
Image 4.2: Displaying the message box to print a success message on the deletion of the file. 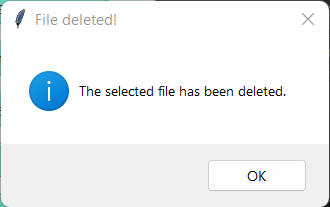
Image 5.1: Renaming a File 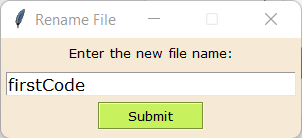
Image 5.2: Selecting the file to rename 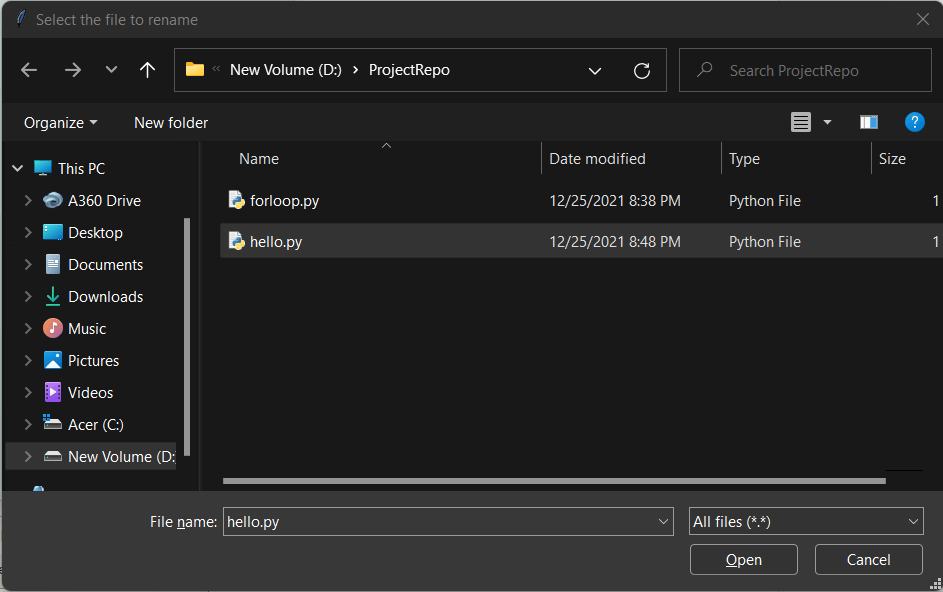
Image 5.3: Displaying the message box to print a success message on the renaming of the file. 
Image 6.1: Opening the folder 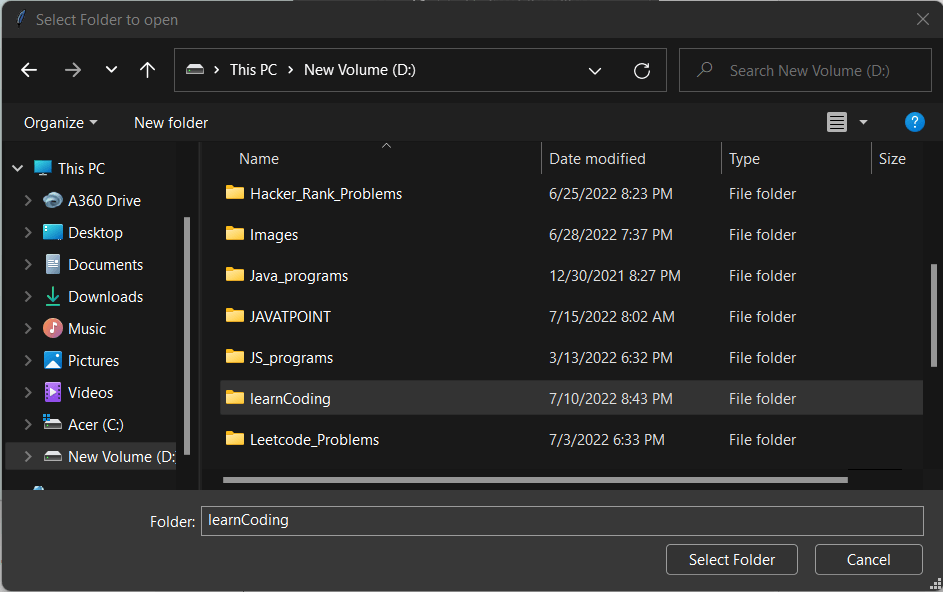
Image 6.2: Displaying the selected folder 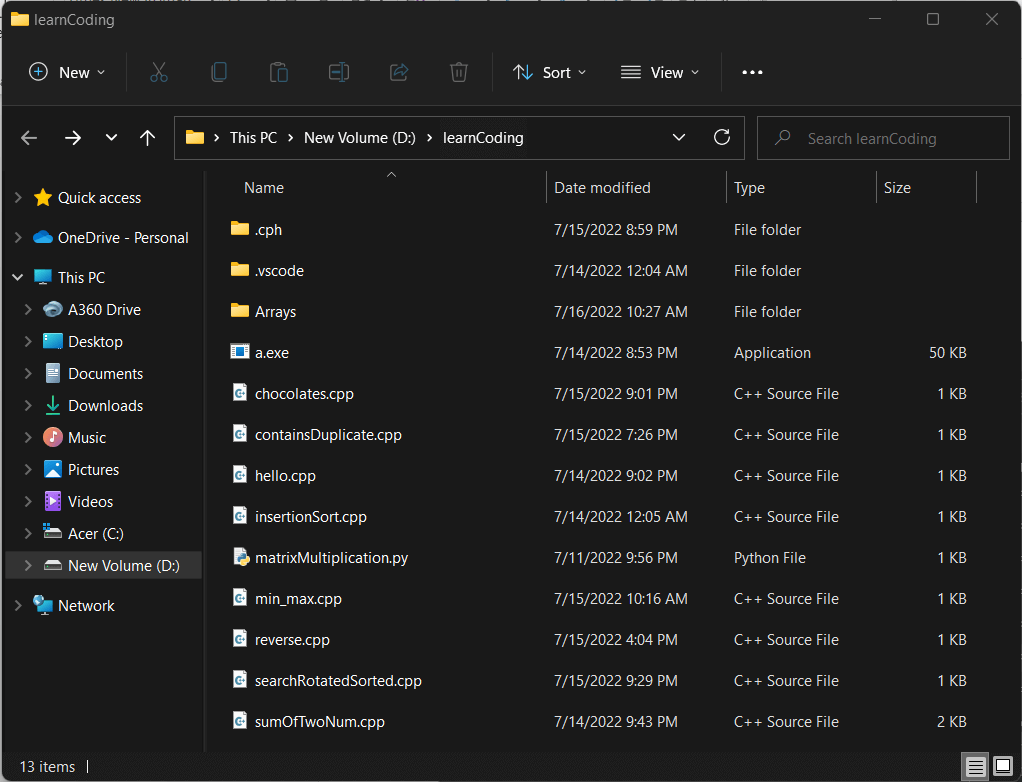
Image 7.1: Deleting a folder from the directory 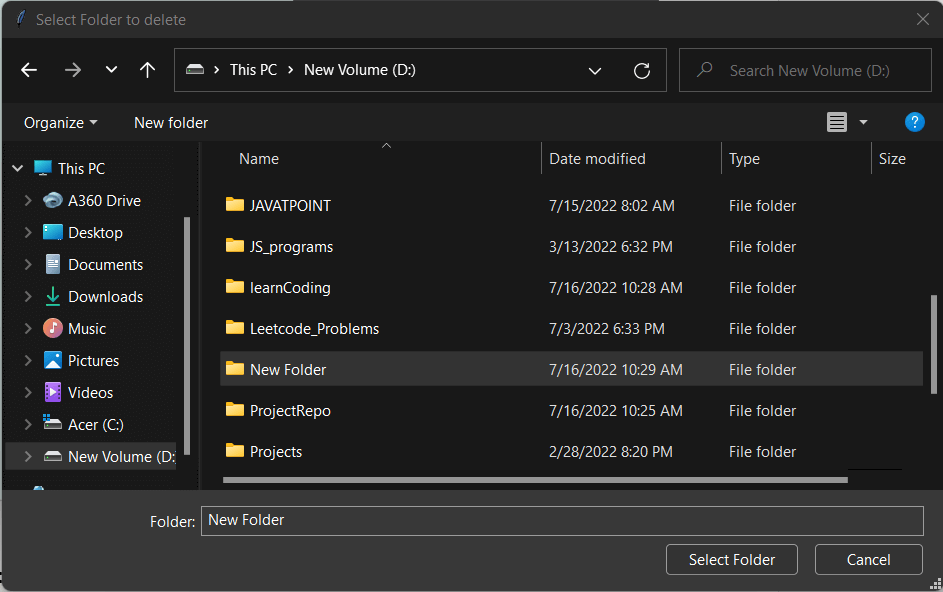
Image 7.2: Displaying the message box to print a success message on the deletion of the folder. 
Image 8.1: Moving the folder. 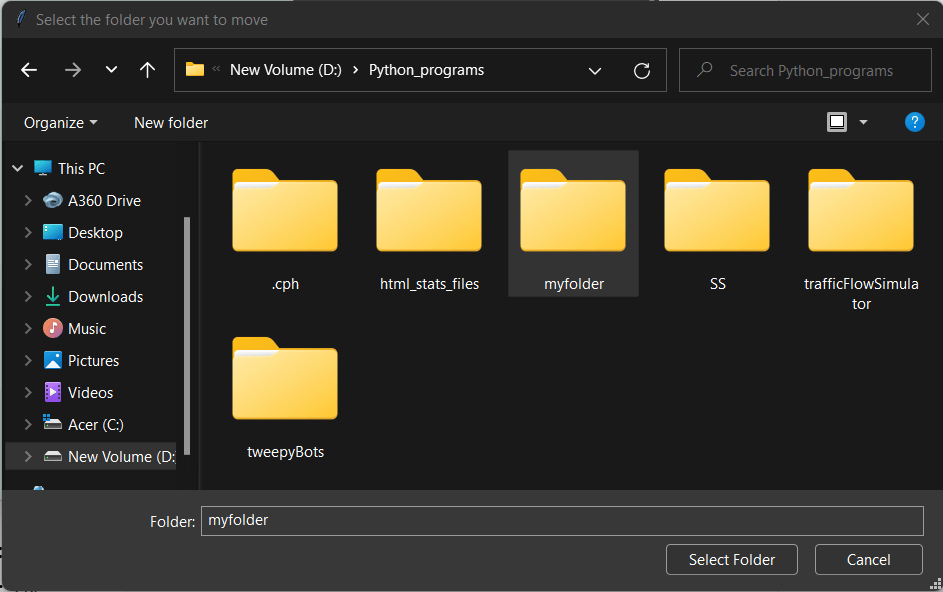
Image 8.2: Displaying the message box to print a success message on the selection of the desired folder. 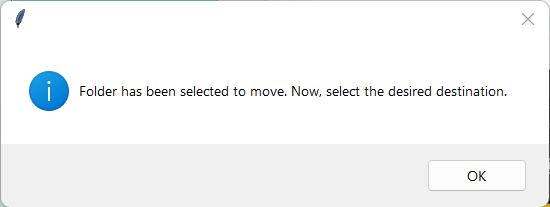
Image 8.3: Selecting the destination for moving the folder. 
Image 8.4: Displaying the message box to print a success message on the moving of the file. 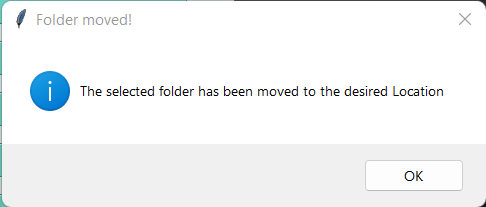
Image 9.1: Selecting the folder to list all the files. 
Image 9.2: Displaying the list box window listing all the files available in the selected folder. 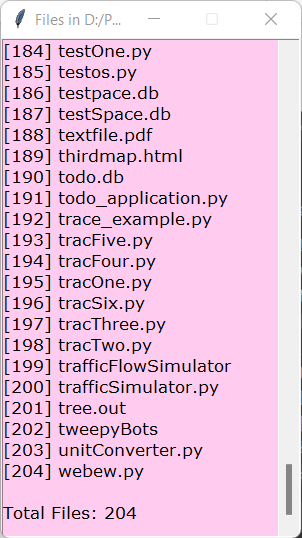
Next TopicAutomated Trading in Python
|
 For Videos Join Our Youtube Channel: Join Now
Feedback
- Send your Feedback to [email protected]
Help Others, Please Share


