| |

GUI Assistant using Wolfram Alpha API in PythonThe Wolfram Alpha Webservice API offers a web-based Application Programming Interface (API), allowing the computational and presentation skills of Wolfram Alpha to be integrated into enterprise, desktop, mobile, and web applications. Wolfram Alpha is an API that can calculate expert-level answers with the help of the algorithms, knowledgebase, and Artificial Intelligence (AI) technology of Wolfram which is made possible by the Wolfram Language. In the following tutorial, we will learn how to build a GUI assistant application in Python which can answer simple questions. But before we start building the project, let us understand the procedure of creating the Wolfram Alpha API ID. Creating the Wolfram Alpha API IDThe following is the step-by-step procedure to create the Wolfram Alpha API ID. Step 1: We will start by creating an account at the official website of Wolfram alpha. The link of the same is as follows: https://account.wolfram.com/auth/create. 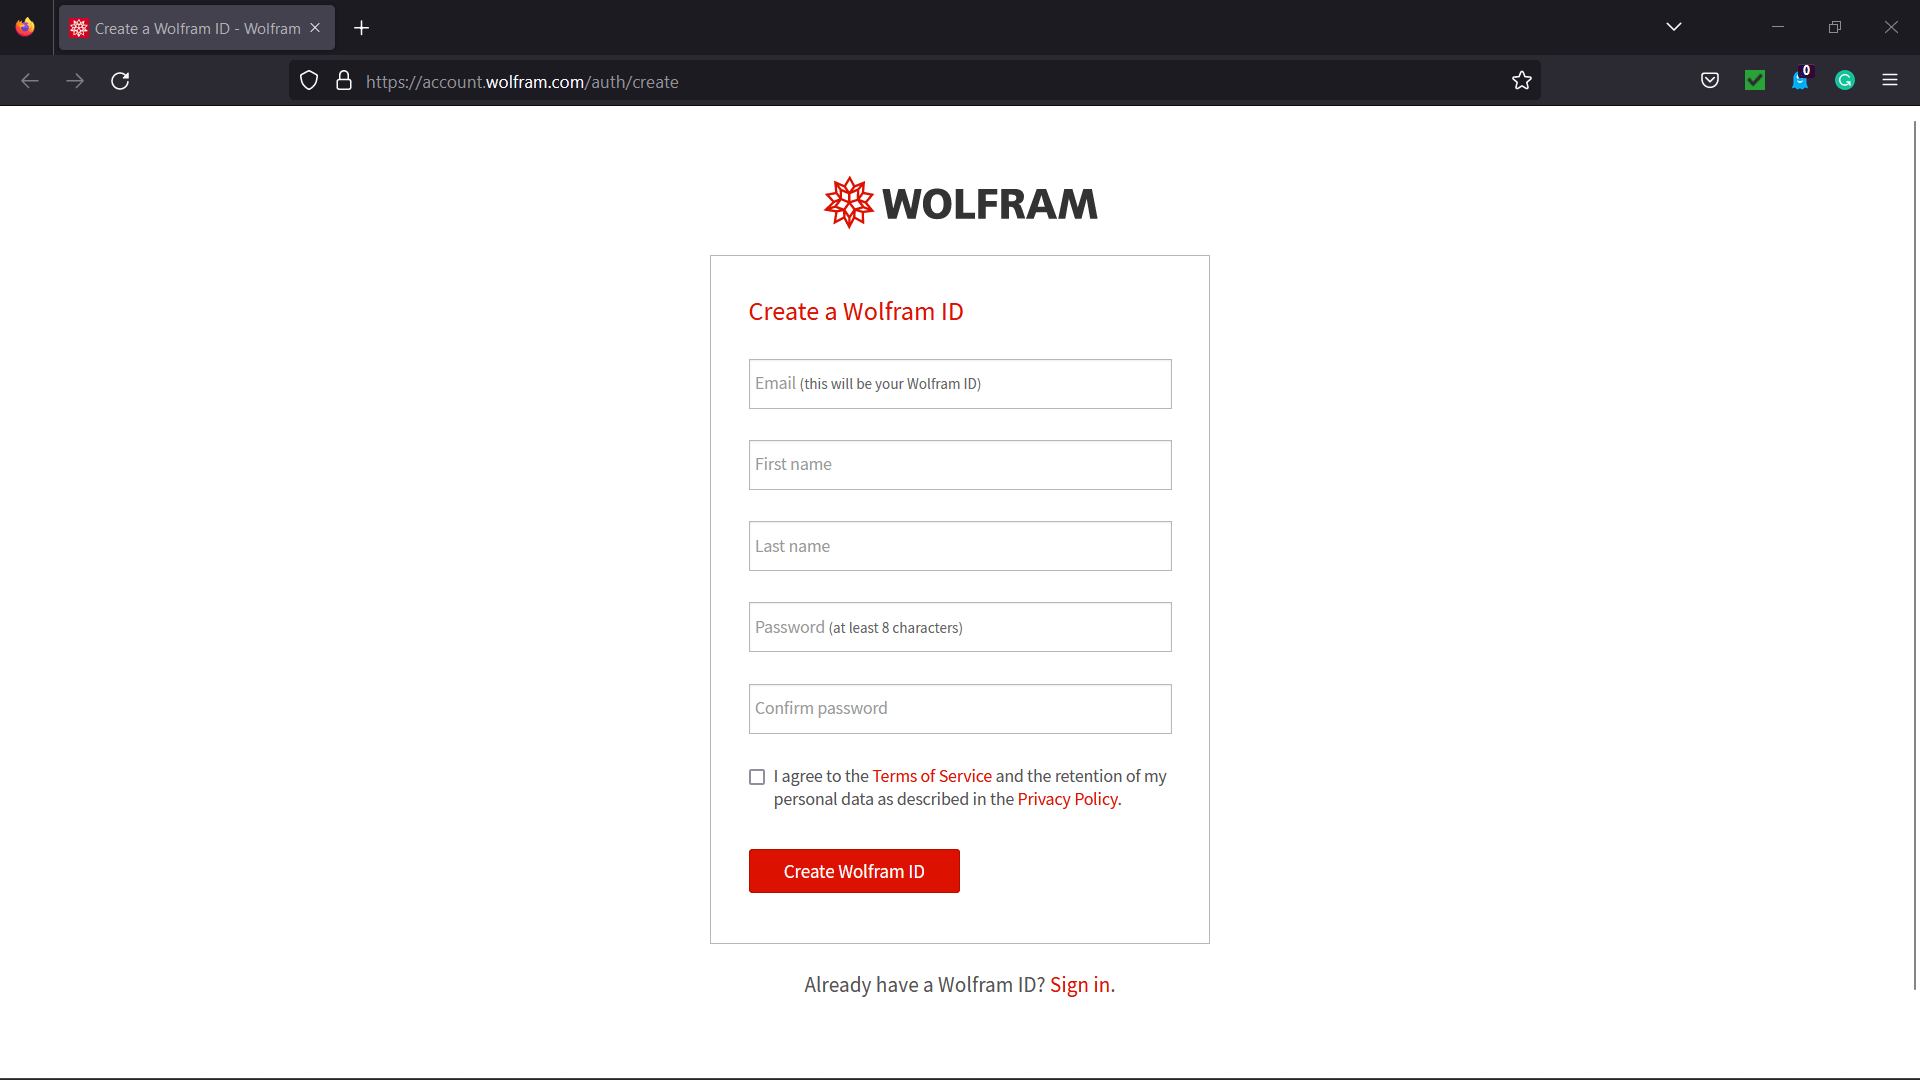
Step 2: Once we have successfully signed up at Wolfram Alpha, we will be redirected to the 'Sign In' page. We will log in by entering the registered E-mail ID as the Wolfram ID. 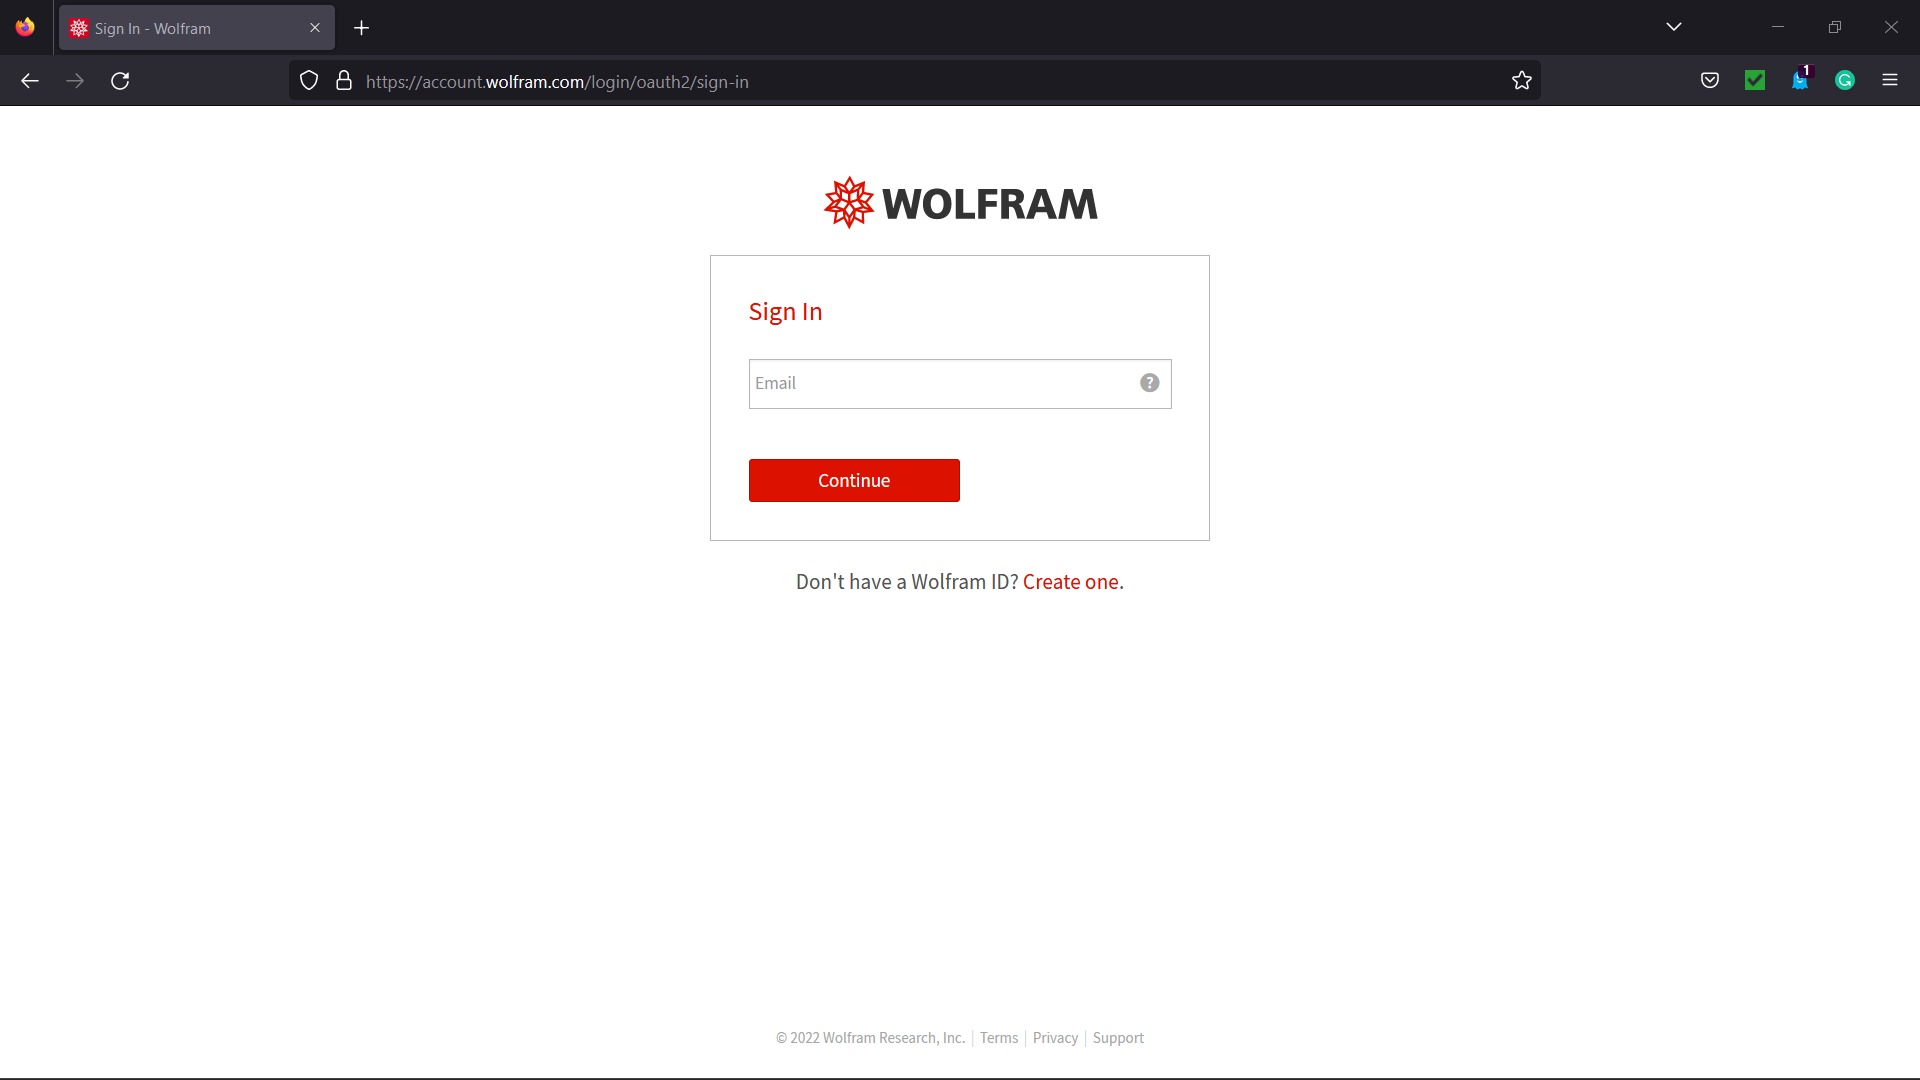
We will now get redirected to the homepage of the website. 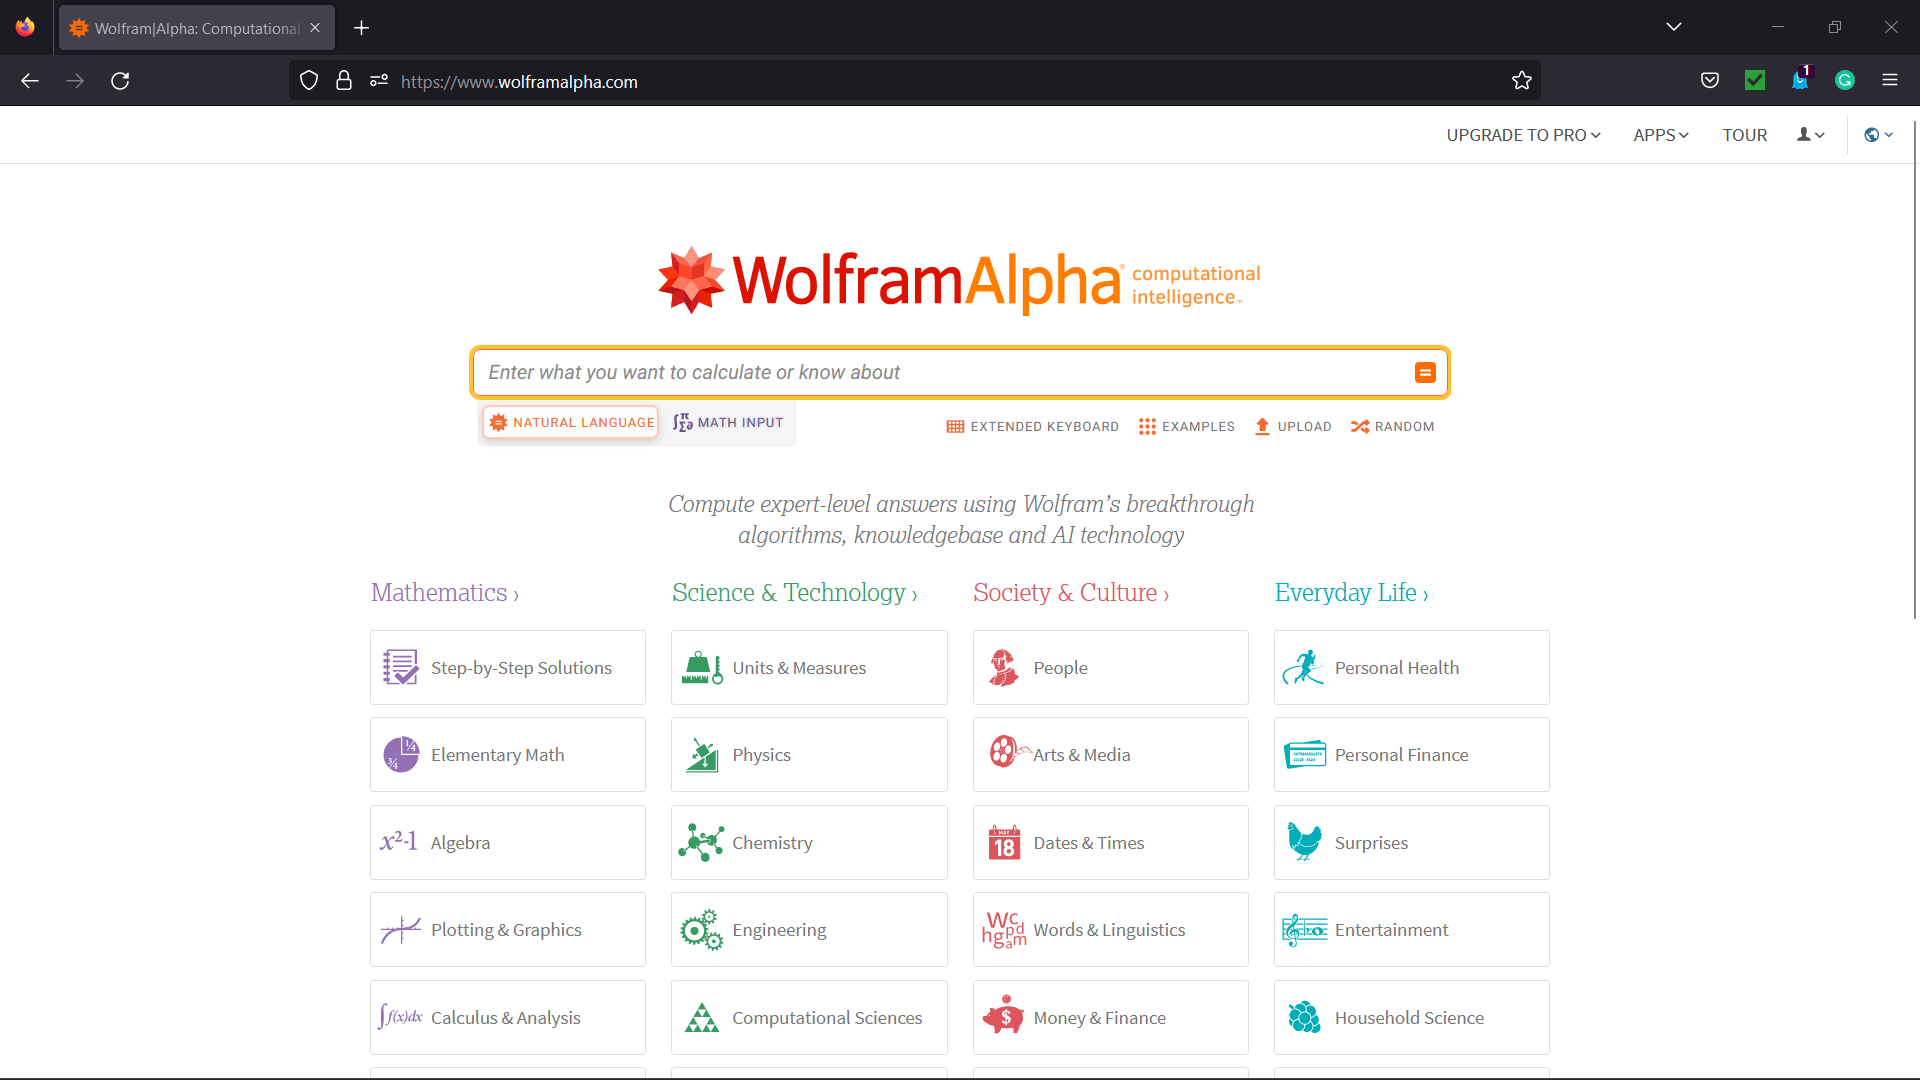
Step 3: We will head to the account section in the top right corner. We will select the 'My Apps (API)' option from the dropdown menu. 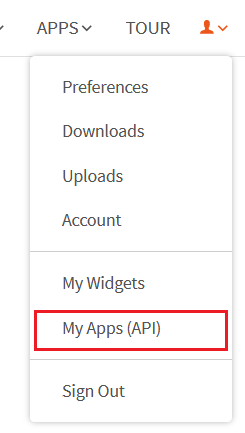
Step 4: We will now click on the 'Get an AppID' button to get the ID. 
Step 5: Once a dialog box appears, as shown below, we will enter the 'Application name' and 'Description'. 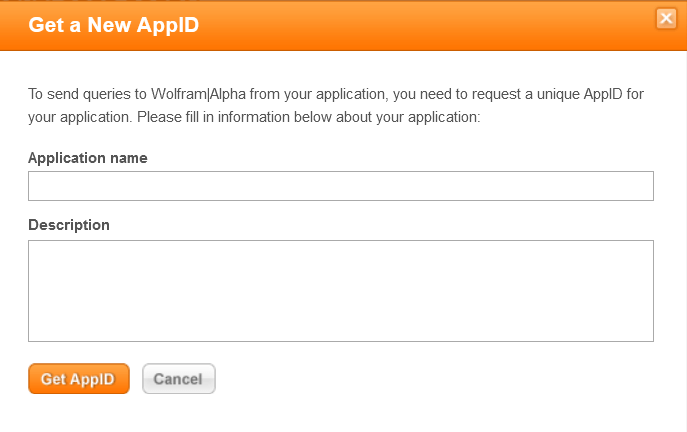
Step 6: We will now note down the APPID that appears in the next dialog box. This app id will be particular to the application. 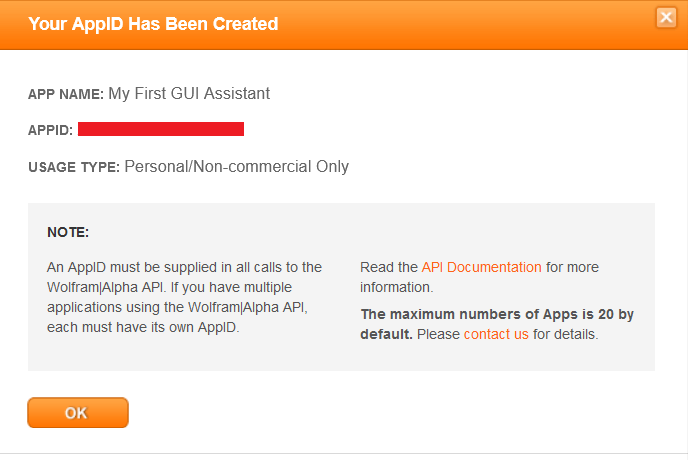
Now that we have gotten the APPID, it is time for us to install the wolframalpha package in Python and see the implementation of this API ID. How to install wolframalpha package?The Python wolframalpha package can be installed using the PIP installer by typing the following command in a command prompt or terminal. Syntax: Once the installation is complete, we can verify whether the wolframalpha package is installed properly or not by creating a new python program file and importing the wolframalpha module. The following is the snippet of code illustrating the same. File: verify.py Now, let us save the file and run the following command in a command prompt or terminal. Syntax: The package has been installed successfully if the program does not return any importing error. In case any exception is raised, try reinstalling the package and consider checking its official documentation. Let us now see the implementation of this module by creating a Command-Line Interface (CLI) for the Assistant application. We will later use this functionality to develop the Graphical User Interface (GUI) with the help of the Tkinter module. Code Implementation for the 'Assistant using Wolfram Alpha API' projectWe will create a simple assistant that will answer the user's question with the help of the Wolfram Alpha API. Let us consider the following snippet of code demonstrating the implementation of the same. File: my_assistant.py Explanation: In the above snippet of code, we have imported the wolframalpha module. We have then defined a function as find_answer() that will return the answer for the asked query passed as a parameter. We have declared a variable as app_id storing the APP ID we created earlier within this function. We have then created an object of the Client() class using the stored APP ID and the query() function to search for the responses to the raised question, storing the result in the response variable. We then declared another variable as answer to store text response only from the response variable. At last, we have returned the result stored in the answer variable. We have then defined the main function, using the input() function to ask the user the question. We have then called the find_answer() function by passing the entered question and storing the result in the answer variable. At last, we have printed the answer for the user. Let us now run this code to see the output. Output 1: Question: Value of pi Answer: 3.1415926535897932384626433832795028841971693993751058209749445923... Output 2: Question: Who is the president of US? Answer: Joe Biden (from 20/01/2021 to present) Output 3: Question: What is the capital of India? Answer: New Delhi, Delhi, India Now that we have understood the use of the wolframalpha module and let us create the GUI and add this functionality to it. Prerequisites of the ProjectThere are some libraries and modules that we will need in the creation of the GUI Assistant Application in Python. These libraries are briefly described as follows:
Since the tkinter module comes preinstalled with Python, there is no need to install it externally. We have also installed the wolframalpha module earlier in this tutorial. We can also install the pillow (PIL) library using the PIP installer by typing the following command in a command prompt or terminal. Syntax: Once the installation is complete, we can verify whether the pillow library is installed properly or not by creating a new python program file and importing the pillow (PIL) module. The following is the snippet of code illustrating the same. File: verify.py Now, let us save the file and run the following command in a command prompt or terminal. Syntax: The library has been installed successfully if the program does not return any importing error. In case any exception is raised, try reinstalling the library and consider checking their official documentation. Let us now start building the project. Building the GUI Assistant Application using Tkinter and Wolfram Alpha API in PythonWe have divided the complete project code for creating this GUI Application in Python into several steps for better understanding. These steps are shown below: Step 1: Importing the necessary modules Step 2: Defining the required functions to execute different operations Step 3: Creating the main window of the application. Step 4: Adding necessary widgets to the window and setting the event triggers. Let us understand the steps mentioned above in a more elaborate way. Importing the necessary modulesAt first, we will start by importing all the required modules, which include all the widgets and modules from the tkinter module, the Image and ImageTk modules from the PIL module, the wolframalpha module. Let us consider the following snippet of code illustrating the same. File: main.py Explanation: In the above snippet of code, we have imported all the widgets and modules from the tkinter module to work with Graphical User Interface. We have then imported the messagebox module from the tkinter module to display some important messages. We then imported the Image and ImageTk modules from the PIL module to add images to the program and use them in the Tkinter application. At last, we have imported the wolframalpha module to calculate the expert-level answers. Defining the necessary function to execute different operationsWe will now define some functions to find the result of the Query, display the result to the users, clear the entries from the application, and close the application. Let us understand the implementation of these functions in detail. Function to find the answer to the entered Query This function will be the same that we used earlier to demonstrate the use of the wolframalpha module. This function will accept a parameter in the form of the Query and return the appropriate answer. Let us consider the following snippet of code illustrating the same. File: main.py Explanation: In the above code snippet, we have defined a function as find_answer() that accepts a parameter as question. We have declared a variable to store the APP ID within this function. We have then created an object of the Client() class using the APP ID and used the try-except method to handle the errors if raised. We have used the query() function to search for the responses of the input query and stored the appropriate result in the answer variable. Function to display the result in the application We will now define a function that will accept the query entered in the entry field and call the find_answer() function to display the answer to that query. Let us consider the following snippet of code illustrating the same. File: main.py Explanation: In the above snippet of code, we have defined the function as compute_result(). Within this function, we have used the delete() method to clear any previous text from the answer_field. We have then used the get() method to retrieve the data from the question_field and checked if the entered query is not an empty string. We have then called the find_answer() with the retrieved query as its parameter and stored the returned result in the answer variable. We have also checked whether the returned value is not an empty string and displayed the result using the insert() method in the answer_field field. We also used the showerror() method of the messagebox module to display the message box with an ERROR message indicating the problem. Function to reset the entries in the application We will now define a function to delete the current entries from the entry field. Let us consider the following snippet of code illustrating the same. File: main.py Explanation: In the above snippet of code, we have defined the function as reset_entries(). Within this function, we have used the delete() method to delete the entries from the entry fields. We have also used the showinfo() method of the messagebox module to display the message box with a SUCCESS statement. Function to close the application We will now define a function to exit the application using the destroy() method of the Tk() class. Let us consider the following snippet of code illustrating the same. File: main.py Explanation: In the above snippet of code, we have defined a function as exit_application(). Within this function, we have used the destroy() method with the object of the Tk() class to close the application. Creating the main window of the applicationNow that we have defined all the necessary functions to run the application, it is time to create the main window where we add the widgets and see their functionalities. We will start by creating the object of the Tk() class of the tkinter module. This object will be the main window of the application. We will also add the title to this window along with an icon. We will also set the window's geometry and configure its background color. Let us consider the following snippet of code demonstrating the same. File: main.py Explanation: In the above snippet of code, we have defined the code for the main function. Within this function, we have instantiated the Tk() class and created the application's main window. We then used the title() function to set the window's title. We have also used the geometry() function to set the size of the window and disabled the resizable option by setting the parameters of the resizable() function to zeros. We have configured the background color to #F0FFFF with the help of the config() function. At last, we have used the iconbitmap() function to set the icon of the application. Adding the required widgets to the window and setting the event triggersSince the main window of the application is created successfully, we will add all the necessary widgets to the window and set the event triggers. These widgets include frames to structure other widgets, labels to display important information, entry fields to insert data, and buttons to manipulate the entered data and call the functions. Let us now understand the addition of these widgets in detail. Adding Frames & Images We will start by adding the frames to the main window. These frames will help structure the other widgets. These frames can be created using the Frame() widget of the tkinter module. We will also import an image to the program using the Image and ImageTk module of the PIL module. This image will make the application much more attractive. Let us consider the following snippet of code demonstrating the same. File: main.py Explanation: In the above snippet of code, we have imported an image file and resized it using the open() function followed by the resize() function of the Image module and made it compatible with the Tkinter usage using the PhotoImage() class of the ImageTk module. We have then used the Frame() widget to add some frames to the main window by setting their master parameters to main_win, the object of the Tk() class we created earlier. We have also set the background color of these frames to #F0FFFF. At last, we have used the pack() function to set the positioning of these frames on the main window screen. Adding the widgets to the title_frame Frame Now that we have successfully added the frames to the main window, it is time to add all the necessary widgets to these frames. We will start by adding some labels to the title_frame Frame. These labels will display an image we imported earlier and the text representing the heading of the application. We will use the Label() widget to create these labels and set their positions on the main window with the help of the grid() function. Let us consider the following snippet of code demonstrating the same. File: main.py Explanation: In the above snippet of code, we have used the Label() widget to add an image and the text on the main window setting their master parameters to the title_frame Frame. We have then used the grid() function to set the position of these labels in the grid format on the window. Adding the widgets to the input_frame Frame We will now add some widgets to the input_frame Frame. These widgets include labels to display the information about the entry fields and the entry fields to enter the query and display the result. We will use the Label() widget to add the labels and the Entry() widget to add the fields to the application. We will then use the grid() function to set the position of these widgets on the main window. Let us consider the following snippet of code illustrating the same. File: main.py Explanation: In the above snippet of code, we have used the Label() and Entry() widgets to add the required labels and entry fields and set the value of their master parameters to the input_frame frame. We have then used the grid() function to set the position of these labels and entry fields in the grid format on the main window screen. Adding the widgets to the button_frame Frame We will now add some buttons to the button_frame Frame using the Button() widget. These buttons will allow us to find the results of the query and generate the output, clear the entries from the entry field, and close the application. File: main.py Explanation: In the above snippet of code, we have used the Button() widget to add some buttons to the application and set their master parameters to the button_frame Frame. We have customized these buttons and used the command parameters to call different functions we created earlier. At last, we have then used the grid() function to set the position of these buttons in the grid format on the main window. Now that we have added all the necessary widgets to the application, it is time for us to run it. Running the Application We will use the mainloop() method with the object of the Tk() class to run the application. Let us consider the following snippet of code illustrating the same. File: main.py Explanation: In the above snippet of code, we have used the mainloop() method with main_win, the object of the Tk() class, to run the application. Hence, the project code is now complete. We will save this python program file and run the following command in the command prompt or terminal to see the output. Syntax: But before we see the output, the complete project code of the 'GUI Assistant using Wolfram Alpha API' is shown below. The Complete Project CodeThe following is the project code for the 'GUI Assistant using Wolfram Alpha API in Python'. File: main.py Output: 
Next TopicSignal Processing Hands-on in Python
|
 For Videos Join Our Youtube Channel: Join Now
Feedback
- Send your Feedback to [email protected]
Help Others, Please Share


