| |
Python Tutorial
Python OOPs
Python MySQL
Python MongoDB
Python SQLite
Python Questions
Plotly
Python Tkinter (GUI)
Python Web Blocker
Python MCQ
Related Tutorials
Python Programs

Automate a WhatsApp message using PythonWe can update everyone's birthdays on Google calendar and turn the notifications on. But what if there is an application that can send birthday wishes without us having to interfere at all? It is all about automation, and let us use Python's vast libraries and options to achieve this. This tutorial explains how to automate WhatsApp messages in individual and group chats using Python's 'pywhatkit library'. Library:Python has a lot of libraries. To get the functionality we want, we can have different options/ libraries to use, out of which we can choose one based on certain needs of the project we develop. To get the WhatsApp Message Automation feature, these are some of the options:
In this tutorial, we'll try automating messages using the Pywhatkit library. Using the Pywhatkit library:Pywhatkit is an inbuilt Python library. It provides features like:
Installing the library:It is easy to use the library, but if you are working with other projects simultaneously, it is preferred to create a new virtual environment as the library has a lot of dependencies. Creating a new virtual environment: Generally, developers use separate virtual environments when working on different projects simultaneously to keep the projects isolated without dependency collisions. Follow these steps to create a new Python virtual environment for your whatsapp project: 1. Open command prompt (cmd) from the start menu. 2. Use the command: in order to change the directory to where you want the project file to be located. E.g., cd Desktop 3. Now, type the command: Note: If you have the latest version of Python, use py instead of python3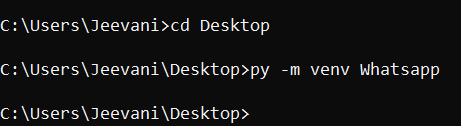
4. The command creates a separate virtual environment with the name specified (Whatsapp here). 5. Use the command: For mac: For Windows: to use/ activate the created virtual environment: 
Installing the library:Now that a separate virtual environment is set up for the project, it is time to install the library. Just give the command: It installs all the library modules, so it takes a bit of time. To check all the dependencies installed in the library: use the command: 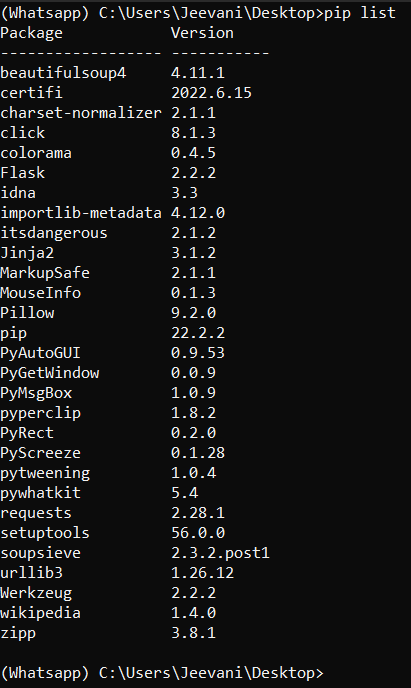
WhatsApp web:Either use WhatsApp web or WhatsApp beta on your laptop/ computer to open whatsapp on your system. If you don't know about whatsapp web:
We'll now learn how to send a whatsapp message to individual contact and groups. Individual contacts:First, import the installed library using the import statement: We need to use the .sendwhatmsg() method to get this functionality: Syntax: Here is an example: 
As you can observe, a message shows the number of seconds within which Python opens Whatsapp and sends the message to the given contact number. Here are some important points:
Group:We learned how to send a message to an individual contact. Sending messages to a group is no different than sending to a single contact. The only thing here is that to send a message to a group, we need the group Id, which acts like the phone number.
For example, https://chat.whatsapp.com/....................... The dotted line represents the Group Id. The method we need to use here is: pywhatkit.sendwhatmsg_to_group() Syntax: Here is an example: 
Other parameters we can use in the methods:
Two more methods are capable of sending messages instantly in the library: 
|
 For Videos Join Our Youtube Channel: Join Now
Feedback
- Send your Feedback to [email protected]
Help Others, Please Share


