| |
Python Tutorial
Python OOPs
Python MySQL
Python MongoDB
Python SQLite
Python Questions
Plotly
Python Tkinter (GUI)
Python Web Blocker
Python MCQ
Related Tutorials
Python Programs

Create the First GUI Application using PyQt5 in PythonThe majority of personal computers in use today have a graphic user interface, or GUI. It offers users with a range of computer skill levels a straightforward experience. Due to its point-and-click interface, GUI apps may require more resources, but they are typically more user-friendly. One of the toolkits for creating cross-platform GUI apps in Python is PyQt. If you already have a solid command of this language, it is strong and simple to learn. You will learn the fundamentals of creating a GUI using PyQt in this article. It demands that you have a basic understanding of both object-oriented programming and Python. Instead of going through basic Python ideas, PyQt will be the major topic of discussion. Describing PyQt :The cross-platform application development framework Qt has a Python connector called PyQt. The advantage of utilising PyQt is that you can create GUI apps with a simple yet potent language like Python. It makes all of the Qt API's features available. The organisation responsible for the creation and upkeep of PyQt is called Riverbank Computing. PyQt6 is the most recent stable release. According to the release history, the PyQt major version's release cycle is consistent with Qt's. The PyQt codebase has compiled C++ and Python code at its core and is a complicated system. In contrast to other Python libraries, it is therefore a difficult procedure to build and install it from the source. We can even take help of the documentation for the individual PyQt version which we wish to use for thorough installation instructions. Both the GPL and commercial versions of it come with installation instructions. Charecteristics of PyQT :The following are crucial aspects of PyQt :
Both complex user interfaces and independent apps may be made using these characteristics in combination. What is an event loop ?There are a few fundamental ideas about how applications are structured in the Qt universe that need to be introduced before the window appears on the screen. You can safely move on to the following section if you are already comfortable with event loops. The QApplication class serves as the foundation of all Qt applications. One and only one QApplication object is required for every application for it to work. This object houses your application's event loop, the central loop that controls all user interaction with the GUI. Each time a user interacts with your application-by pressing a key, clicking the mouse, or moving the mouse-an event is generated and added to the event queue. Each time the event loop iterates, the queue is examined to see if there are any waiting events. If one is discovered, the event is sent along with control to the appropriate event handler. After handling the event, the event handler returns control to the event loop so it may wait for further events. Per application, there is only one active event loop. What is QMainWindow ?As we learned in the last section, every widget in Qt may be a window. For instance, if QPushButton is used in place of QWidget, you will receive a window with a single pushbutton. And as a result, our main window is now enhanced. Sizes of window and widgets :Right now, you may easily resize the window by grabbing any corner with your mouse and dragging it to the desired size. Although it's a good idea to allow users to resize your apps, there may be occasions when you wish to impose limits on the minimum or maximum sizes or lock a window to a specific size. A QSize object is used in Qt to define sizes. The width and height parameters for this are accepted in that order. Making a simple GUI using PyQt :Let's create a simple "basic" GUI to get a feel for PyQt. Also, this will further be helpful in getting to know this process from the starting level. Before we continue, it is important to note that PyQt utilises camelCase for the names of its methods and properties. To maintain consistency throughout this essay, camelCase will be used in place of Python's suggested naming convention for variables and functions. We'll purposefully keep things basic and straightforward for the time being. I'll assume you've already generated an app.py file in your project directory. As you proceed with the instructions below, you may add the lines of code from each step to your app.py file. Step - 1 : Import the necessary classesThere are several built-in modules included with PyQt. But when creating a GUI, the QtWidgets module will be the one you use the most frequently. You may utilise its classes to build your GUI. We will just utilise the QApplication and QWidgets classes because our aim is to develop the most fundamental "python" GUI. Begin by importing them as follows : The additional classes you want to utilise in your application may be imported in a similar manner. Step - 2 : Start up the programmeBy establishing a QApplication instance, we must initialise the app. It is in charge of controlling the application's primary settings and control scheme. As a result, you must create an instance of this class before making any other user interface-related objects. If you want the app to accept arguments from the command line, you may supply sys.argv in place of the empty array that was supplied to QApplication in the code above. If you are giving sys.argv as an argument, make sure you import sys. Step - 3 : Create the primary windowThe main window is a widget without a parent, often known as a top-level window. There must be a primary window in every GUI. Right now, we'll construct a QWidget instance and set it as our default window as follows : There are several more Qwidget methods you might call after making an instance of it. We have used the setWindowTitle and setGeometry methods to create our straightforward GUI. The GUI's size and placement on the screen are controlled via the setGeometry method. SetGeometry is the function signature for it (x, y, width, height). The width and height parameters are used to establish the window's width and height, respectively, while the first two arguments define the window's x and y positions on the screen. The setWindowTitle method does exactly what its name implies-it sets the application's title. The title can be supplied as a string parameter. If you don't set the title manually, the window won't have one. Step - 4 : Display the primary windowBy default, the window we established in the preceding step is hidden. By using the show approach, we need to demonstrate it : Step - 5 : Start the event loopThe event loop must then be started by launching the programme by the help of exec method. The event loop can also be started by using app.exec_() as an alternative. Complete Code :Your app.py file should include the following code if you have completed all five of the aforementioned steps : You must use the command python3 app.py to run app.py, just as you would any other Python script. You should be able to view the presented window. The window's appearance is greatly influenced by your system. Output: The output of the code mentioned above to create a GUI application using PyQt5 is given below in the form of a screenshot. 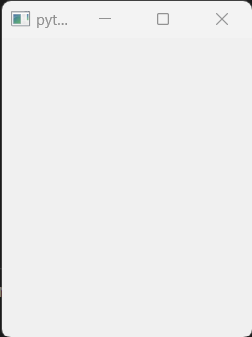
Conclusion :In this article we covered what is PyQt5 in Python and how it can be useful for us. We learned to create a simple GUI using PyQt5. We also got to know about various general methods like setGeometry method to set the size of the window and the setWindowTitle method to set window's title. We also discussed the QApplication class, QMainWindow class and event loop in a GUI window in this part. The techniques Qt offers for widgets and windows to interact with one another and with your own code will help you to make your application more attractive and reactive. |
 For Videos Join Our Youtube Channel: Join Now
Feedback
- Send your Feedback to [email protected]
Help Others, Please Share


