| |

Get Started with RabbitMQ and PythonIn this tutorial, we will learn about RabbitMQ and implement it using Python. This tutorial will also give you a brief knowledge of message queue and defines essential concepts. We will understand the basic functionalities of the RabbitMQ, message queue, exchanges, and many others. Before diving deep into this tutorial, let's have a basic understanding of RabbitMQ. What is RabbitMQ?A RabbitMQ is one of the popular message brokers used to transmit messages from end to end. Messages are the way to transmit information. A message can contain any kind of information, and it could have information about a process or task. A message broker works as the post office; when we want some message, we put the information in the letter and keep it in the post box, so we can be sure that the letter carrier will eventually deliver them to the recipient. RabbitMQ uses some terms such as -
Note - A producer, consumer, and broker do not have to reside on the same host. Most applications don't have, and an application can be both a procedure and a consumer.RabbitMQ ExampleA message broker works as a bridge between various services (for example - web applications). They play an essential role in reducing the load and delivery times of the web application servers by delegating tasks that would typically take up a lot of time or resources to a third party with no other job. We take a real-world example - A web application that takes uploaded information by the user. The website uses this information to generate a PDF and email it back to the user. To create the pdf, the application will take several seconds. Hence, the role of the message queue emerges. The queue will be used to perform the task. Every time users upload their information into the web interface, the web application will create a "PDF processing" message consisting of all the essential information the user needs into a message and placed onto a queue defined in RabbitMQ. 
The above diagram is a basic diagram of a message queue - there is application known as the producers that creates message and transmit them to the broker (the message queue). The second application is consumer, connect to the queue and subscribe to the message to be processed. A Software can be worked as the procedure, or consumer, or a both a consumer and producer of messages. Messages are stored in the queue until consumer retrieves them. When and why we should use RabbitMQMessage queuing allows web servers to respond quickly instead of being forced to perform the resource-heavy procedure on the spot that delays response time. The message queue plays an essential role if we want to distribute the message to multiple consumers or balance loads between workers. The consumer takes a message off the queue and starts processing the PDF. At the same time, the producer is queuing up new messages. There is also an interesting fact, the consumer can reside on a different server than the producer, or they can reside on the same server. The request can be created in one programming language and handled in another programming language. The point is that the two applications will only communicate through the messages they send to each other, which means the sender and receiver have low coupling. What are Exchanges?As we discussed earlier, messages are stored in the queue; but they are not stored directly. The procedure sends a message to an exchange, and the exchange is responsible for routing the message to different queues with the help of bindings and routing keys. A binding is responsible for an exchange. Message flow in RabbitMQLet's understand the flow of the messages in RabbitMQ.
Types of ExchangesBelow are the essential exchanges.
Installation of RabbitMQWe will install the RabbitMQ in window which is straightforward process. Before installing the RabbitMQ, we must have Erlang virtual machine, if you already Erlang installed then you can directly install the RabbitMQ. 1. Install Erlang on WindowsClick on the official website and download the OTP 22.0. Then click on the above highlighted OTP 22.0 windows xx-bit Binary file; it will be around 94+ MB in size. Once we download the otp_win64_22.0 file then we would see the below setup window. 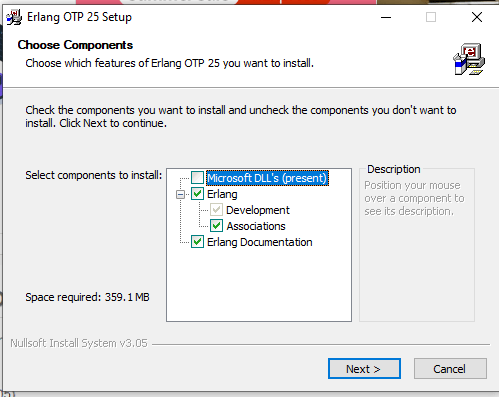
Select the Erlang checkbox and click on the Next button. Then choose the destination folder to install the Erlang and click on the Next button. 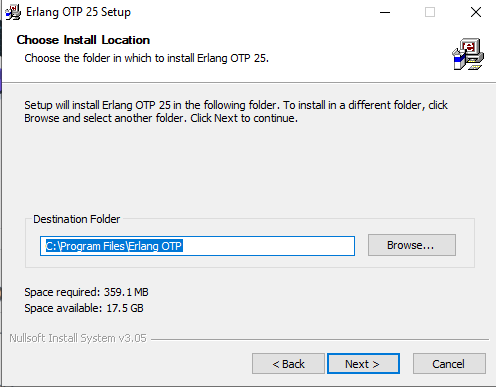
It will show the start menu, select and click on the install button. 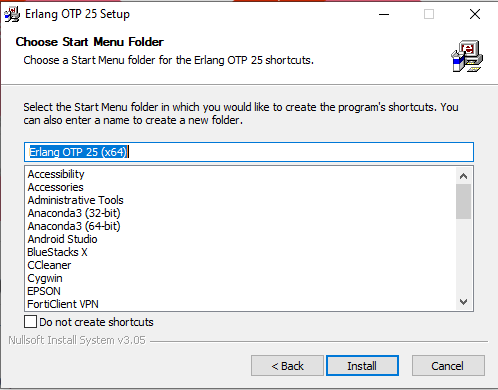
Now the Erlang installation will start; it will take a while to complete. 
Now click on the close button, we have successfully installed. 2. Enable RabbitMQ Management PluginsRabbitMQ runs by default as window services; if you are much interested in working with the command line tool, it depends on us. 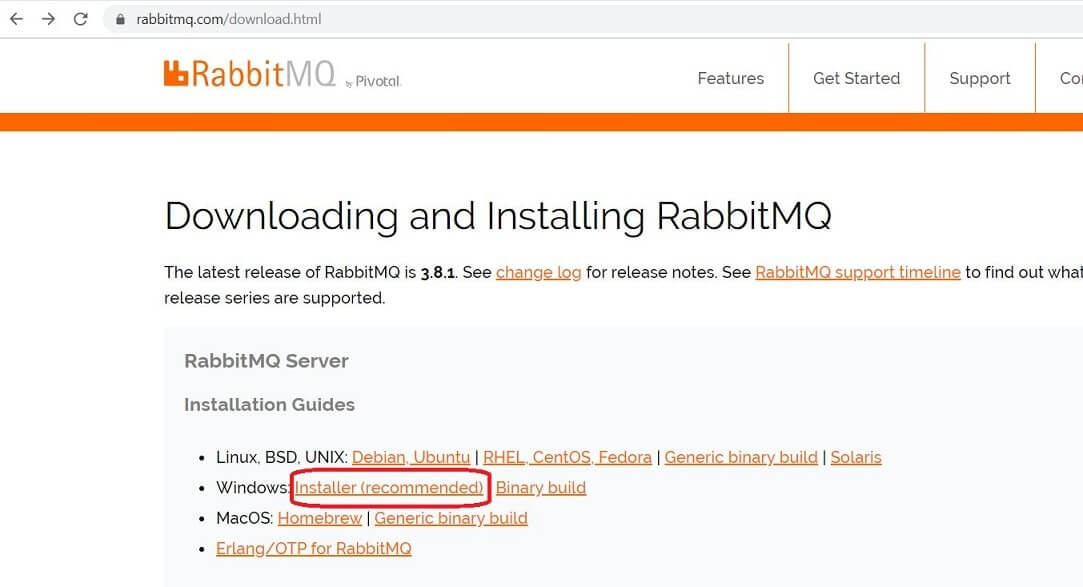
Now download RabbitMQ server.exe as show in the below image. 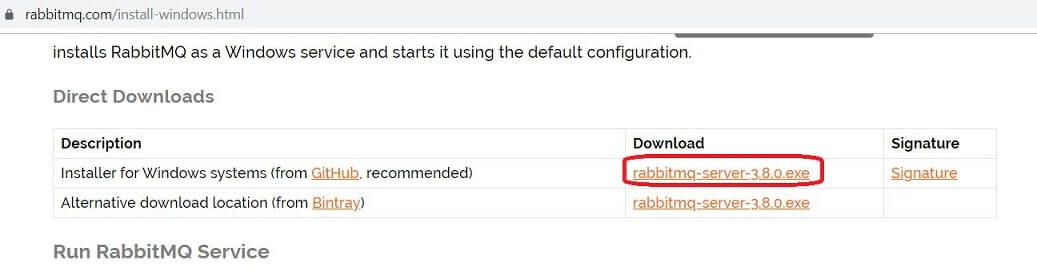
Double click on download rabbitmq-server-3.8.1.exe and click on Next. 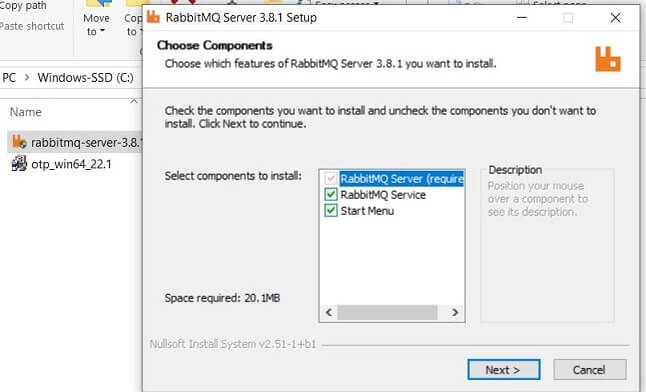
Follow the above process, click on Finish and installation will complete. Implement RabbitMQ with PythonNow, we will learn to implement RabbitMQ with Python. First, we create a send.py file which will send a message to the queue. To work with the RabbitMQ we need to install the pika module in our system. To install the pika, type the following command in the terminal. This command will install the pika in the local machine. Now we are ready to work with the RabbitMQ. In the above code, we import the pika module and establish the connection with the broker on the local machine -hence the local. We need to specify the name or IP address to connect to the different devices. The next step is configuring the queue, or we need to ensure the recipient queue exists. If we send the message to a non-existing location, RabbitMQ will drop the message. We will create the my_queue, which the message will deliver. Now we are ready to transmit the message. We will send a string "Hello World" to my_queue. As discussed earlier, we cannot deliver the message to the queue directly. It always needs to go through an exchange. An empty string defines the default exchange. This exchange is special - it allows us to specify exactly to which queue the message is to go. We need to specify the queue name in the routing_key parameter. close the connection using the below command. ReceivingWe will create our second program receive.py message from the queue and print to the screen. Again, we need to establish the connection with RabbitMQ server. We will use the previous code. We also need to check if queue exists as we check in the above code. So here is the question may arise, why we would need to declare the queue again - we have already declared it in our previous code. We could avoid that if we were sure that the queue already exists. Let's take and scenario - if the send.py file run before. But we are not yet sure which program run first. So it is good to be declaring the queue in the both programs. Receiving message from the queue is more complex. It works by subscribing a callback function to a queue. The callback function is called by pika library in every received message. In our program, the function will print on the screen the contents of the message. Now we need to inform the RabbitMQ that this particular callback function should receive message from our my_queue. Fortunately, we have repeated the about our queue declaration so we don't need to worry about the queue existing related errors. The auto_ack parameter will be described later_on. There is a scenario where we enter in the endless loop waits for the data and runs callbacks whenever necessary. In such case, we will handle keyboardInterrupt error. Let's see the below code snippet. Now it is time to put all our code at one place to get more understanding. send.py Receive.py Now we run the above script in the terminal. First, let's start a consumer which will run continuously waiting for message deliveries. Output: Waiting for messages. To exit press CTRL + C. Now start the procedure in the terminal. The procedure program will stop after every run. The consumer will print the Waiting for messages. To exit press CTRL+C Received 'Hello World!' Congratulations, we send our first message through RabbitMQ successfully. In this tutorial, we have learned how to send and receive a message from a named queue. ConclusionThis tutorial included the guide to implementing RabbitMQ with the Python programming language. Apart from that, we have also discussed the introduction to RabbitMQ and why we use it. Following this guide, we will get to know about the basic functionality and flow. Rest you can follow the official documentation to get more insights into the RabbitMQ. Its documentation is well-written with the appropriate example.
Next TopicHow to Send Push Notification in Python
|
 For Videos Join Our Youtube Channel: Join Now
Feedback
- Send your Feedback to [email protected]
Help Others, Please Share


