| |
Python Tutorial
Python OOPs
Python MySQL
Python MongoDB
Python SQLite
Python Questions
Plotly
Python Tkinter (GUI)
Python Web Blocker
Python MCQ
Related Tutorials
Python Programs

Python Appium FrameworkGenerally, mobile automation is meant to be very difficult and needs high skills. We believe that a tester must have a diverse set of abilities. You do not need to be an expert in all of them, yet it is critical to have considered a range of topics and examined various methods. The context in which you assess will inform you of the specific testing technique and test equipment. The more options you are acquainted with, the better your context-specific selection will be. The concept of mobile testing has become popular among testers. But, testers are not ready to start with mobile automation because of time-taking processes and actions. Mobile testing is much more challenging and complex than web automation as it needs To make the ease of work of mobile testing, Python gives a framework named appium which helps in Mobile testing. The Appium framework helps to build a robust mobile test automation framework. Let's understand the Appium framework for Mobile Automation Testing. What is Appium Framework?Appium is an open-source solution for automating mobile web, mobile native, and mobile hybrid apps on iOS and Android platforms. Appium is "cross-platform" because it allows you to create tests using the same API on many platforms, such as iOS and Android. This allows for significant or total code reuse between iOS and Android test suites. Features of Appium Framework
Drawback of the Appium Framework
Appium InspectorAppium Inspector is a mobile application automation tool for QA engineers. This tool serves as the usual process for identifying mobile application elements. Prerequisites for Python Appium Framework
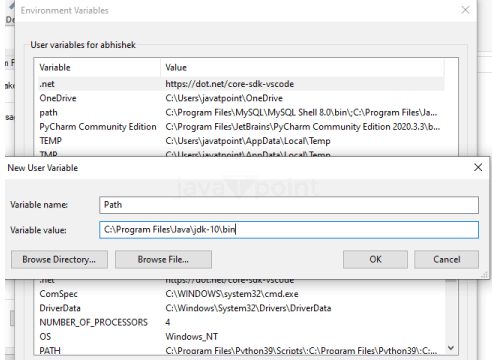
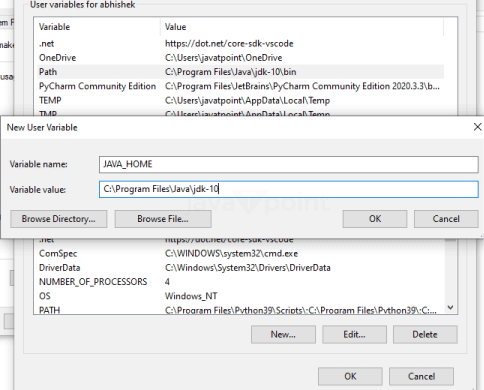
Now, let's begin with installing the Appium framework and its usage for automation mobile testing. Installing the Appium framework needs a few steps, which include: Step 1: Downloading the Recent Appium framework Firstly, we must download the latest Appium framework and run the exe file to install the Appium desktop app. Or we can install the Python library for Appium, which we will discuss later in this article. Step 2: Installing Java JDK The next step is to install the Java JDK.
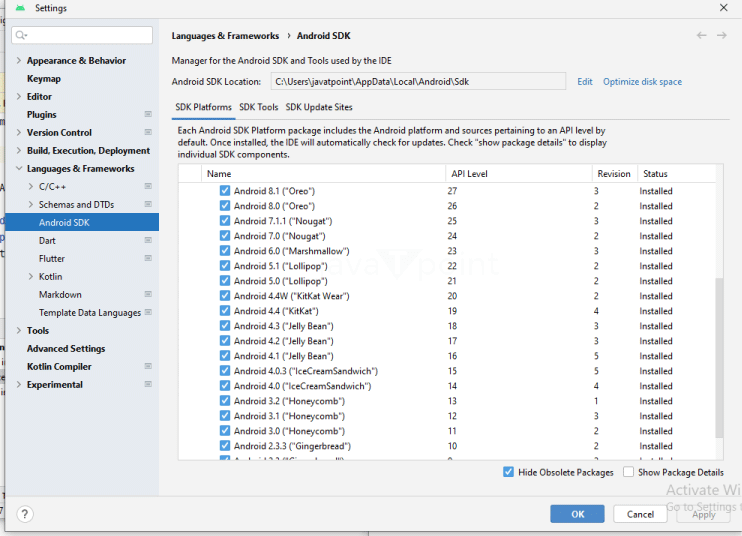
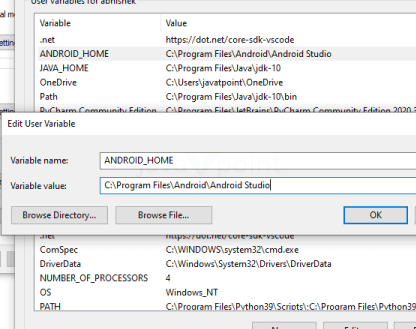
Step 2: Android Studio - Download and Installation Download the latest version of Android Studio and install it.
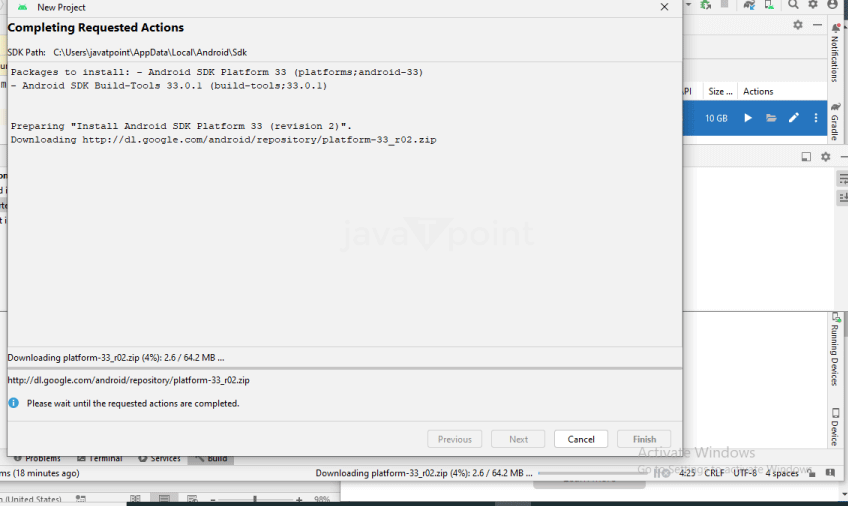
Step 3: Installing Android Images and Tools
Step 4: Installing the Python Client library Client libraries in Java, Python, PHP, Ruby, C#, and JavaScript enable Appium's enhancements to the WebDriver concept. You choose to use these client libraries instead of your usual WebDriver client when utilizing Appium. You are all set to start the Appium framework. Step 5: Starting the Android Virtual Device (AVD) Manager Launch the Android Virtual Device (AVD) manager and start the process by clicking the AVD_Manager. Now, create an emulator with the required options and start with the start button Step 6: Getting Started with Appium Server Console. Start the Appium Server Console by selecting and double-clicking the file. Step 7: Launching the Appium Node Server To launch the Appium node server, click on the rocket icon. We can also automate tests directly with the Python terminal. Firstly we will download the Appium framework in the Python terminal using this command line: Along with the Appium Python Client, we need to install the Selenium framework. It can be installed using: Now, we have set up the Appium framework. Let's start with the test using Appium. It takes a few steps to complete the testing part. Testing with AppiumStep 1: Create a test app in the Android Studio named "Appium Test". We will choose all the default settings while creating the app. Step 2: Now, add the appium jars into the app made by following the steps below:
Step 3: Now, click on the build.gradle in the App made. All the libraries are on the screen using the build.gradle. Step 4: Now, we will make a Java Class: Step 5: Running the Test
Next TopicApp User Segmentation in Python
|

 For Videos Join Our Youtube Channel: Join Now
Feedback
- Send your Feedback to [email protected]
Help Others, Please Share


