| |

How to use IPythonWhen we install the Python in our local machine, Python interactive shell comes by default. In our coding journey, we might find some exiting features of the standard REPL. The IPython is an advance version of the interactive Python that can enhance our coding capabilities. IPython shell is a better and fast way to learning Python and executing code without the need for a full-fledged interactive development environment such as Pycharm. In this tutorial, we will discuss about the major aspects and functionality of the Python shell, write and executable code in IPython, integrated IPython in Python scripts and many other important things. Get Started with IPythonIn this section, we will install and initialize the IPython in our local machine. We need to make sure that Python should be install in the system, if not then you can follow the below steps to install IPython. Installing and initiating IPython only requires a few steps. Here's an updated explanation that includes the option of creating and activating a virtual environment instead of installing IPython globally:
By following these steps, you can install and initiate IPython on your system, either globally or within a virtual environment, providing you with a powerful interactive Python environment for your development and experimentation. We need to type the ipython in terminal. It opens the ipython shell. 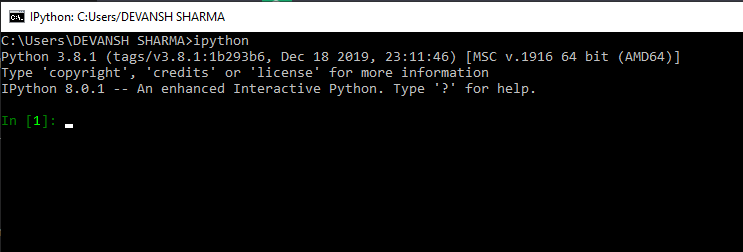
Once you start the IPython interactive shell, you will see a message confirming the successful installation of IPython on your machine. The shell will display the first prompt, typically shown as `In [1]`, indicating that it is ready to accept input. To exit the IPython interactive shell and return to the regular command line, you can use the `exit` command. By executing `exit`, you will switch from IPython back to the command line environment. Now that you have IPython up and running, you are ready to explore its powerful features and see how it can enhance your Python workflow. IPython provides an interactive and efficient environment for writing and executing Python code, offering a range of features such as code autocompletion, history management, inline documentation, debugging tools, and more. Take advantage of these capabilities to streamline your Python development and make your coding experience more productive. Improve Your Interactive Python Workflow with IPythonHowever, Python shell is very efficient and versatile tool but Ipython takes think on other with powerful features than enhance your coding productivity. Following the noteworthy distinctions that add up to a more user-friendly interface - Enhanced Interactive Environment - IPython provides an interactive environment that offers features like syntax highlighting, tab completion, and multiline editing. These features make it easier to write and modify code, enhancing the overall coding experience. Rich Output and Visualization - IPython allows the display of rich output, including HTML, images, audio, and video, directly within the shell. It also integrates well with data visualization libraries such as Matplotlib, making it convenient to create and explore plots and charts. Powerful History Management - IPython keeps a history of your executed commands, allowing you to easily recall and reuse previous code snippets. You can navigate the command history using keyboard shortcuts and search for specific commands, saving you time and effort. Magic Commands - IPython introduces magic commands, which are prefixed with % or %%. These commands provide additional functionality, such as system commands, timing code execution, debugging, and more. Magic commands enhance productivity by streamlining common tasks and providing quick access to useful functionality. Integrated Help and Documentation: IPython provides built-in help and documentation features. By using the ? symbol, you can access documentation and get information about objects, functions, and modules directly within the shell. This makes it convenient to explore and understand Python APIs without leaving the coding environment. These advantages make the huge difference in programmer. IPython is not just limited to the command-line shell; it is also available as part of Jupyter Notebooks. Jupyter Notebooks provide a browser-based interactive interface that leverages the power of IPython, offering similar features and capabilities. The standard Python shell provides an interactive command-line interface where you can interact with Python. It allows you to enter statements or expressions, which are then executed by the Python interpreter, and the resulting output is displayed. The shell operates in a read-evaluate-print loop (REPL) manner, where you can enter commands or code snippets one at a time, observe their execution, and see the output immediately. This allows for quick experimentation, testing small code snippets, and exploring Python features in an interactive manner. 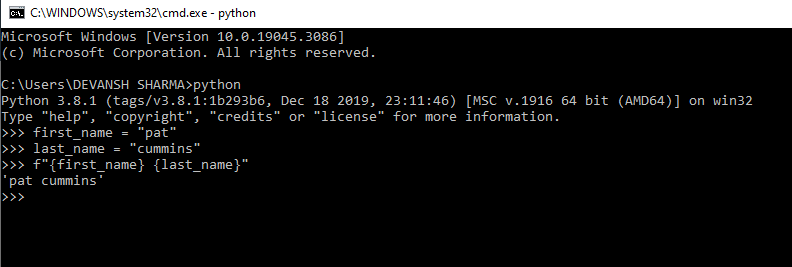
In the provided code examples, you have the ability to define variables, such as first_name and last_name, and concatenate the two strings. Furthermore, in the Python shell, you can create more complex programs by defining other objects like functions and class objects. The IPython interactive shell shares similarities with the Python shell but offers a more expressive code layout and additional features. One notable distinction is the presence of numbered input and output prompts in the IPython interface. These prompts indicate the order of execution and make it easier to refer back to previous inputs and outputs. In IPython, each input line is prefixed with a number, typically displayed as In [X]:, where X represents the execution count. This numbering allows you to keep track of the order in which commands were entered and executed. 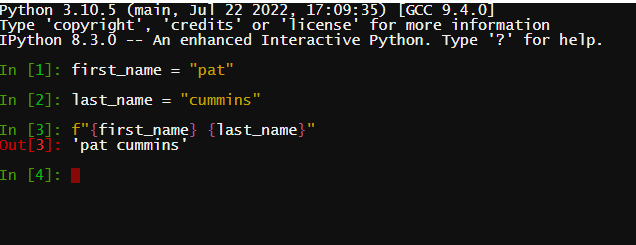
When you initiate a new IPython session using the `ipython` command, you can create variables within the shell. IPython assigns a unique number to each variable that you define. Additionally, the concatenation of two variables generates an output prompt. The code arrangement in IPython is visually clearer, with a space separating the prompts. Now, let's delve into the significance of those numbers and explore IPython's input and output prompts, which are among its key distinguishing features. In IPython, each input line is accompanied by an input prompt, denoted by `In [X]:`, where `X` represents a sequentially increasing number. These numbers serve as a reference to the input commands you've entered. The input prompts make it easier to identify and revisit specific commands in your code history. IPython also generates output prompts, marked as `Out[X]:`, which correspond to the results of executed code. The output prompts help establish a connection between the input commands and their corresponding outputs, providing a clear link between the two. This feature simplifies the task of tracing back your calculations or referring to previous results. The presence of numbered input and output prompts in IPython enhances code readability, enabling you to understand and follow the flow of execution more effectively. The distinct arrangement, with a space separating the prompts, further enhances the visual clarity of the code. With these features, IPython provides a more intuitive and interactive coding environment, making it easier to work with your code, explore data, and document your analysis or experimentation. Understanding the Input and Output PromptsOne of the most significant differences between Ipython shell and the standard Python shell is numbered inputs and outputs. It is also known as input and output prompts. In IPython, a prompt refers to one or more lines of code entered as input. Each prompt carries a unique number assigned by IPython. When you execute the code and receive output, the output prompt will have the same number as the corresponding input prompt. As we can see that, we have defined the first_name in 1 prompts, last_name in 2 prompts, and sports in the third prompt. In prompt 4, we use an f-string to concatenate the values of the variables. It displays the combine string result. In Ipython, we can access the In and Out variable to print the list of all input output we typed in the terminal. Now, we will compare the Ipython shell to the standard Python shell interface. In contrast to the standard Python shell, the interactive Python shell does not utilize numbered input and output prompts. Instead, it uses the >>> symbol to represent the prompts for entering code statements or expressions. The separation of code into input and output prompts, as offered by interactive shells like IPython, enhances the intuitiveness of working with Python code. This distinction between input and output prompts aids in understanding and executing code, enabling a more effective learning experience when working with Python. Applying Multiline Code in PythonPython interactive shell is not much user-friendly as it takes lots of time and we need to aware of Python's indentation-based syntax. In interactive shell, we need to set the indentation each line of code block manually. Let's understand the following example. Example - 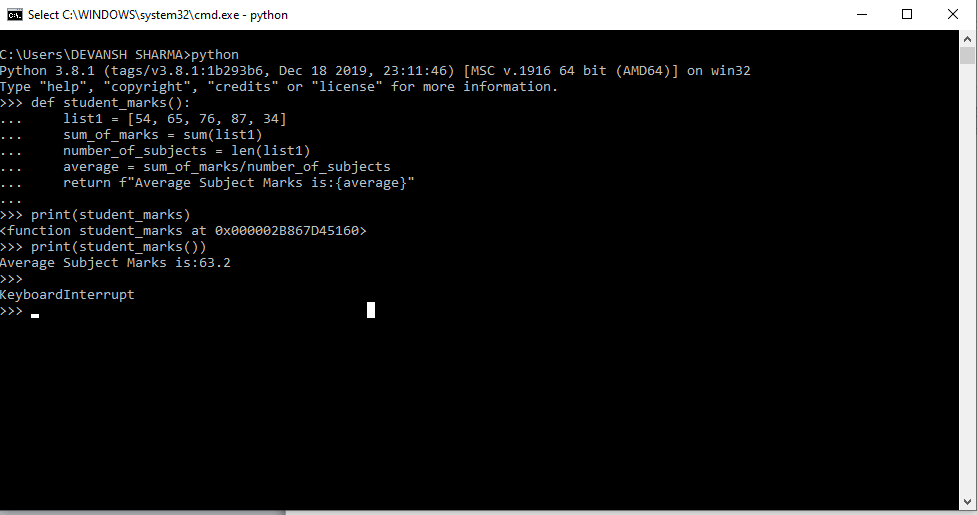
We have to use the four space indentation in interactive shell otherwise code will through an error and we have to define the function from scratch. Whereas IPython shell automatically applies the indentation to the following lines of the function. Let's see the following example. Example - One advantage of IPython over Python's standard shell is its ability to handle indentation automatically when working with code blocks, such as functions. In the IPython interactive shell, you are relieved from the manual task of applying indentation after the first line of your function. IPython understands and recognizes Python's indentation-based block structure. As a result, when entering multi-line code blocks like functions, IPython intelligently handles the indentation for you. You only need to enter the code without worrying about explicitly adding the appropriate indentation levels. Embed Python into ScriptsIPython offers a distinctive capability that sets it apart from the standard Python shell: the ability to embed IPython within existing Python scripts. This feature provides valuable functionalities in your coding environment, allowing you to have an interactive session integrated within your script. When you embed IPython in a Python script, you gain the ability to interactively explore and manipulate variables, as well as execute commands that you have defined in your script. This means that you can pause the script's execution at specific points and interact with the variables and objects at that stage. We create a new_test.py file and some lines of code. Example - The embed() method launch an interactive session. We can run new_test.py file as we would run any Python script. Python will execute all the lines of the code until it reaches the call to embed(). Let's understand the following example. 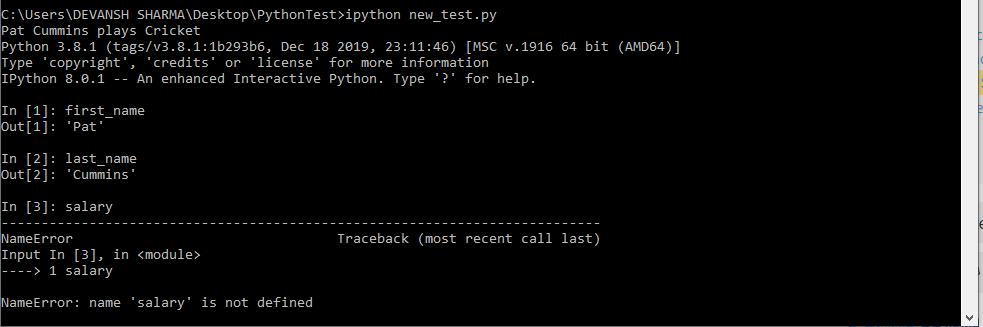
After the execution of the print() statement in line 8 of our script, the output "Pat Cummins plays Cricket" is displayed in the terminal. Following this, the interactive shell is launched. This interactive shell allows you to interactively explore the variables and execute commands within the context of the script However, it's important to note that variables defined after the embed() function call, such as salary, are not available in the namespace, as demonstrated in prompt 3. This behavior ensures that only the variables you specifically choose to import into the interactive shell's namespace are accessible. It prevents cluttering the namespace with unnecessary variables and encourages a more controlled and intentional interaction with the script's variables. Ipython Magic CommandsUnlike Ipython, Python interactive shell doesn't have own commands. Magic commands in Ipython provide an edge over REPLs. Magic commands in IPython are typically denoted by the percent sign (%) as a prefix. When using a single percent sign, the command is applied to a single line of code. On the other hand, if you use a double percent sign (%%), the command is applied to the entire prompt, which can encompass multiple lines of code. In IPython, such prompts are referred to as cells. We will learn about the several magic commands that provide us to the better understanding of Ipython. Navigate File StructuresUsing the %pwd command, we can display current working directory within the file system. This is similar to the UNIX shell's built-in pwd command. The ability to navigate files and directories is a valuable feature offered by IPython. It provides clarity and convenience, particularly when working with complex projects or managing multiple directories concurrently. To list the files and directories in your current location, you can use the %ls command. The `%ls` command in IPython is used to list all the directories within your current location. This command proves useful for quickly examining the contents of a directory without having to leave the IPython environment. Similarly, the `%cd` command allows you to navigate your machine's file structure from within IPython. It functions in a similar manner to the `cd` command used in the command line interface. By using `%cd`, you can change the current working directory to a different location within your file system directly from the IPython environment. Here we go the PythonTest folder. The prompt shows the file path. By utilizing the combination of the three file system traversal commands (%cd, %ls, and %pwd) within the interactive shell, locating files or folders becomes a straightforward task. Bookmarking Working DirectoriesThe bookmark feature in IPython is a useful tool when you want to quickly access your preferred directories without navigating through the entire file structure. It allows you to create bookmarks for specific directories, making it convenient to jump directly to those locations. To create a bookmark, you can use the syntax %bookmark <bookmark-name> <directory>. For instance, let's say you want to bookmark the folder that contains your new_test.py file. You can achieve this by executing a command such as `%bookmark mydir /path/to/PythonTest. By creating this bookmark, you establish a reference to the desired directory. Later on, you can easily navigate to the bookmarked directory by using %cd -b <bookmark-name>. In the example above, you would use %cd -b mydir to navigate directly to the PythonTest without having to specify the full path. The bookmark feature simplifies accessing frequently used directories, saving you time and effort when working on specific projects or switching between different folders. It provides a convenient way to store and retrieve directory locations, streamlining your workflow and enhancing productivity within the IPython environment. Hence, we have created the bookmark for the PythonTest directory by including the path to the folder. Using the bookmark, we can jump to the folder regardless of current location using the %cd -b PythonTest Command. ConclusionIn this tutorial, we have discussed about the Ipython installation and initialization, differentiate Ipython from standard Python shell and learned some magic commands. These magic commands make coding more efficient. How Ipython is much effective but there are other options like bpython and standard REPL to boost the coding skills.
Next TopicImprove Object Oriented Design in Python
|
 For Videos Join Our Youtube Channel: Join Now
Feedback
- Send your Feedback to [email protected]
Help Others, Please Share


