| |

Python Progressbar ModuleIt is very basic human nature that we would like to know when the given process will be complete and what percentage of the given task is done. This is because we become very impatient while a process is going on, and we have only to wait until it is completed. This is very understandable because it is our nature to remain curious about what is happening and when it is happening. Therefore, we always try to find out when the given task will complete and how much time will the given task take to complete. For example, when we are downloading a file or software, we always look for how much time is remaining or how much time will take to download the file. Thus, we can say that if a given time or given percentage is available to us, we will lesser impatient than we can feel if we don't know about these points. Sometimes, visual illustration of downloading the file also helps keep calm and stay patient until the process is completed. This is because the visual illustration of downloading a file tells us that this much percentage of the file is downloaded or this much is remaining. But actually, these visual illustrations are not meant to be Indicators of downloads, but they actually keep our attention and make downloading or suffering more interactive. Visual illustrations have also become very common these days, and they can be seen embedded in almost every application, website, or software. Therefore, we can see that these visual illustrations of the ongoing process (like downloading a file, suffering on a site, etc.) are important aspects of any website, software, or application. Now, most of us would think that it would be very hard to create these video illustrations by ourselves, and it requires hundreds of lines of back-end coding. But, in reality, this is exactly not true, and it is not very difficult to create such visual illustrations by ourselves. Many programming languages offer us packages that we can use to create these video illustrations. Like any other aspect of programming language, Python is also ahead in this aspect. Talking specifically about Python, it offers us many packages such as tqdm, progressbar, etc., which we can use in programs to create progress bars by ourselves. From all the progress bars' packages offered by Python, we will learn only about the progressbar module in this tutorial. We will understand this progressbar module of Python and work on this module by importing it into example programs. Introduction to Progressbar Module of PythonProgressbar is a Python module that comes with lots of functions that we can use to create visual illustrations for an ongoing process that will help us distract from the impatience we feel. The progressbar module has many built-in functions which we can use in a Python program to create visual illustrations of the ongoing process and process completion time. This module allows us to create a progress bar for the ongoing process so that we can know how much percentage of the process is completed and how long it will take it to complete. Progress bar or loading bars which we usually see in gaming applications, loading screens, can be created using functions of this module. This loading bar indicates that resources required for starting the application or game are being imported from the main memory of the system or server of the application. In this tutorial, we will create a loading bar or progress bar using the progressbar module of Python. We will use this module in the example programs to understand the implementation of this module. Progressbar Module of Python: InstallationThe progressbar module of Python is not an in-built package of Python, and it means it requires an installation process to install this module into our system. Since this module doesn't come while installing source Python, we have first to make sure that this module is successfully installed in our system if we want to perform operations using functions of this module. If the progressbar is not already present in our system, we have multiple installation methods which we can use to install the progressbar module into our system, and only after that can we use functions of this module in example programs. One of the easiest and simplest methods to install the progressbar module in our system is using the pip installer. We will use the pip installer method to install the progressbar module in our system, and to install the progressbar module using this method; we have to first write down the following command inside the command prompt terminal of our system: Or, we can also use the following pip command to install the latest version of the progressbar module (progressbar2) in our system: After writing the pip command mentioned above in the prompt shell of our system, we have to press the 'enter,' which will start the installation process of the progressbar (or progressbar2) module. Once the installation process of this module starts, we have to wait for a while until the pip installer installs all the required dependencies for this module. 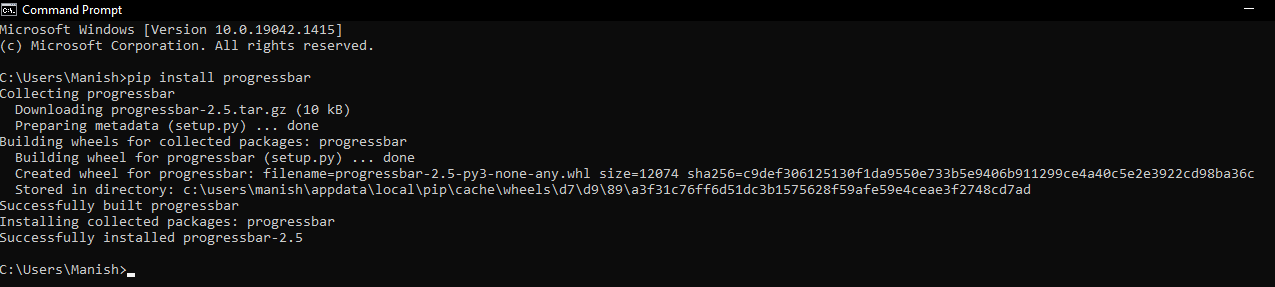
As we can see, the progressbar module is successfully installed in our system with the help of the pip installer. We can also install the progressbar2 module by following the same installation process and writing down the second pip command (given above). We can now move forward with the implementation part of the progressbar module as this module is successfully installed in our system, and now, we can use functions of it in any example programs. Progressbar Module of Python: ImplementationIn this part, we will import the progressbar module that we have just installed into example programs to use the functions of this module to understand the implementation of this module. We will try to create a progress bar using the functions of this module, and the progressbar will be displayed in the output when the program is executed. The output of the progress bar will depend upon the Python IDE on which we are running the example programs. We can also use progressbar2 as it is the upgraded version of the progressbar module and performs all functions which one can perform using the later one. But, here in this tutorial, we will only import the progressbar module into the example program and use functions of it to understand its implementation. Look at the following example program to understand the implementation of the progressbar module: Example: Look at the following example program where we have created a progress bar using the functions of the progressbar module: Output: Following is the progress bar created using the progress bar module: 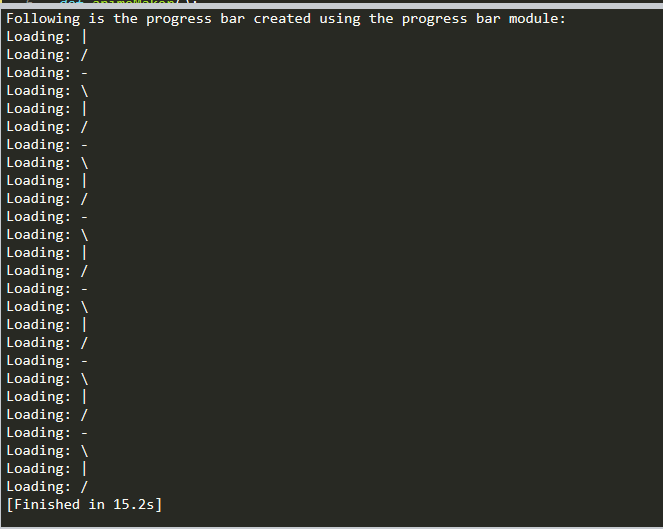
As we can see, the progress bar is printed and shown in the output, and the output displayed will vary according to the Python IDE in which we run this example program. That's how we can create a progress bar or load bar using the functions of the progressbar or progressbar2 module. Explanation: First, we have imported the progressbar module as pgr in the program. After that, we have also imported the time module into the program to use functions of this module to create time-lapse while creating a progressbar. Then, we defined a default function with animeMaker() name and used the progressbar module's functions inside this function to create a progressbar. Inside this default function, first, we have created a widget for the loading bar using the AnimatedMarker() function of the progressbar module. After that, we have defined another variable to create a bar using the ProgressBar function of the progressbar module. Inside this function, we have given widget variable (varWidget) as an argument to define the widget of the loading bar. After that, we have used a for loop in the function so that it can continuously loop over the loading bar, and an animated bar will be displayed in the output. Inside the for loop, first, we have used the sleep() function has been used to display the loading bar status after a break of a given time, i.e., 0.5 seconds. Then, we used the update() function of the progressbar module to update the loading bar in the output up to the given limit in the function, i.e., a, which we defined in the range of 26. Lastly, we displayed the loading bar in the output by calling the animeMaker function. ConclusionWe can create a loading bar or progress bar using the functions of the progressbar or progressbar2 module inside a Python program. The output of the loading bar or progress bar will be dependent on the Python IDE on which we are running our program, and animations of the progress bars may vary according to these IDEs. The progressbar module is very helpful in creating all such kinds of animated progress bars and loading bars.
Next TopicPython Pronouncing Module
|
 For Videos Join Our Youtube Channel: Join Now
Feedback
- Send your Feedback to [email protected]
Help Others, Please Share


